Table of Contents
How to schedule tasks with crontab on macOS
Cron is a time-based job scheduler that is available on Unix-like computer operating systems such as macOS. The actions of cron are driven by a crontab (cron table) file, that specifies shell commands to run periodically on a given schedule. This article explains how you can schedule tasks with crontab on macOS.
The anatomy of a crontab file
Each line of a crontab file represents a job and looks like this:
┌───────────── minute (0 - 59)
│ ┌───────────── hour (0 - 23)
│ │ ┌───────────── day of the month (1 - 31)
│ │ │ ┌───────────── month (1 - 12)
│ │ │ │ ┌───────────── day of the week (0 - 6)
│ │ │ │ │
│ │ │ │ │
│ │ │ │ │

* * * * * command
The syntax of each line expects a cron expression made of five fields (minute, hour, day of the month, month, day of the week) which represent the time to execute the command, followed by a shell command to execute.
Editing the crontab
To edit (and create) a crontab file, open a new Terminal and type the following command:
crontab -e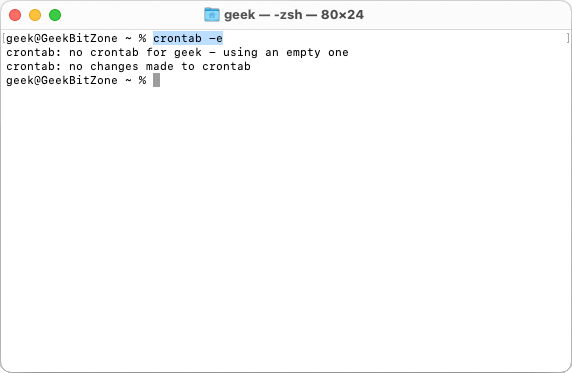
The crontab will open in an editor of your choice, which by default is vim. For this example, let us assume that we just want to print hello world into a text file at 12:15 on each day of the year. The syntax would look like this:
15 12 * * * echo hello world >> /Users/geek/result.txt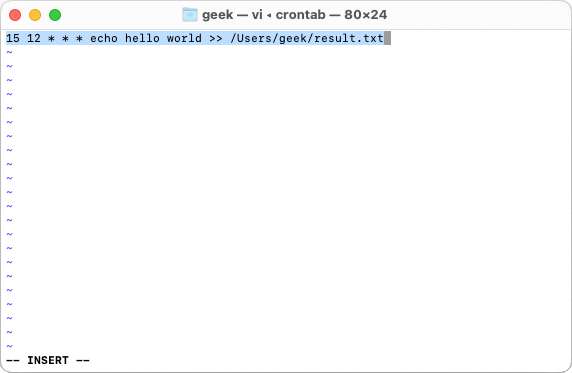
Once you save and close, the crontab file is installed (but not yet guaranteed to be running).
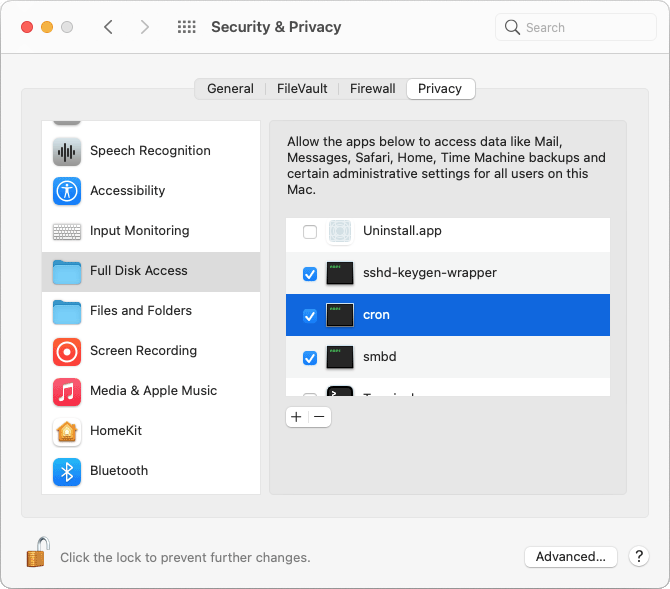
Giving cron full disk access
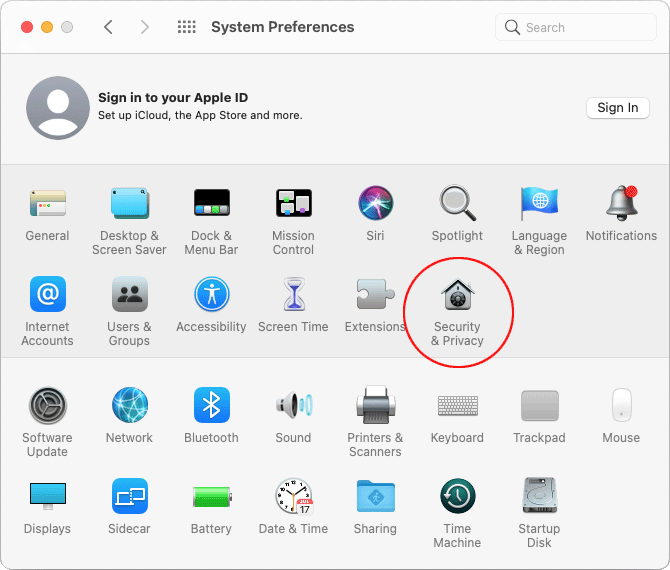
If you are using macOS Catalina (or higher) you will also need to give the cron service Full Disk Access.
Go to the System Preferences and select Security & Privacy.
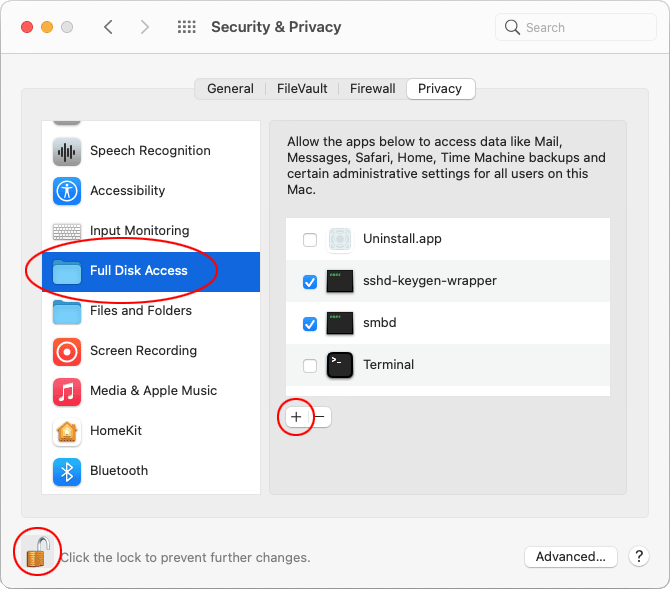
In the left-hand column, select Full Disk Access, click the padlock icon, enter your password and click on the plus icon for a file browser to appear.
When the file browser appears, press ⌘ ⇧ G to open the go to folder dialog and type:
/usr/sbin/cron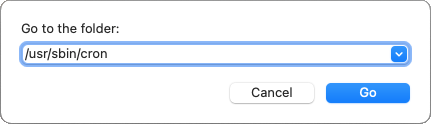
Press Go to close the dialog and confirm that cron appears in the list of apps that have full disk access in the Security & Privacy window.
Crontab has now been successfully installed on systems running macOS Catalina (and higher).
Displaying the crontab
To display the contents of the crontab, type the following command:
crontab -l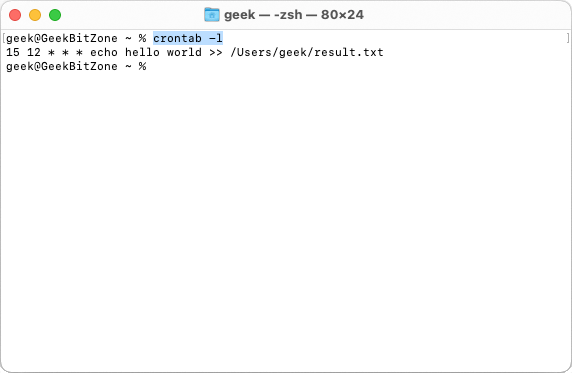
Removing the crontab
If you no longer wish to run the crontab, type the following command to remove it:
crontab -r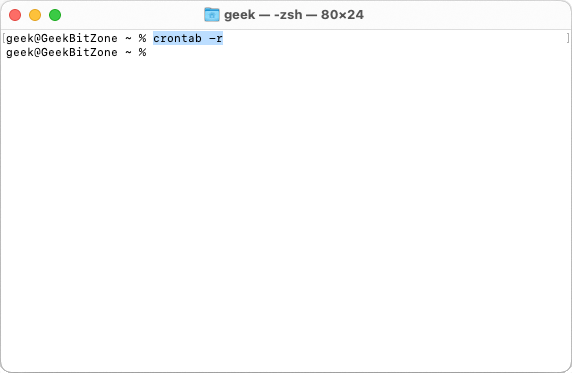
Changing the default editor
It is possible to specify a different editor when you edit the crontab by typing the following command:
export VISUAL=/usr/bin/nano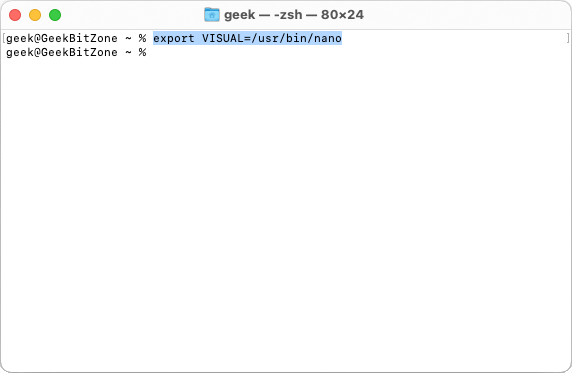
In this instance the default editor was changed to nano.
Summary
This guide has shown how cron, a time-based job scheduler available on Unix-like computer operating systems such as macOS can be used to schedule tasks with a crontab on macOS.
Further information
For more information about the crontab, in a Terminal type:
man crontabWe also recommend visiting the crontab guru website for further examples on how to construct a crontab file.
See Also

How to install and configure Syncthing on the Mac

How to restart the Samba (SMB) file sharing service on macOS
How to enable case-sensitive file system support in PyCharm for macOS
How to disable Adobe Creative Cloud during startup on the Mac

How to mount external volumes in Docker
Which components can be upgraded on my Mac?

How to hide external disk drives from the desktop in macOS

How to upgrade rsync on macOS Catalina
How to change the startup programs in macOS

How to install Nextcloud on Mac with Docker
comments powered by Disqus
See also
- How to install and configure Syncthing on the Mac
- How to restart the Samba (SMB) file sharing service on macOS
- How to enable case-sensitive file system support in PyCharm for macOS
- How to disable Adobe Creative Cloud during startup on the Mac
- How to mount external volumes in Docker
- Which components can be upgraded on my Mac?
- How to hide external disk drives from the desktop in macOS
- How to upgrade rsync on macOS Catalina
- How to change the startup programs in macOS
- How to install Nextcloud on Mac with Docker