Table of Contents
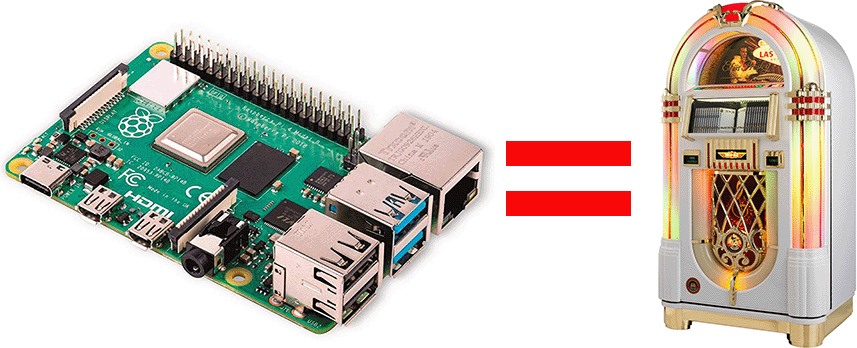
How to turn your Raspberry Pi into a Jukebox
This guide we will show how you can turn your Raspberry Pi into a low-cost music streaming device with help of the Pi MusicBox Linux distribution.
Requirements
- Raspberry Pi (any model except 4)
- SD card (4 GB recommended)
- Network connection
- Computer with SD card reader (macOS, Windows or Linux)
- Speakers/Amplifier/Headphones
Note: The examples in this tutorial are shown with macOS, but any other operating system can be used as well.
Downloading Pi MusicBox
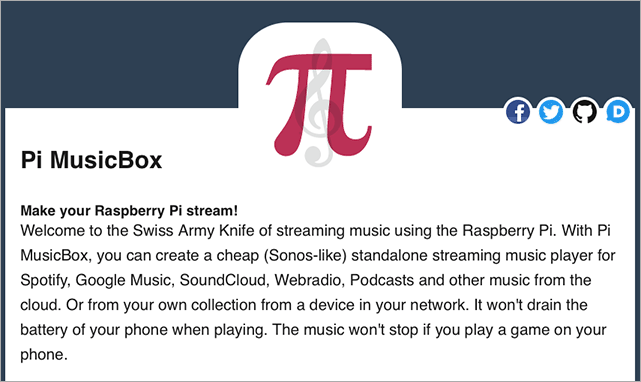
Go to the Pi MusicBox website.
Follow the download link located toward the bottom of the page.
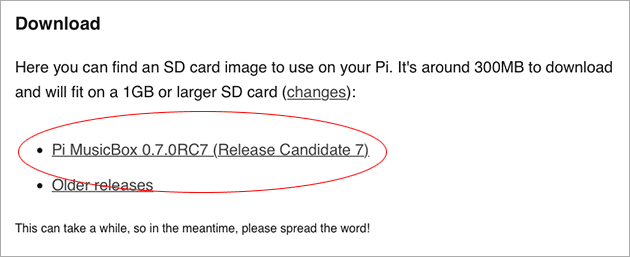
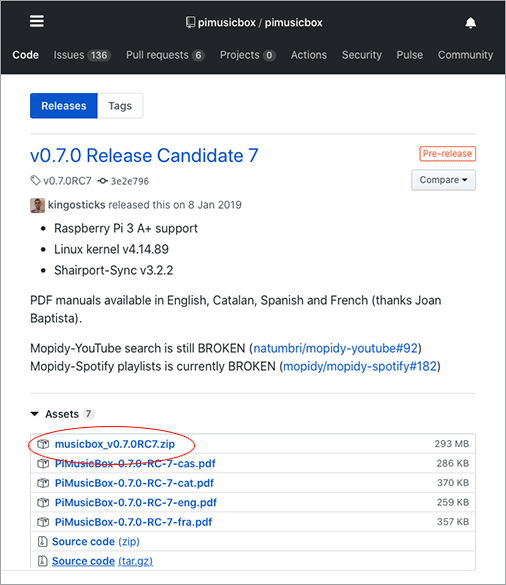
This link will take you to GitHub.com where the binaries as well as the source code is stored. At the time of writing Pi MusicBox is at version 0.7.0 Release Candidate 7, but that is likely to change as this article becomes older.
Click on the download link labelled musicbox_v0.7.0RC7.zip.
Extract the zip file into a directory of your choice.

Preparing the SD card
We will now write the Pi MusicBox image to an SD card. There are many ways that an image can be written, but we will in this tutorial use a freeware tool for macOS called ApplePi-Baker V2. If you are using another operating system or prefer to use your own memory card utility, you can skip to the next section.
ApplePi-Baker V2 is located at Tweaking4All.com.
https://www.tweaking4all.com/software/macosx-software/applepi-baker-v2/
The download link can be found two thirds down the page.
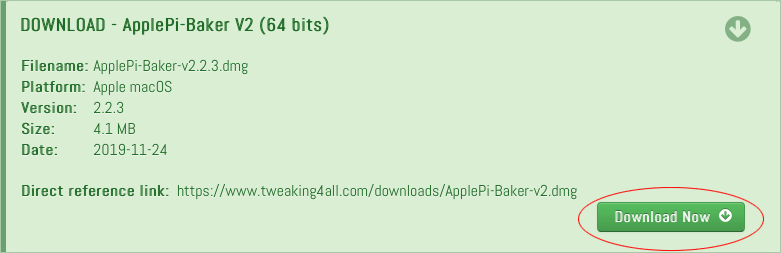
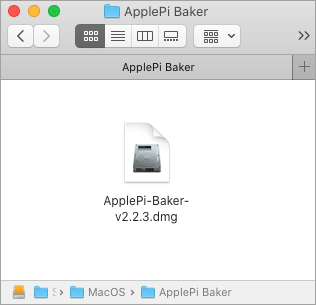
Once downloaded, double-click the icon to start the installer.
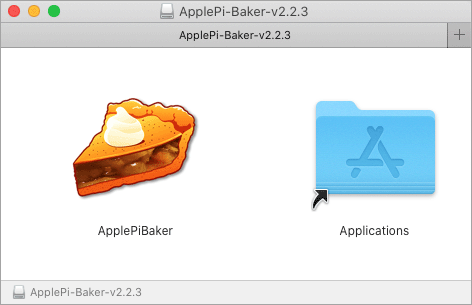
Drag & Drop the ApplePiBaker icon into your Applications folder to complete the installation.
Once installed, open LaunchPad and double-click the icon to launch ApplePi-Baker.

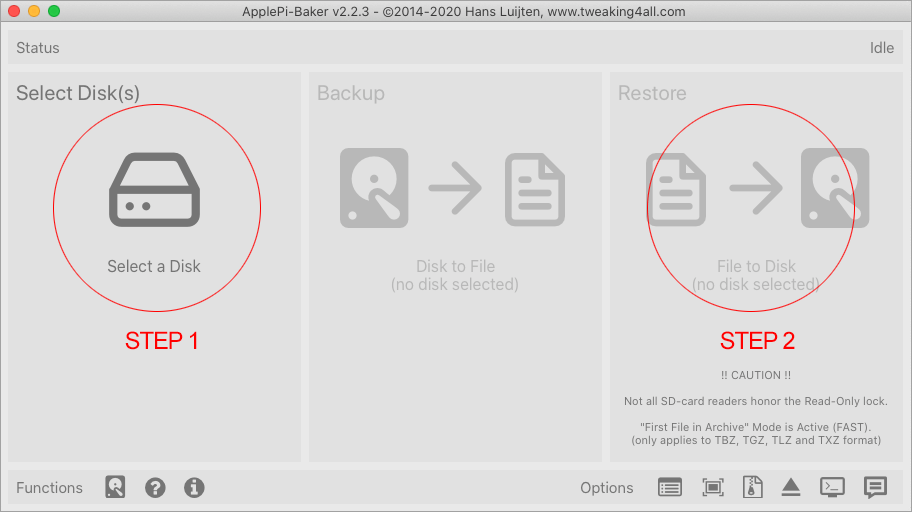
The user interface is very simple with only two steps to consider.
-
- Select a disk where to write the file and;
-
- Specify path to the Pi MusicBox image.
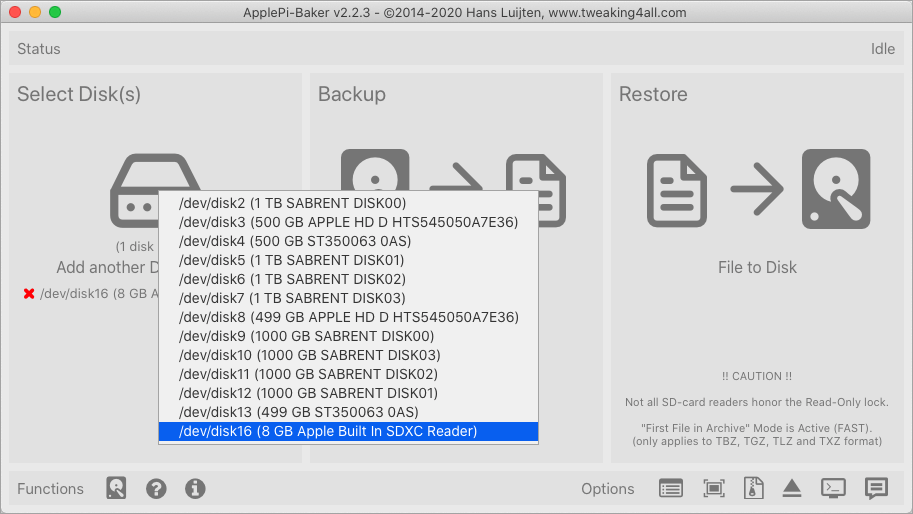
With an understanding of the user interface, let us insert an empty SD card into our computer and select the SD card from the list of devices in Step 1. Be sure to select the correct disk in case you have many devices connected to your computer.
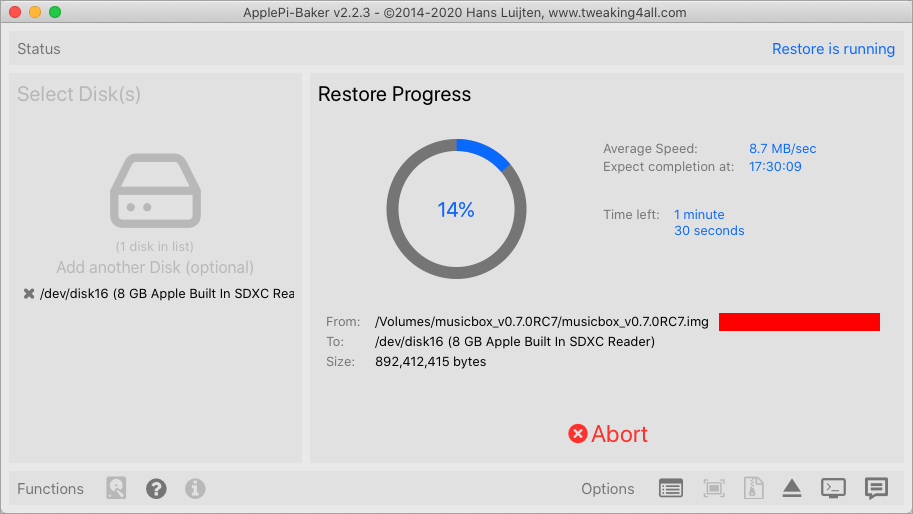
Next select the Pi MusicBox disk image in Step 2, which at the time of writing is musicbox_v0.7.0RC7.img.
The image writer will start as soon as you have selected the file and will only take a few minutes.
You will see a Process Completed message once the files have been written to the SD card.
You can now close Apple-Pi Baker.
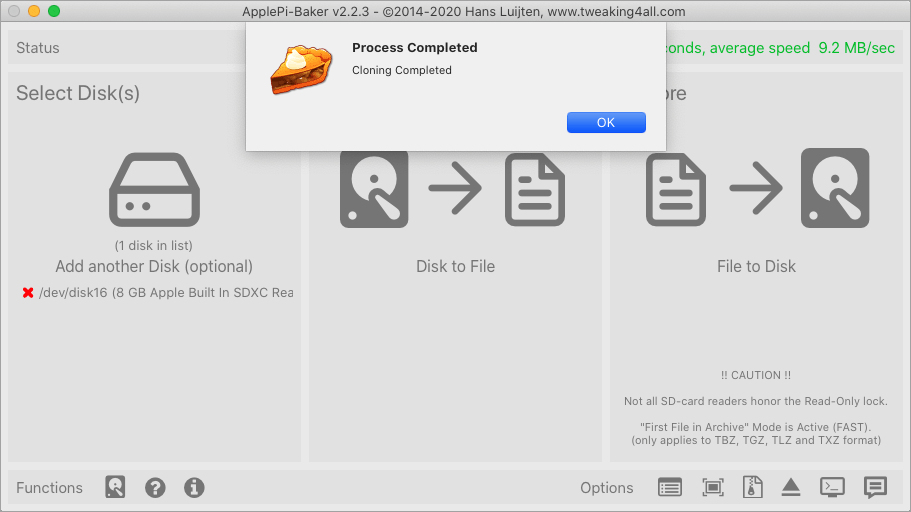
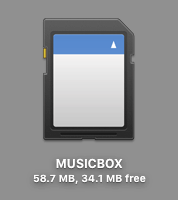
Your untitled SD card has now have been renamed to MUSICBOX.
Pre-boot configuration
As Pi MusicBox is a Linux distribution dedicated specifically to music streaming you should not need to do much apart from connect your speakers or amplifier to the headphone jack on the Raspberry Pi. We will, however, change a few settings before we boot up the Raspberry Pi.
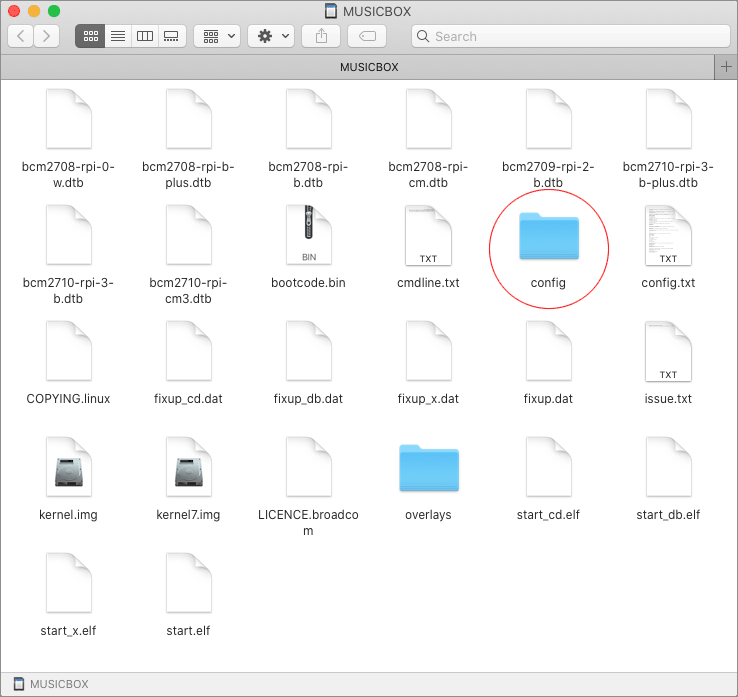
Browse to the config folder on the SD card.
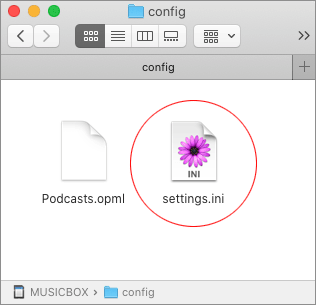
Open the settings.ini file in your favourite text editor.
If you are planning to connect to a Wi-Fi network, locate the Network Settings section in the settings.ini file and enter your Wi-Fi name and password under wifi_network and wifi_password. You can skip this step if you are only connecting via ethernet.
# --------------------
# | Network Settings |
# --------------------
[network]
# Settings for your WiFi network, if you use a (supported) wifi-dongle
# Only supports WPA security, no WEP or access points without security (dive into the command line for that!)
wifi_network = your_wifi_network
wifi_password = your_wifi_password
You will also need to enable_ssh if you want to adjust any settings after the installation and do not want to connect a physical keyboard and monitor to the Raspberry Pi.
# Enable this to allow remote login via SSH on MusicBox
enable_ssh = true
Finally, locate the MusicBox Settings section to set a new root_password. Is is always recommended to change the default password in order to achieve a minimum level of security, even though we do not recommend to run Pi MusicBox outside your home firewall.
# ---------------------
# | MusicBox Settings |
# ---------------------
[musicbox]
# To secure your device, change the default password to something else.
# For security, the value below will be automatically cleared once the password is changed.
root_password = your_password
You can now eject the SD card from your computer and insert it into the Raspberry Pi.

Installation
If you have not yet done so, connect your amplifier or speakers to the Raspberry Pi as we are now ready to boot up the system. The installation, which is completely automatic, will start as soon as the device has been turned on and will only take a few minutes.
You will see the following message once the installation has finished (assumes that a monitor is physically connected to the Raspberry Pi so that you can see what is going on).
************************
Initializing MusicBox...
************************
Setting sound configuration...
Probing sound devices:
card 0: ALSA [bcm2835 ALSA], device 0: bcm2835 ALSA [bcm2835 ALSA]
card 0: ALSA [bcm2835 ALSA], device 1: bcm2835 ALSA [bcm2835 IEC958/HDMI]
* Found internal device: card0
    HDMI output detected
* Found internal device: card0
    HDMI output detected
Selected card=0  (i2s=  output=analog  usb=  intc=0)
Using audio card0 (analog)
MusicBox name is MusicBox
Stopping Samba daemons: nmbd smbd.
Starting Samba daemons: nmbd smbd.
Starting Dropbear SSH server: dropbear.
Starting daemon monitor: monit.
***********************************************************************************
My IP address is 192.168.1.XXX
Connect to me in your browser at http://MusicBox.local or http://192.168.1.XXX
***********************************************************************************
We will now test the SSH connection to see if we are able to connect to the Raspberry Pi.
In a Terminal, type the following:
$ ssh root@musicbox.localType yes if this is the first time you are connecting to the Raspberry Pi, followed by your password.
The authenticity of host 'musicbox.local (xxxx:xxxx:xxxx:xxxx:xxxx:xxxx:xxxx:xxxx)' can't be established.
RSA key fingerprint is SHA256:XXXXXXXXXXXXXXXXXXXXXXXXXXXXXXXXXXXXXXXXXXXX.
Are you sure you want to continue connecting (yes/no)? yes

Warning: Permanently added 'musicbox.local, xxxx:xxxx:xxxx:xxxx:xxxx:xxxx:xxxx:xxxx' (RSA) to the list of known hosts.
root@musicbox.local's password: your_password


 ______ _    _______            _       ______
(_____ (_)  (_______)          (_)     (____  \
 _____) )    _  _  _ _   _  ___ _  ____ ____)  ) ___ _   _
|  ____/ |  | ||_|| | | | |/___) |/ ___)  __  ( / _ ( \ / )
| |    | |  | |   | | |_| |___ | ( (___| |__)  ) |_| ) X (
|_|    |_|  |_|   |_|____/(___/|_|\____)______/ \___(_/ \_)

Welcome!

root@MusicBox:~#
You have successfully connected to the Raspberry Pi as root if you can see the root@MusicBox shell prompt.
Type exit to close the Terminal session.
# exitThe Dashboard
We are now ready to view the dashboard that ships with Pi MusicBox. In a Web Browser, type the following address to access the web page.
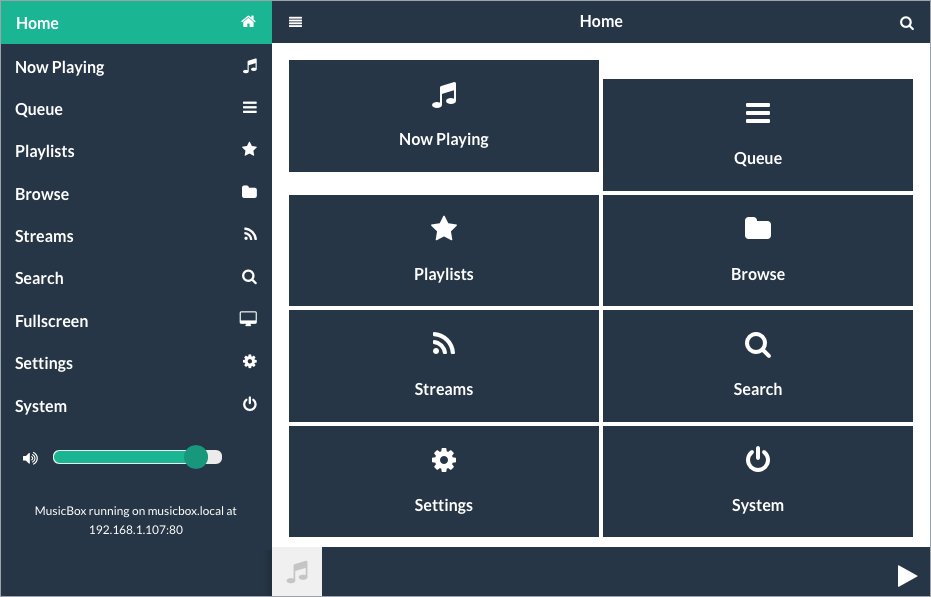
From here you can set various configuration options as well as listen to music via internet radio.
Enabling AirPlay
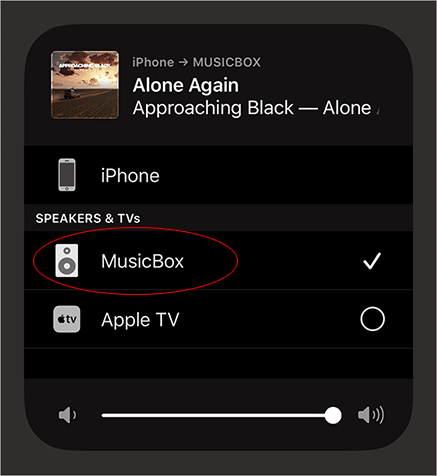
If you have an AirPlay compatible device, such as an iPhone, you will need to enable AirPlay Streaming in the Settings before you can stream music from your iPhone.
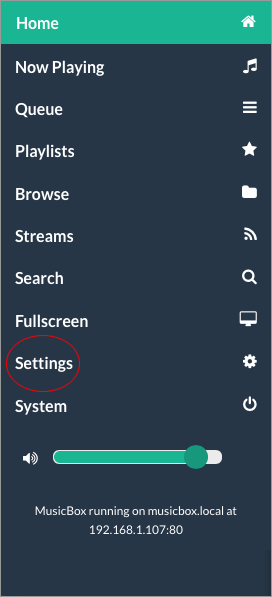
In the left-hand menu, select Settings.
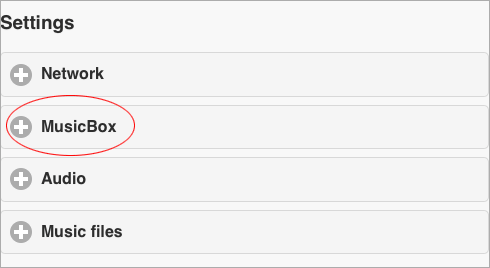
On the Settings page, expand the MusicBox tab.
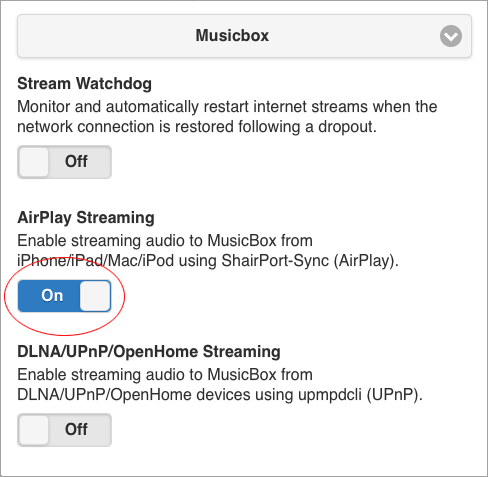
Scroll down the page until you reach AirPlay Streaming. Enable this option.
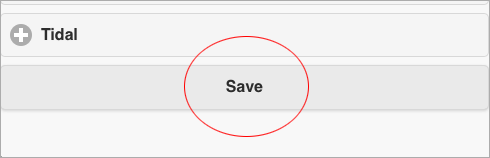
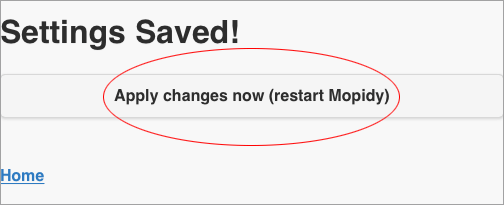
Scroll further down to the bottom of the page and press the Save button.
Finally, press Apply changes now (restart Mopidy) in order for the changes to take effect.
Once the Raspberry Pi has restarted you will be able to select MusicBox in the list of AirPlay compatible devices on your iPhone.
Streaming via macOS
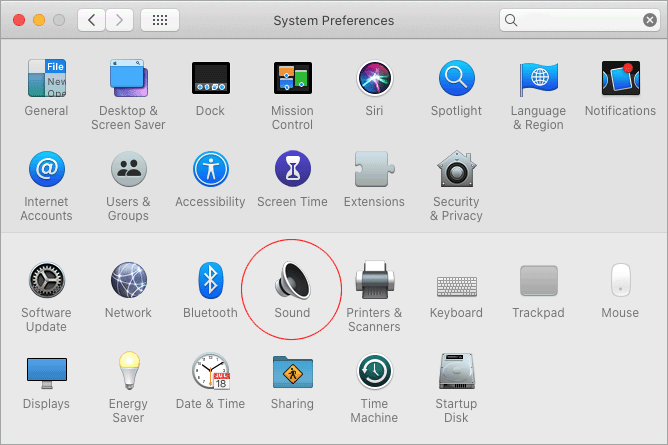
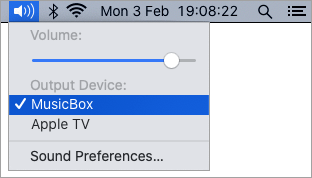
If you are streaming from a computer with macOS, you will need change the sound output device in System Preferences.
Open System Preferences via LaunchPad.

Select Sound.
Select MusicBox in the list of Output devices.
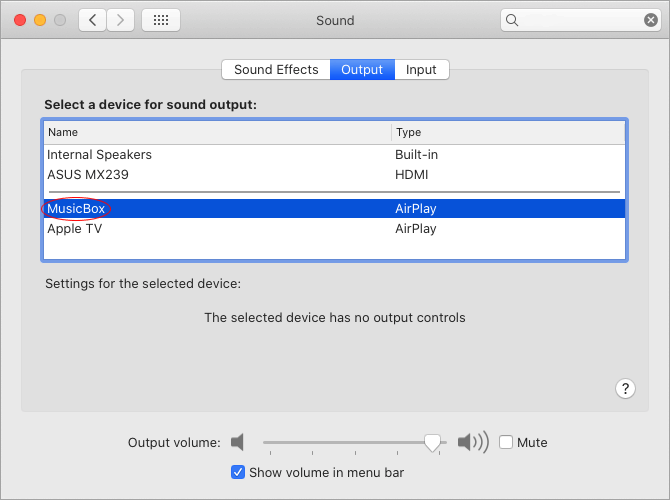
MusicBox can also be selected directly from the top menu bar if the Volume icon is visible.
Summary
This guide has shown how a Raspberry Pi can be turned into a low cost Jukebox with help of the Pi Music Box Linux distribution. In many cases it can actually be a better solution than the Bluetooth/AirPlay speakers that are currently available on the market due to the fact that sound quality will depend entirely on what amplifier or speaker the Raspberry Pi is connected to.
Happy streaming!
See Also
How to connect to GitHub with SSH

How to compile OpenEmu for macOS
How to install Gitk for macOS
10 Useful Git Commands

How to access a Plex Server behind CGNAT with ngrok

10 Influential Pixel Artists

How to Customise the Linux Bash Prompt
How to Merge and Rebase in Git

How to add new PDF compression filters for the Preview tool on Mac

How to create PDFs with the Preview tool on Mac
comments powered by Disqus
See also
- How to connect to GitHub with SSH
- How to compile OpenEmu for macOS
- How to install Gitk for macOS
- 10 Useful Git Commands
- How to access a Plex Server behind CGNAT with ngrok
- 10 Influential Pixel Artists
- How to Customise the Linux Bash Prompt
- How to Merge and Rebase in Git
- How to add new PDF compression filters for the Preview tool on Mac
- How to create PDFs with the Preview tool on Mac