Table of Contents
How to replace a drive on a Synology NAS with Synology Hybrid RAID (SHR) on DiskStation Manager (DSM) 6.2
We will in this article show how you can easily replace a drive on a Synology NAS with Synology Hybrid RAID (SHR) on DiskStation Manager (DSM) 6.2.
Introduction
We have based our article on the six bay DiskStation DS620slim which has been set up with Synology Hybrid RAID (SHR) with two-drive fail over. On this NAS, Drive 5, is only using a 512 GB disk, while the other five drives use 1 TB disks. Our goal is to replace Drive 5 with a 1 TB disk.
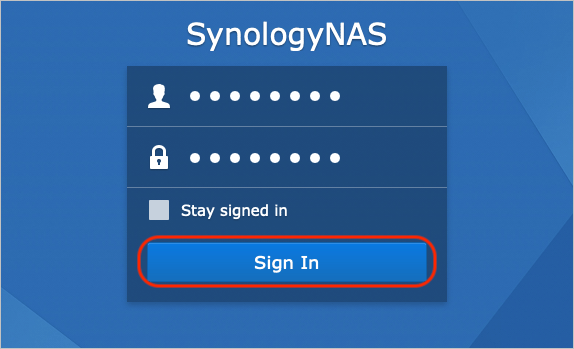
Log in to DiskStation Manager (DSM) 6.2 by typing in your username and password, followed by the Sign In button.
Launching Storage Manager
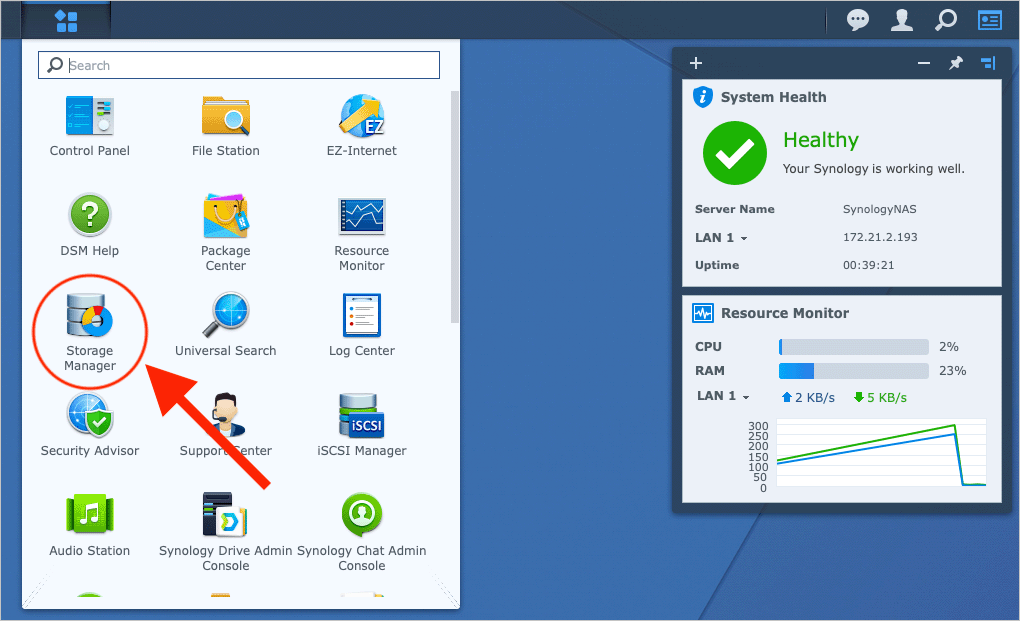
Once you are logged in to the desktop, open the Main menu…
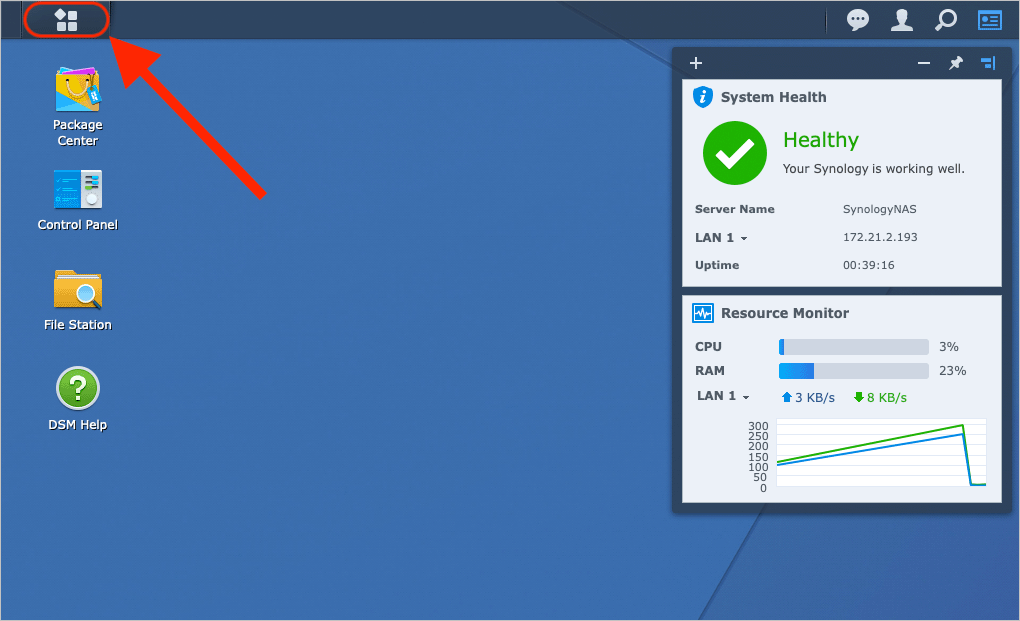
… to launch Storage Manager.
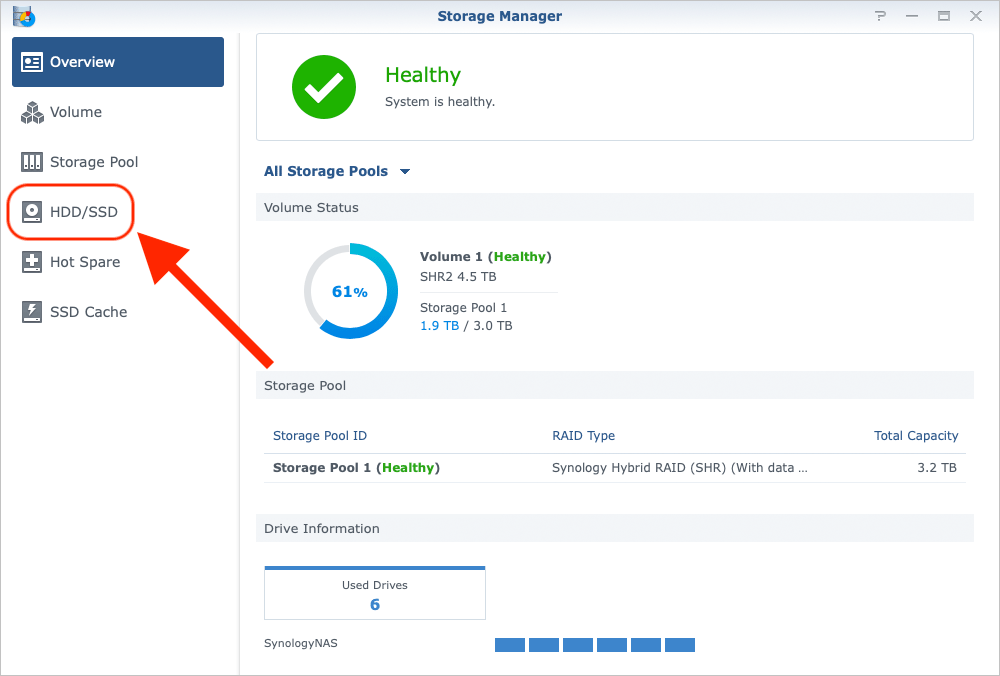
On the Overview page of Storage Manager, select the HDD/SSD button in the left-hand side column.
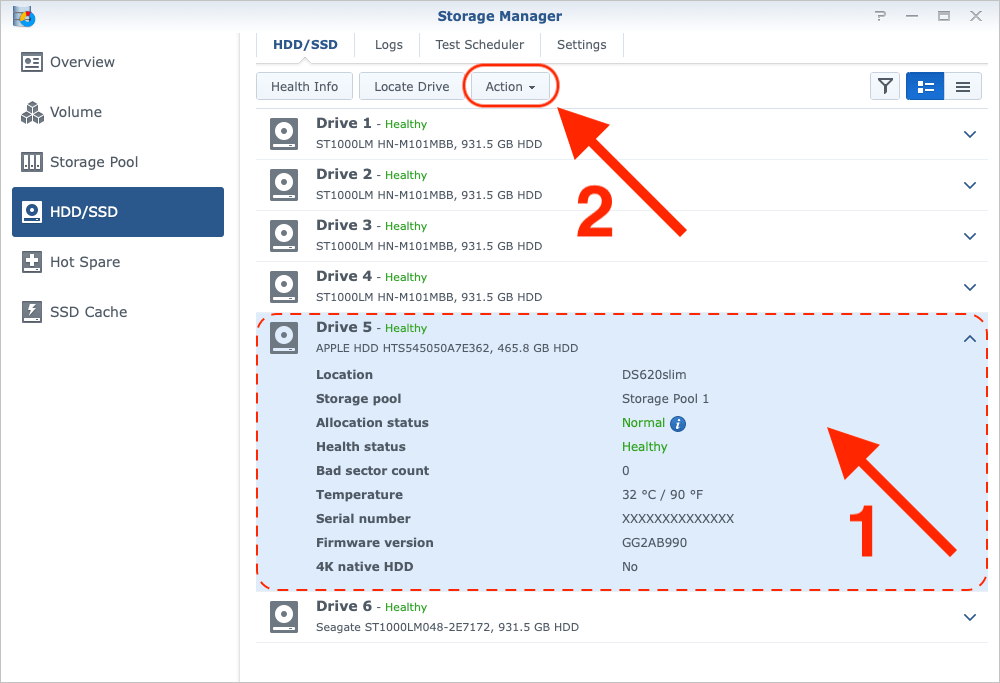
As a first step, make sure to select the drive that you want to replace (Drive 5 in our example) and then press the Action button.
Deactivating the Drive
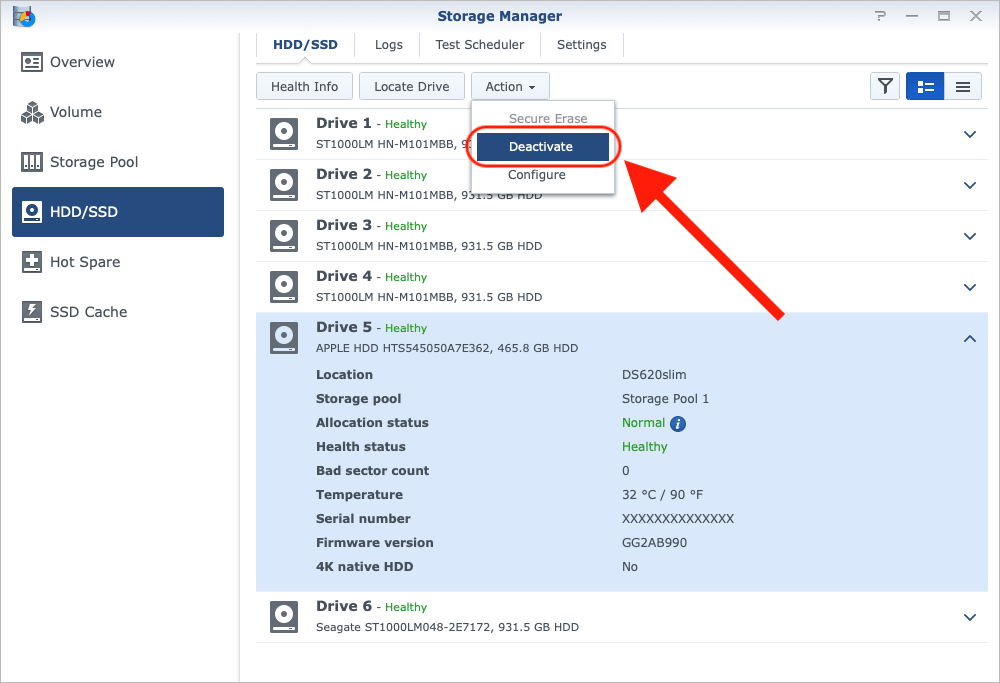
From the Action menu, select the Deactivate menu option.
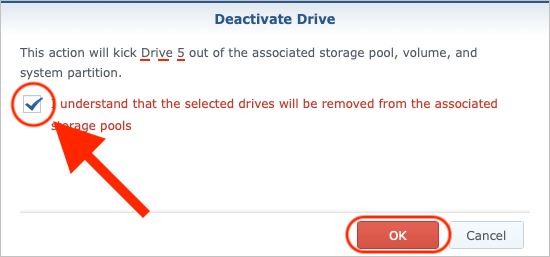
You will now be asked to confirm if you want to remove the selected drive from the associated storage pool.
Tick the checkbox once you have double checked that the drive number is correct.
Press OK to continue.
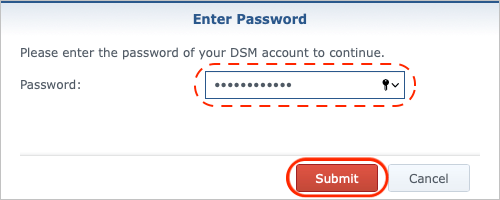
You will then be asked to enter your administrator’s password.
Press the Submit button to remove the drive.
There is no going back now!
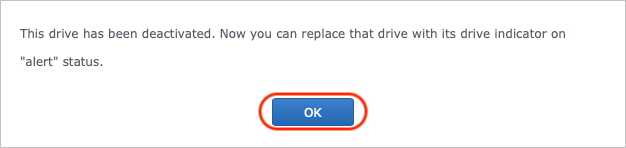
You will see confirmation that the selected drive has been deactivated (removed) from the system.
Press OK to close the window.
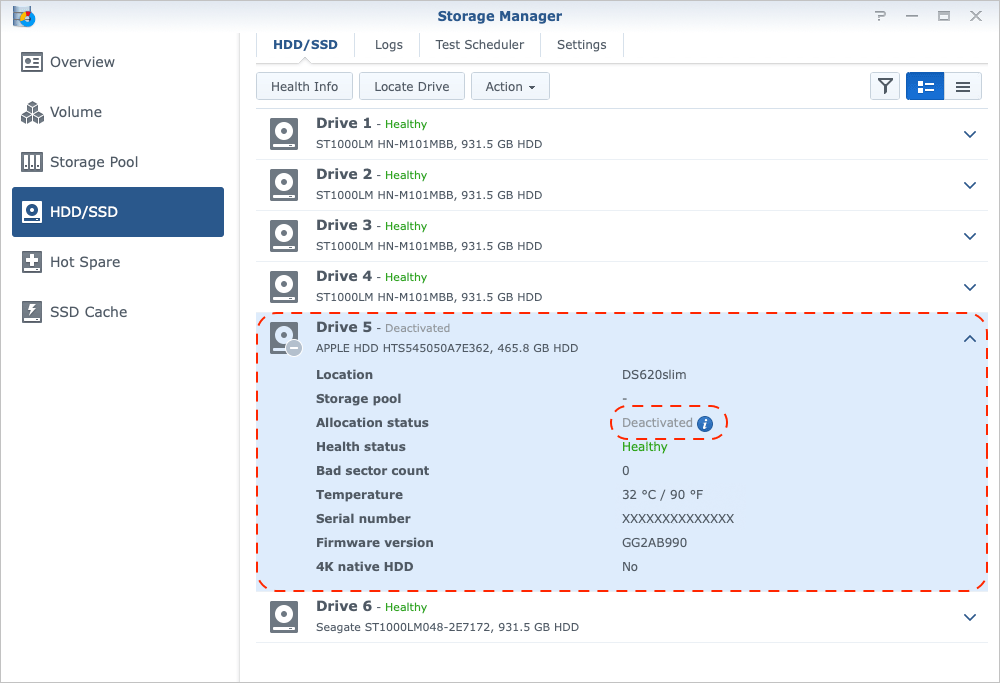
Back on the HDD/SDD page you should see that the Allocation status of Drive 5 says Deactivated.
You will also start to hear a short beep from your Synology NAS at regular intervals.
Replacing the Drive
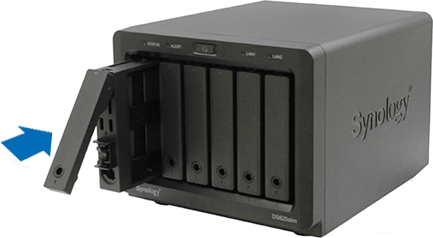
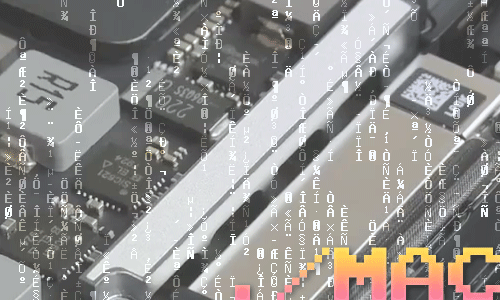
You can now remove the drive from your Synology NAS. If your unit supports hot-swapping, you can simply pull out the drive while the system is running. On the other hand, if your NAS does not support hot-swapping, then you will need to power it down first.
Please read the manual for your specific NAS model so that you do not accidentally corrupt the RAID!
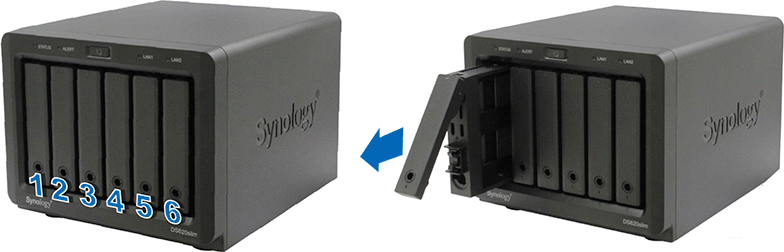
Apologies for the inaccurate stock-photo representation which shows Drive 1 being pulled out, when it is in fact Drive 5 that we are replacing in this tutorial! :)
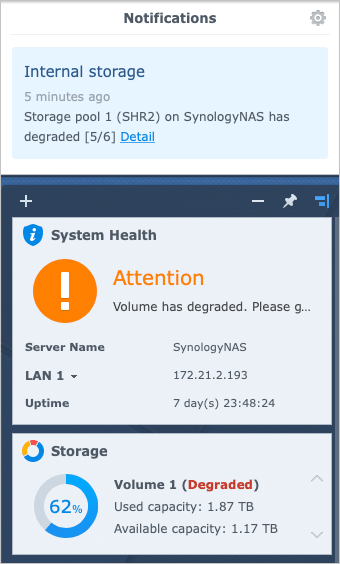
You will notice that Drive 5 is now missing from the HDD/SDD page.
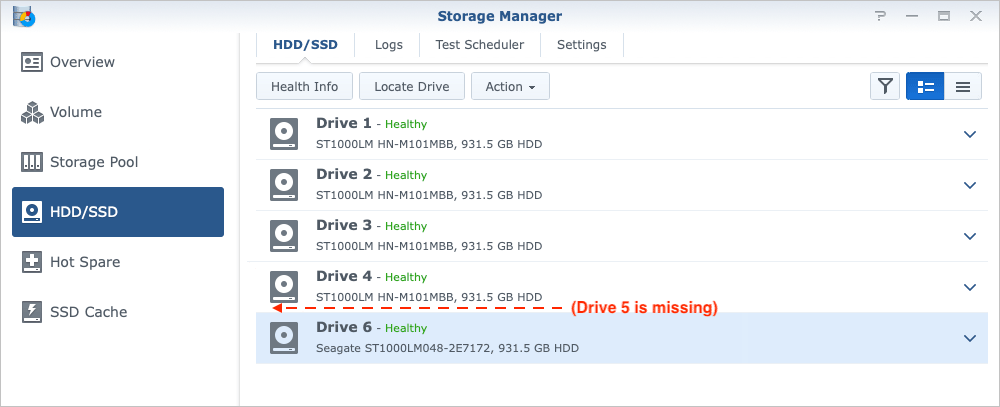
You will also see several warnings that your storage pool has been degraded.
Do not worry about the warnings, as we will now insert our new drive into the NAS.
Repairing the Storage Pool
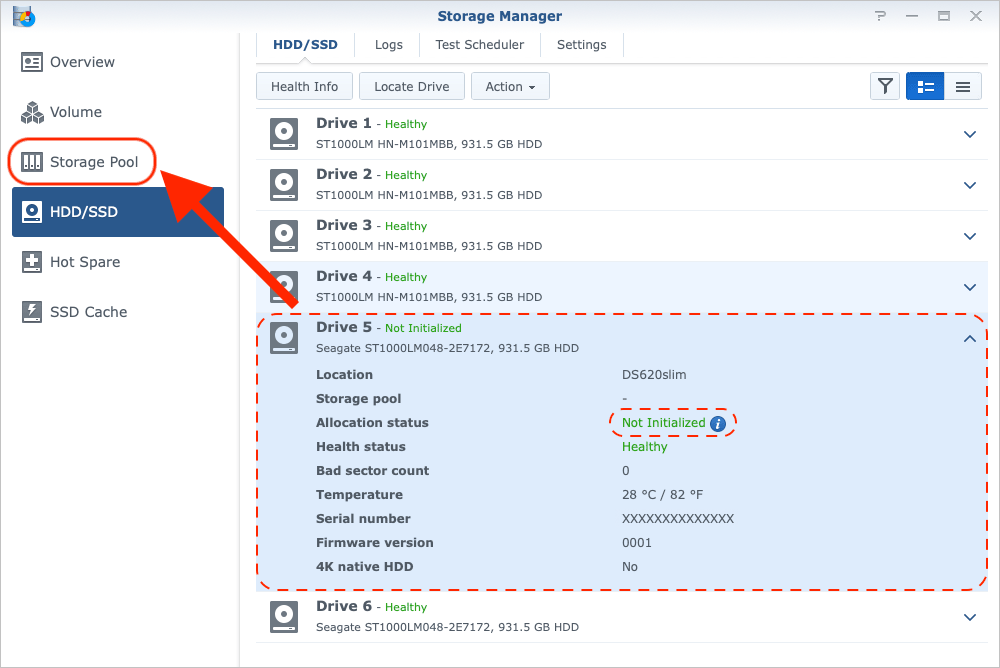
Once you have added the new drive, Drive 5 will show up as Not Initialized on the HDD/SSD page.
Press the Storage Pool button in the left-hand column.
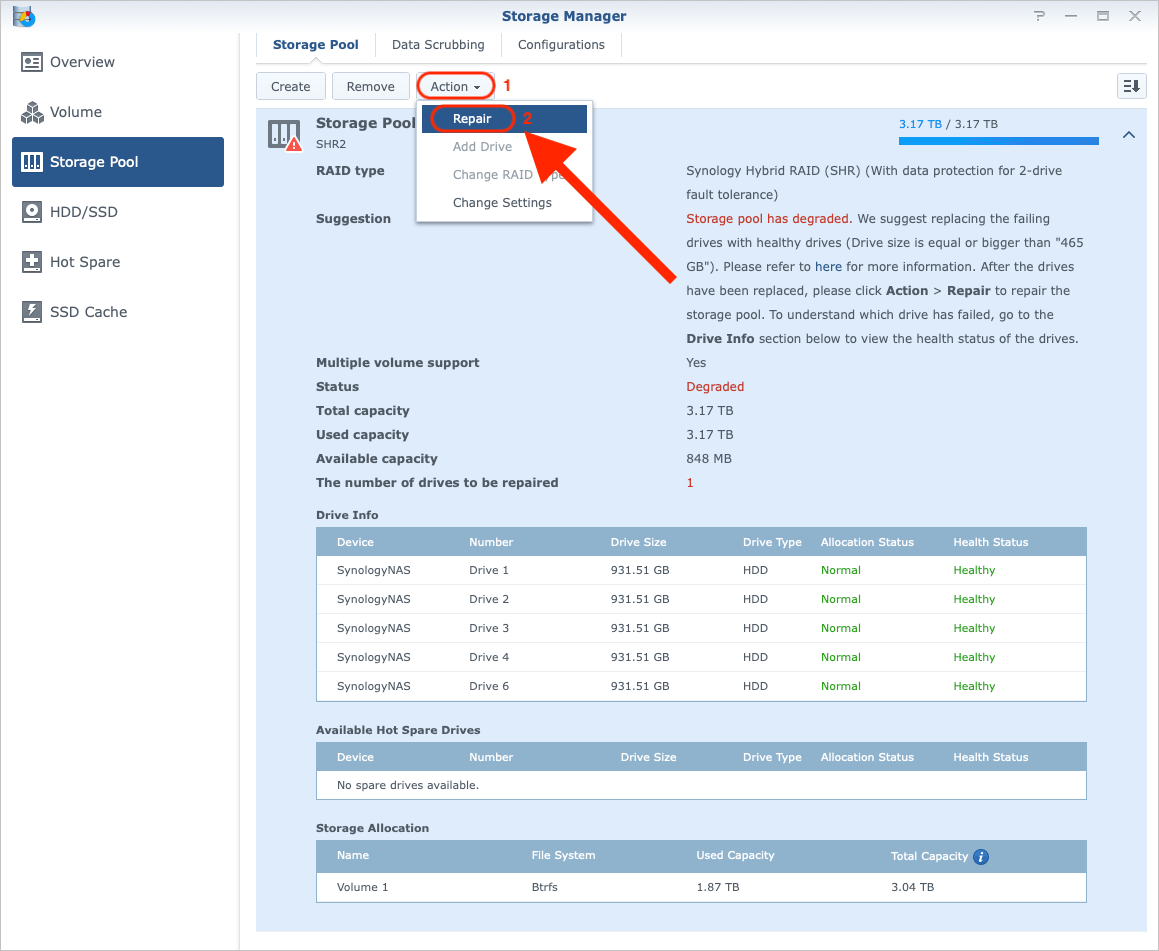
On the Storage Pool page, press Action > Repair.
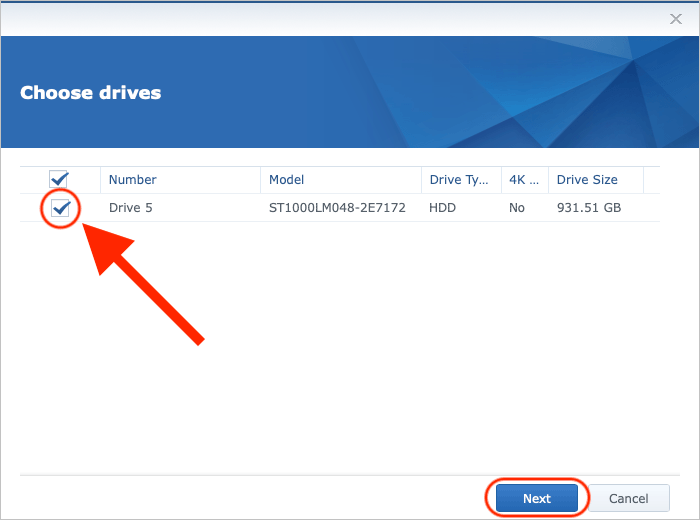
Select your newly added drive by ticking the appropriate checkbox and then press Next to continue.
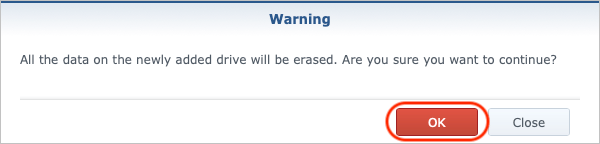
You will receive a warning that all the data on the newly added drive will be erased.
Press OK to continue.
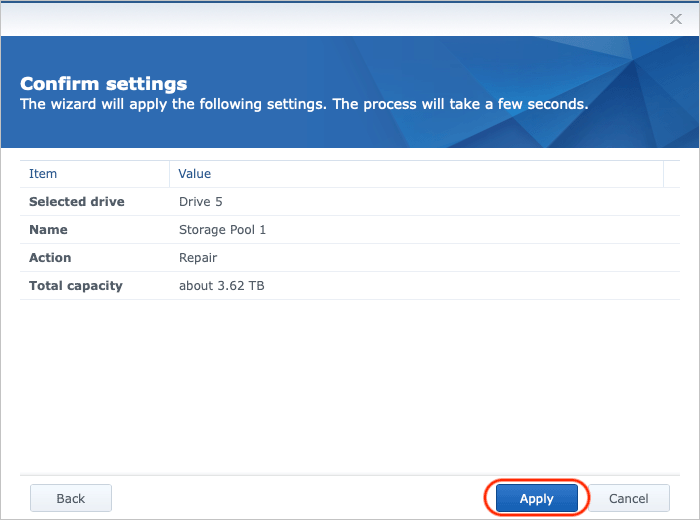
You will see a final confirmation page.
Press Apply to repair (and format) the drive.
The confirmation window will close and bring you back to the Storage Pool page where you can see that it is in the process of repairing itself. Drive 5 has also shown up in the Drive Info table, but has not yet been Initialized.
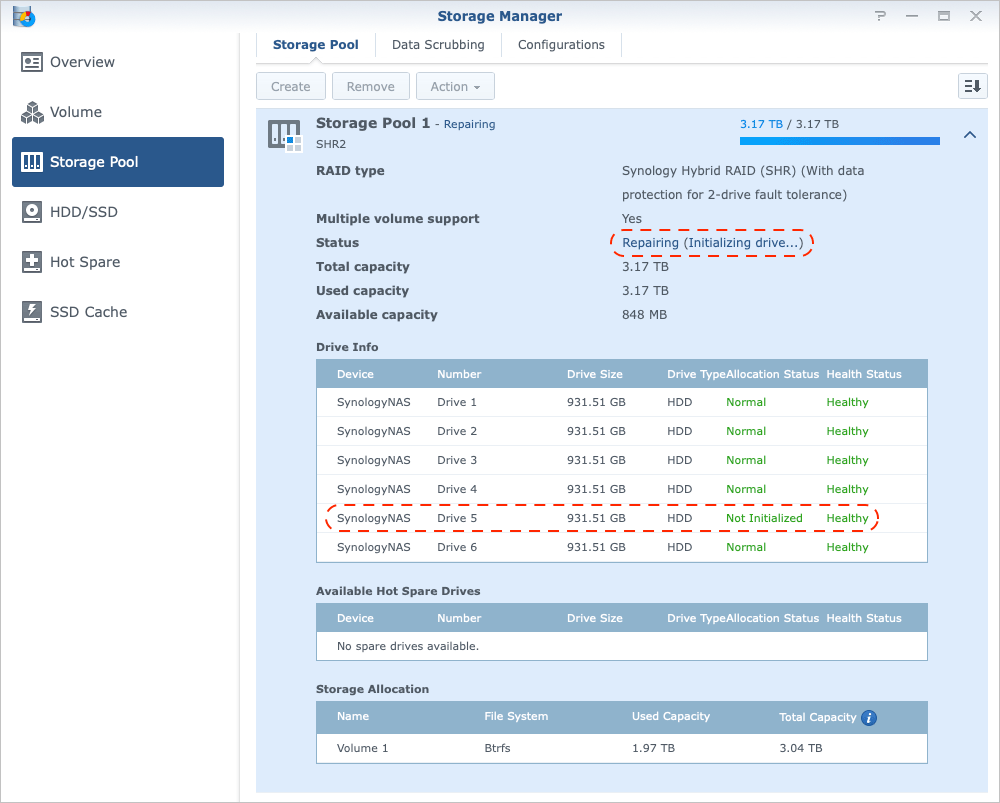
After a short while the Storage Pool Status will change to Repairing (Checking parity consistency %).
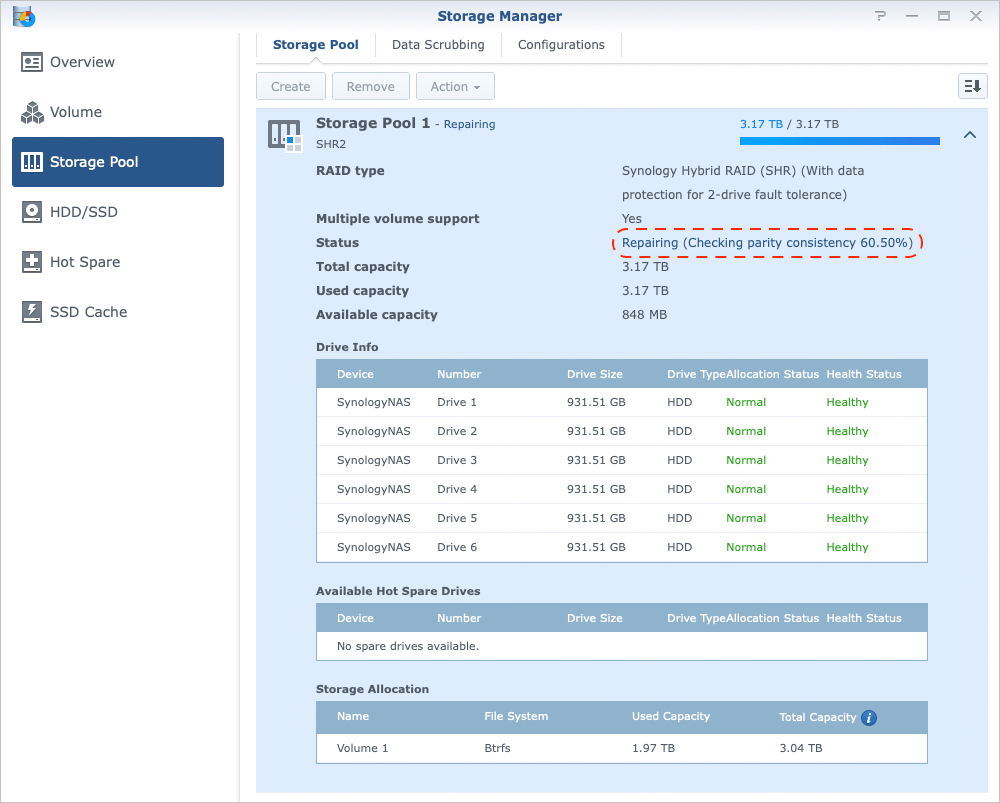
This is the time when you might want to call it a day, because the repair process will take a very long time. The percentage counter will also restart from 0% for each additional drive that you have in the storage pool, so you can easily imagine how many hours (or days) this will take.
Please note that you can continue to use the NAS while the storage pool is in the process of being repaired, but that you will experience a substantial performance hit.

We are going to bed anyway. See you in the morning! :)
Expanding the Volume
Fast-forward to the next morning, we finally see the notification that we have been waiting for:
“System successfully repaired [Storage Pool 1] with disk [Drive 5].”

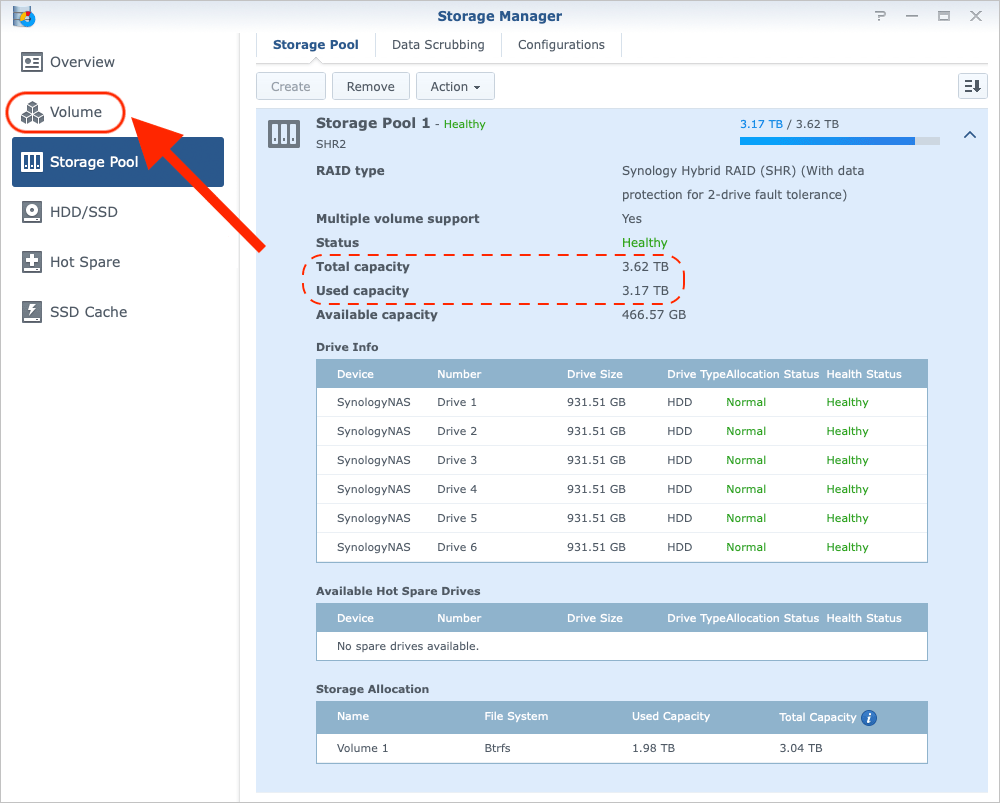
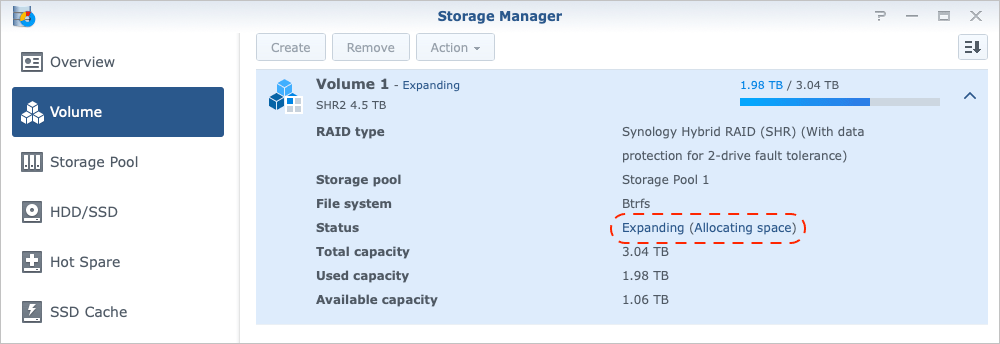
Our work is, however, not yet done. On the Storage Pool page, if we compare Used capacity (3.17 TB) versus Total capacity (3.62 TB), we can see that the numbers are not identical. This is because even though the drive has been added to the storage pool, we have not yet configured the Volume to use up this extra space. We will do that now.
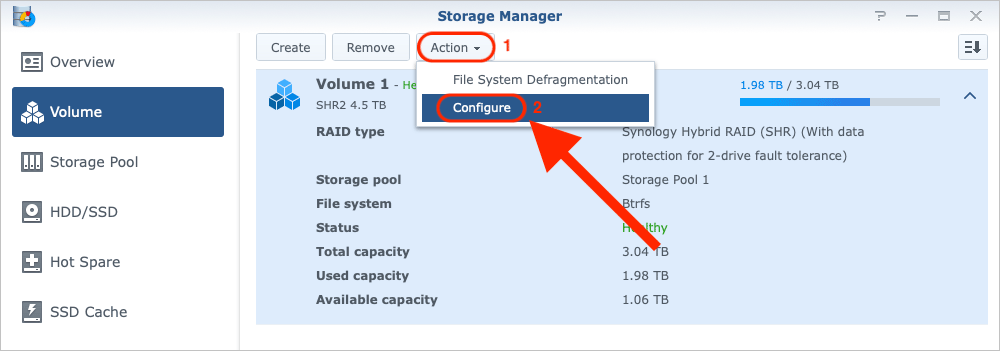
Select the Volume button in the left-hand side column.
On the Volume page, press Action > Configure.
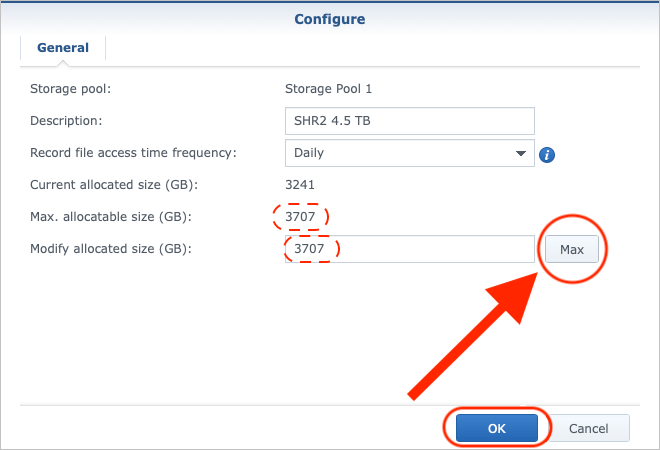
Select your new allocated size. We will just press the Max button to use all available space for this Volume.
Press OK to start the expansion process.
The confirmation window will close and bring you back to the Volume page where you can see that the Status column now shows Expanding (Allocating space).
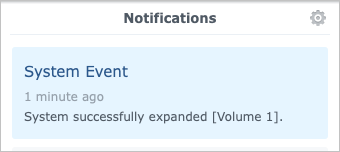
You should receive the following notification in a couple of minutes:
“System successfully expanded [Volume 1].”
If we now go back to the Storage Pool page, we can see that Total capacity matches Used capacity.
Great, our Volume has successfully been expanded.

That is it! We have successfully replaced and expanded our new drive on the Synology NAS.

All that remains now is to confirm is that our System is healthy.
Summary
This article has shown how you can easily replace a drive on a Synology NAS with Synology Hybrid RAID (SHR) on DiskStation Manager (DSM) 6.2.
References
Synology.com
https://www.synology.com/
DiskStation DS620slim
https://www.synology.com/en-uk/products/DS620slim
Synology Hybrid RAID (SHR)
https://kb.synology.com/en-global/DSM/tutorial/What_is_Synology_Hybrid_RAID_SHR
DiskStation Manager (DSM) 6.2
https://www.synology.com/en-uk/dsm/6.2
See Also
How to test the memory and to find the results on a Synology NAS
How to secure IOT devices with VLANs and firewall rules on an Ubiquiti EdgeRouter-X and a MikroTik switch running SwOS Lite
How to turn your Mac into an AirPrint server - for free
How to schedule tasks with crontab on macOS

How to install and configure Syncthing on the Mac

How to restart the Samba (SMB) file sharing service on macOS
How to enable case-sensitive file system support in PyCharm for macOS
How to disable Adobe Creative Cloud during startup on the Mac

How to mount external volumes in Docker
Which components can be upgraded on my Mac?
comments powered by Disqus
See also
- How to test the memory and to find the results on a Synology NAS
- How to secure IOT devices with VLANs and firewall rules on an Ubiquiti EdgeRouter-X and a MikroTik switch running SwOS Lite
- How to turn your Mac into an AirPrint server - for free
- How to schedule tasks with crontab on macOS
- How to install and configure Syncthing on the Mac
- How to restart the Samba (SMB) file sharing service on macOS
- How to enable case-sensitive file system support in PyCharm for macOS
- How to disable Adobe Creative Cloud during startup on the Mac
- How to mount external volumes in Docker
- Which components can be upgraded on my Mac?