Table of Contents
How to access a Plex Server behind CGNAT with ngrok
One of the key benefits of running your own Plex Server is to have full control over your content as well as not having to pay any subscription fees.* You may also want to be able to remotely access your files, which is easy, as long as you are able to connect to your home network.
*Assumes that you have not subscribed to the Plex Pass.
Requirements
- macOS or;
- Linux or;
- Windows (with PowerShell)
Introduction
Unfortunately it has become increasingly common nowadays not to have direct access to your home network, unless you pay for a static IP address which can be pricey in the long run.
What happens is that ISP’s bundle together the IP addresses of multiple households into one single external address through something called Carrier Grade Network Address Translation (CGNAT). This is the process where a network device, usually a firewall, assigns a public address to a computer (or group of computers) inside a private network.
The main use of CGNAT is to limit the number of public IP addresses an organisation can use, for both economic or security purposes, and is more common if you live in an apartment block.
Solution
So what options are available to Plex users who are behind CGNAT?
-
The easiest, but most expensive option, is to pay for a static IP address which can be port-forwarded from your router.
-
Another option, which we are going to present here, is to download the free third party tool ngrok, which behaves like an SSH tunnel that is able to bypass NAT Mapping and firewall restrictions by creating a long-lived TCP tunnel from a randomly generated subdomain on ngrok.com.
Installation
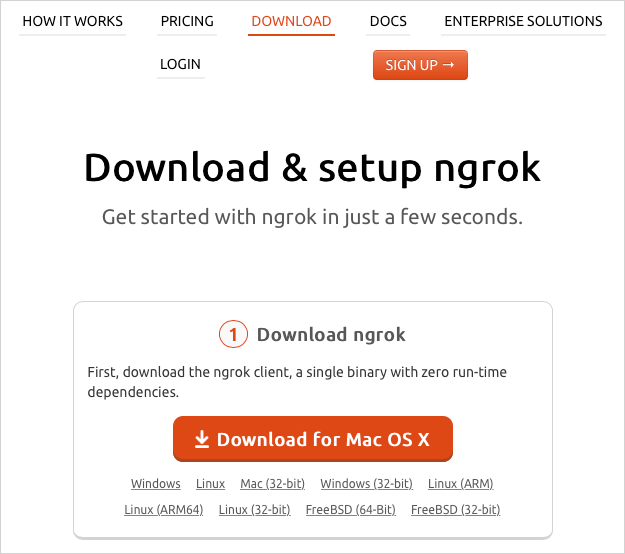
At only 25MB, ngrok is a lightweight application and does not even come with an installer. The only requirement is to sign up for a free account, and of course, to download the software from ngrok’s website. Go to www.ngrok.com.

Navigate to the download section and select your platform (Mac/Windows/Linux/etc). Then click on the big red/orange download button.
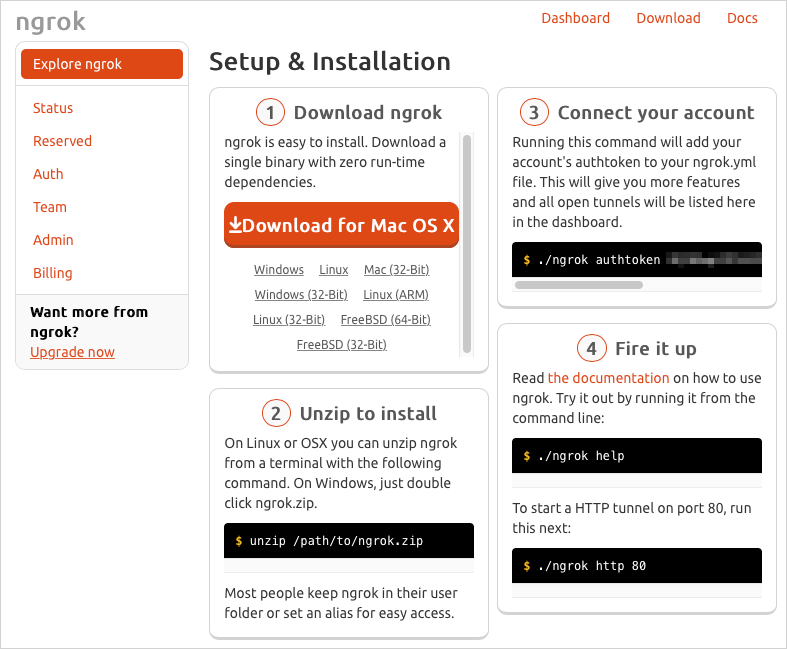
Depending on your chosen platform, you should now have a file called ngrok-stable-xxx-xxx.zip in your download folder. Unzip it with any file extraction tool. In many cases you should just be able to double-click or right-click on the file.
The extracted file is named ngrok and runs from any directory. We recommend, however, that you move the file into your applications directory. For macOS users the recommended location is /Applications.
Registration
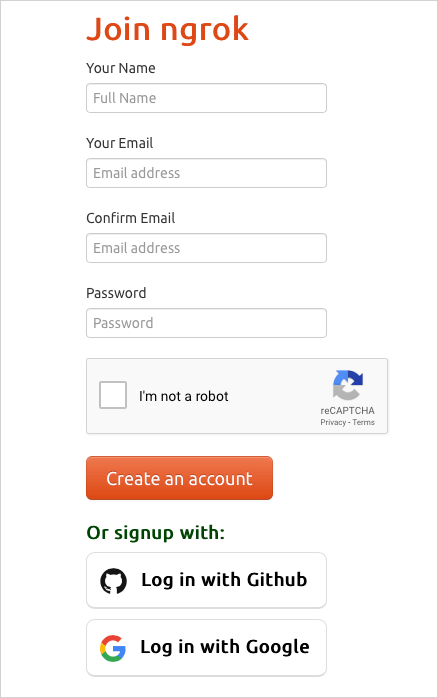
In order to fully take advantage of the features that ngrok has to offer it is recommended to sign up for a free account. This will give access to a personalised dashboard which lists active tunnels, as well as giving you the benefit of longer sessions between tunnel timeouts.
Follow this link to the signup page and use any of the following sign up methods: Email, GitHub or Google.
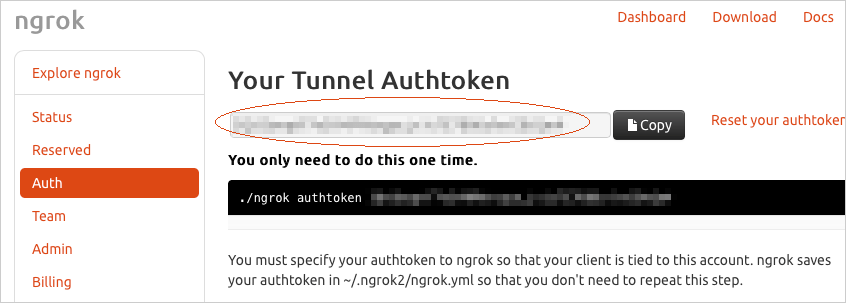
We will then reach the main dashboard.
In the left hand side menu, click on the Auth button and take a note of your unique authentication token (highlighted in red) which we will use in the next step.
Usage
As we will shortly demonstrate, using ngrok cannot be simpler. Make sure that you have navigated to your installation directory by typing the following command in a shell. (We will use macOS in our example, but the same workflow applies to Linux and Windows PowerShell users.)
$ cd /ApplicationsWe will then run the following command to add our authentication token to the ngrok.yml configuration file. (Replace the many xxx’s with your own unique token).
$ ./ngrok authtoken xxxxxxxxxxxxxxxxxxxxxxxxxxxxxxxxxxxxxxx
Authtoken saved to configuration file: /Users/geek/.ngrok2/ngrok.yml
We are now ready to use ngrok and will type the following command, ./ngrok tcp 32400, to start a TCP tunnel
from our internal Plex Server port. The default port number for Plex is usually 32400.
$ ./ngrok tcp 32400


ngrok by @inconshreveable                                                             (Ctrl+C to quit)
Session Status                online
Account                       Example (Plan: Free)
Version                       2.3.35
Region                        United States (us)
Web Interface                 http://127.0.0.1:4040
Forwarding                    tcp://0.tcp.ngrok.io:11648 -> localhost:32400

Connections                   ttl     opn     rt1     rt5     p50     p90
                              0       0       0.00    0.00    0.00    0.00
Take a note of the output log which tells us that a public URL has been forwarded from our internal IP address. In our example above, next to Forwarding, the public URL is tcp://0.tcp.ngrok.io and the port is 11648.
By default, all ngrok tunnels will connect through servers in the United States, but if you are based in another country, it might be preferable to use a server closer to home instead.
The –region flag helps us in this instance by telling ngrok which server it should connect to. If you are based in Europe, the command would instead look like this.
$ ./ngrok tcp 32400 --region eu


ngrok by @inconshreveable                                                                                                                                                                   (Ctrl+C to quit)

Session Status                online
Account                       Example (Plan: Free)
Version                       2.3.35
Region                        Europe (eu)
Web Interface                 http://127.0.0.1:4040
Forwarding                    tcp://0.tcp.eu.ngrok.io:11648 -> localhost:32400

Connections                   ttl     opn     rt1     rt5     p50     p90
                              0       0       0.00    0.00    0.00    0.00
We will now use this information to add our external IP address to Plex Server. Due to restrictions in their software we are only allowed to enter IP addresses and will therefore have to convert our URL into an IP address. Linux (or macOS) provides several ways to do this. Listed below are two commonly used commands. If you prefer, you can also use any free web service to achieve this. Hint: search “url to ip” in any search engine.
$ dig +short tcp://0.tcp.ngrok.io

3.19.114.185
$ nslookup tcp://0.tcp.ngrok.io
Server: fe80::1%7
Address: fe80::1%7#53
Non-authoritative answer:
Name: tcp://0.tcp.ngrok.io
Address: 3.19.114.185The external URL, in this example, is resolved to 3.19.114.185. Armed with this information we will now launch Plex Server. In a web browser, type the following address.
http://localhost:32400

On the Plex Server landing page, navigate to the Settings page by clicking on the toolbar icon in the upper right hand corner. Then in the left hand side column, scroll down to the Network section and locate the field labelled Custom server access URLs.
Enter the external IP address and port number. In our example we will write:
http://3.19.114.185:11648
(Optional: For increased security you may want to use an https address instead.)
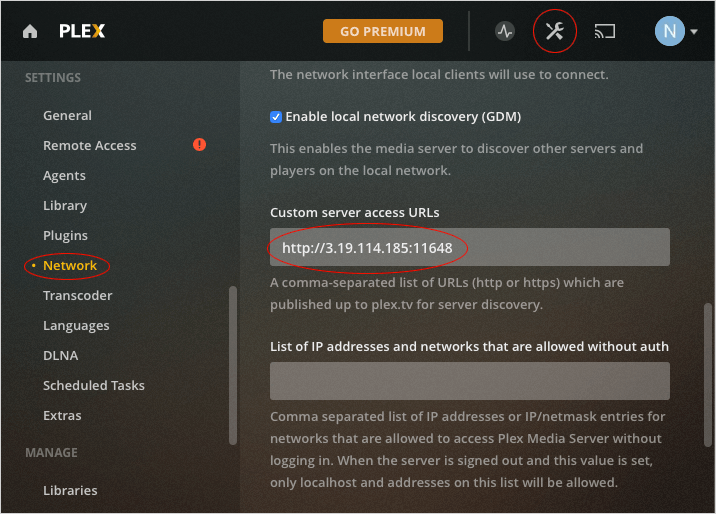
Please note that you do not need to enable Remote Access because this feature is only supported by port forwarding and does not work with CGNAT.
Test run
We are now ready to test if the setup actually works. From any external web browser, i.e. a location outside your home network, type in the IP address that was entered under the Custom server access URLs section, i.e. 3.19.114.185:11648.
If everything works correctly, you should now see Plex Server’s familiar dashboard. If you are using Plex’s native mobile app, there is nothing more that you need to do as it will automatically redirect you to a login page were you will be required to sign in to gain access to your account. After this you should be able to access your content as normal.
Limitations
One limitation of the free plan is that you will be assigned a random port number each time ngrok is restarted. This means that you will have to update your Plex Server settings as well, every single time! If this becomes a hassle, a subscription to ngrok’s paid service might be worthwhile because it will give you the additional benefit of reserving port numbers.
Summary
There you have it. Even when you are not able to directly connect to your home Plex Server, due to CGNAT restrictions, it is still possible to work around the problem by using ngrok’s tunneling feature.
Further information
For more information on how to use ngrok, type ngrok help.
$ ./ngrok help

NAME:
   ngrok - tunnel local ports to public URLs and inspect traffic

DESCRIPTION:
    ngrok exposes local networked services behinds NATs and firewalls to the
    public internet over a secure tunnel. Share local websites, build/test
    webhook consumers and self-host personal services.
    Detailed help for each command is available with 'ngrok help <command>'.
    Open http://localhost:4040 for ngrok's web interface to inspect traffic.

EXAMPLES:
    ngrok http 80                    # secure public URL for port 80 web server
    ngrok http -subdomain=baz 8080   # port 8080 available at baz.ngrok.io
    ngrok http foo.dev:80            # tunnel to host:port instead of localhost
    ngrok http https://localhost     # expose a local https server
    ngrok tcp 22                     # tunnel arbitrary TCP traffic to port 22
    ngrok tls -hostname=foo.com 443  # TLS traffic for foo.com to port 443
    ngrok start foo bar baz          # start tunnels from the configuration file

VERSION:
   2.3.35

AUTHOR:
  inconshreveable - <alan@ngrok.com>

COMMANDS:
   authtoken	save authtoken to configuration file
   credits	prints author and licensing information
   http		start an HTTP tunnel
   start	start tunnels by name from the configuration file
   tcp		start a TCP tunnel
   tls		start a TLS tunnel
   update	update ngrok to the latest version
   version	print the version string
   help		Shows a list of commands or help for one command
See Also

10 Influential Pixel Artists

How to Customise the Linux Bash Prompt
How to Merge and Rebase in Git

How to add new PDF compression filters for the Preview tool on Mac

How to create PDFs with the Preview tool on Mac

How to install Homebrew for Mac
How to find out which shell I am running?

How to sync files with lftp
How to mirror drives with rsync
How to install a Samsung ML-191x 252x Series printer with AirPrint support on a Raspberry Pi
comments powered by Disqus
See also
- 10 Influential Pixel Artists
- How to Customise the Linux Bash Prompt
- How to Merge and Rebase in Git
- How to add new PDF compression filters for the Preview tool on Mac
- How to create PDFs with the Preview tool on Mac
- How to install Homebrew for Mac
- How to find out which shell I am running?
- How to sync files with lftp
- How to mirror drives with rsync
- How to install a Samsung ML-191x 252x Series printer with AirPrint support on a Raspberry Pi