Table of Contents
How to resize a Debian Linux partition inside a Proxmox VM
If you have ever come across the issue of needing to expand storage space inside your Debian Linux Virtual Machine (VM), then this article is for you. In this step-by-step guide, we will show you how to increase the size of an existing Linux partition in Proxmox VE.
The testing environment
This guide was written against:
- Proxmox VE (8.1.4)
- Debian Linux (12.4.0)
⚠️ While these commands and methodologies should work in other Linux distributions, we can’t verify it. Therefore, always take a backup before making any changes!
lsblk: Listing of partition layouts
Let’s first run the lsblk command in the Console to confirm our current partition layout.
lsblk -p💡 Use the additional -p option to display the complete device path.
Below is a typical layout that you might see after a default Debian installation.
The root partition, /, is located at /dev/sda1, and the swap partition is under /dev/sda5, which is part of the Extended partition /dev/sda2.
Our goal is to resize /dev/sda1.
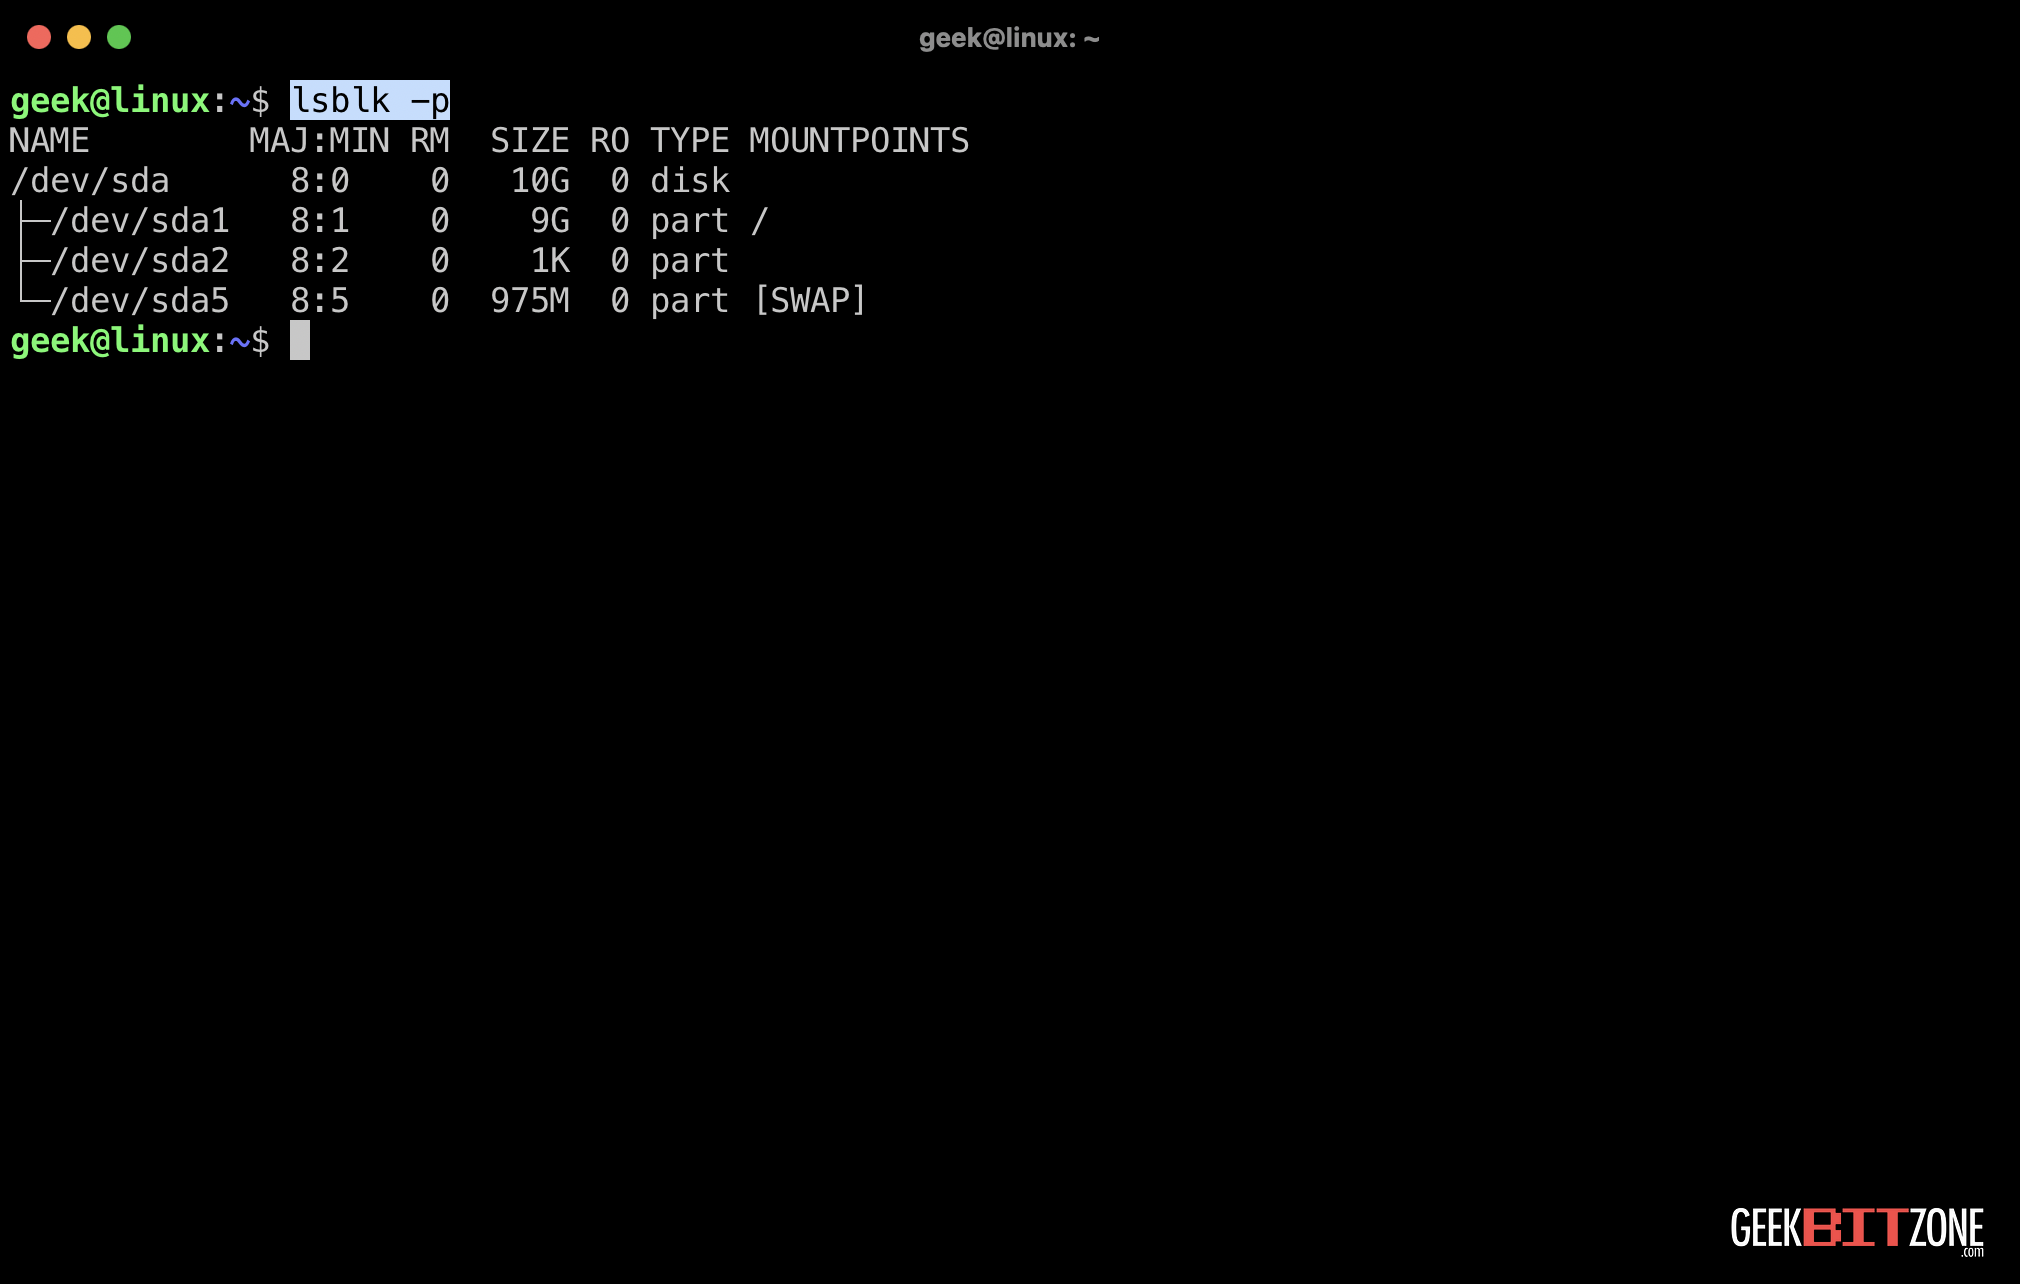
💡 The total disk size in this example is 10 GiB.
Resizing the hard disk in Proxmox
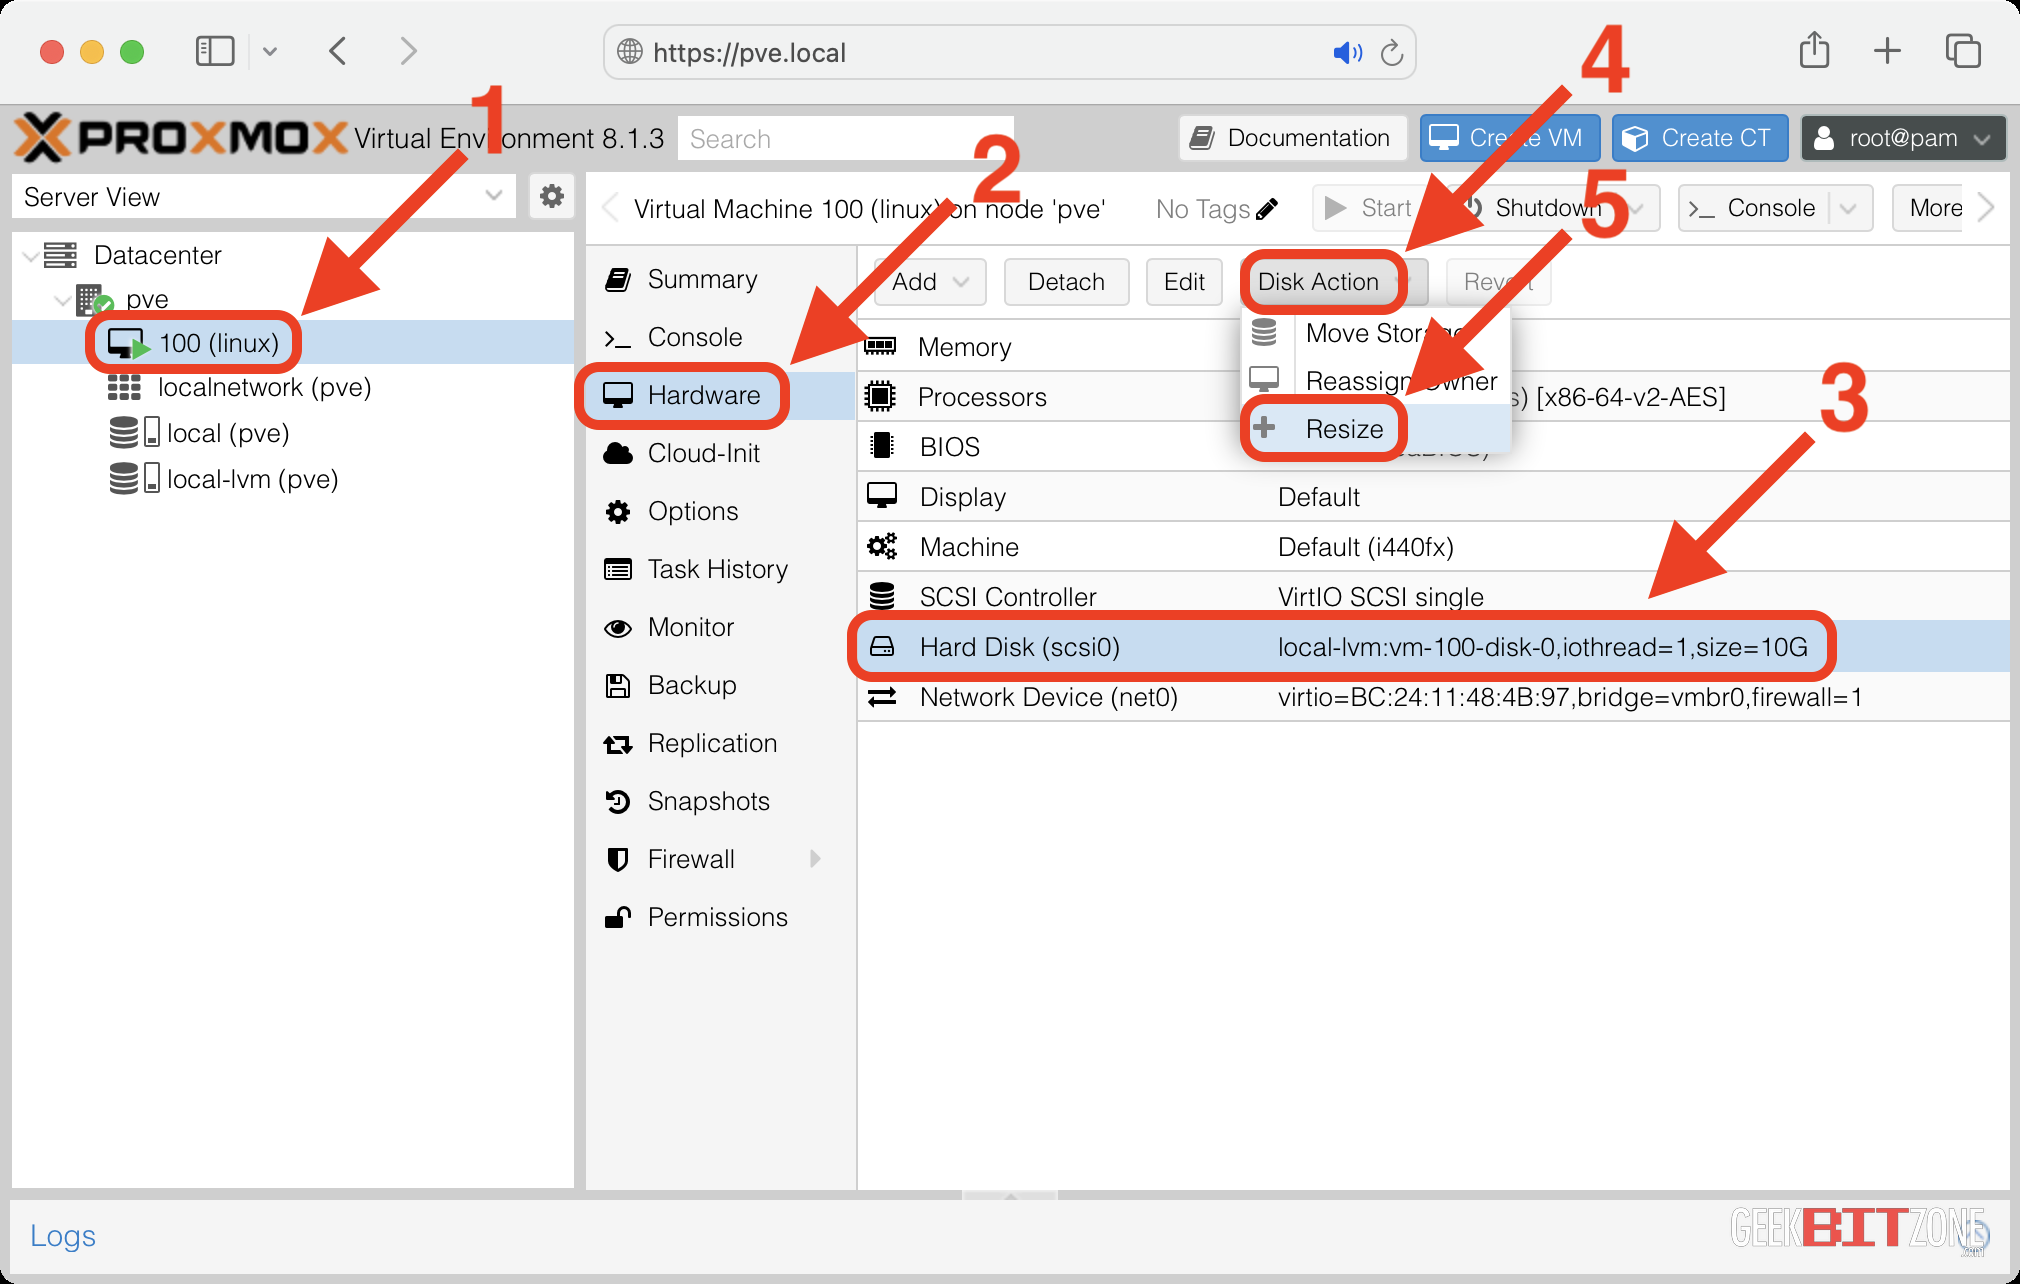
In Proxmox, choose your VM [1], navigate to Hardware [2], Hard Disk (type) [3], click on Disk Action [4], and choose Resize [5].
Enter a Size Increment (GiB) and press Resize disk.
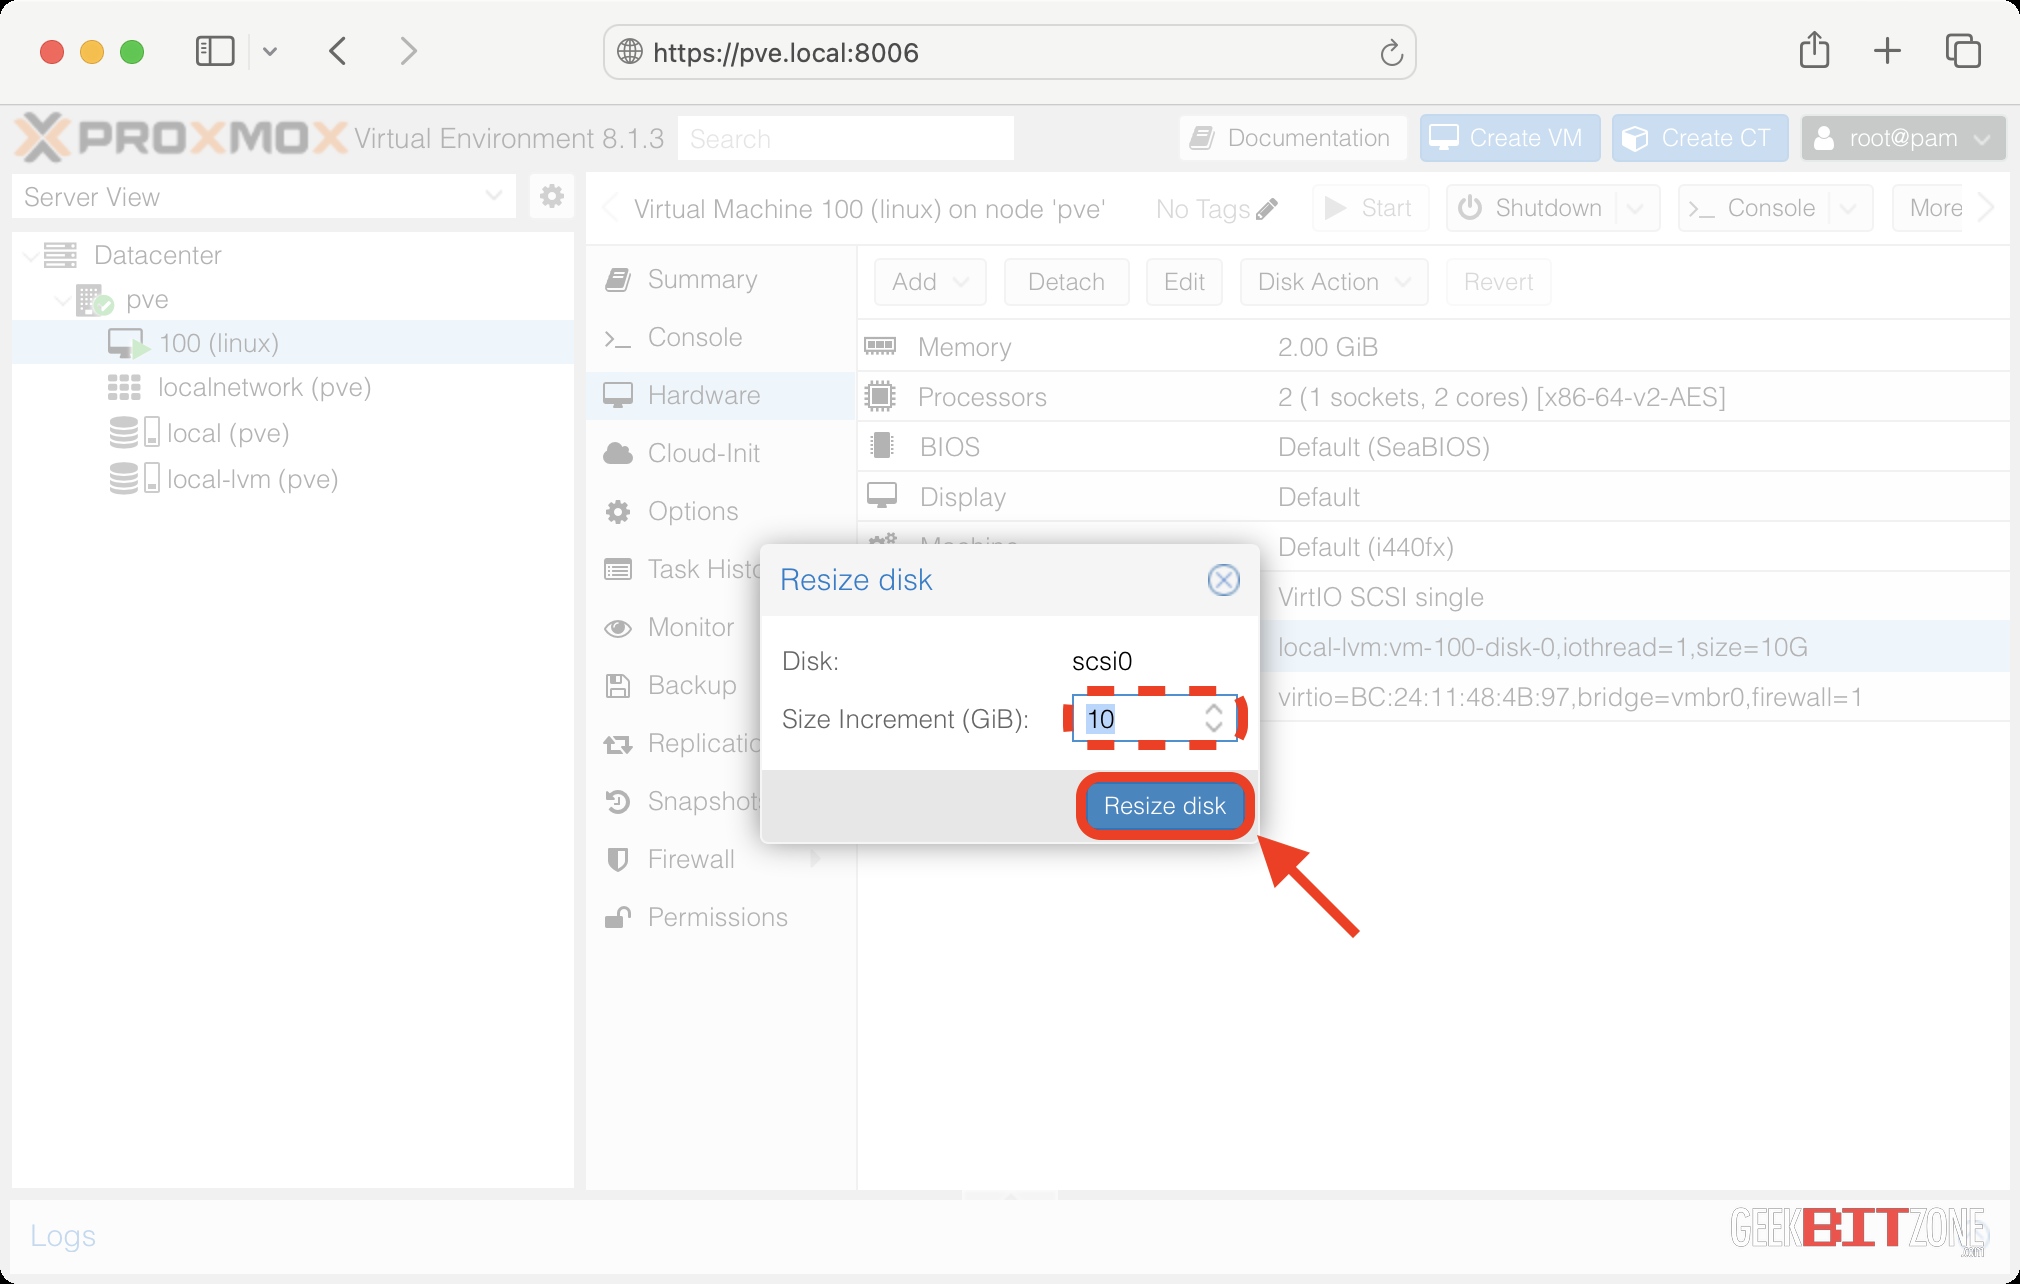
💡 We are in this example resizing our disk by 10 GiB.
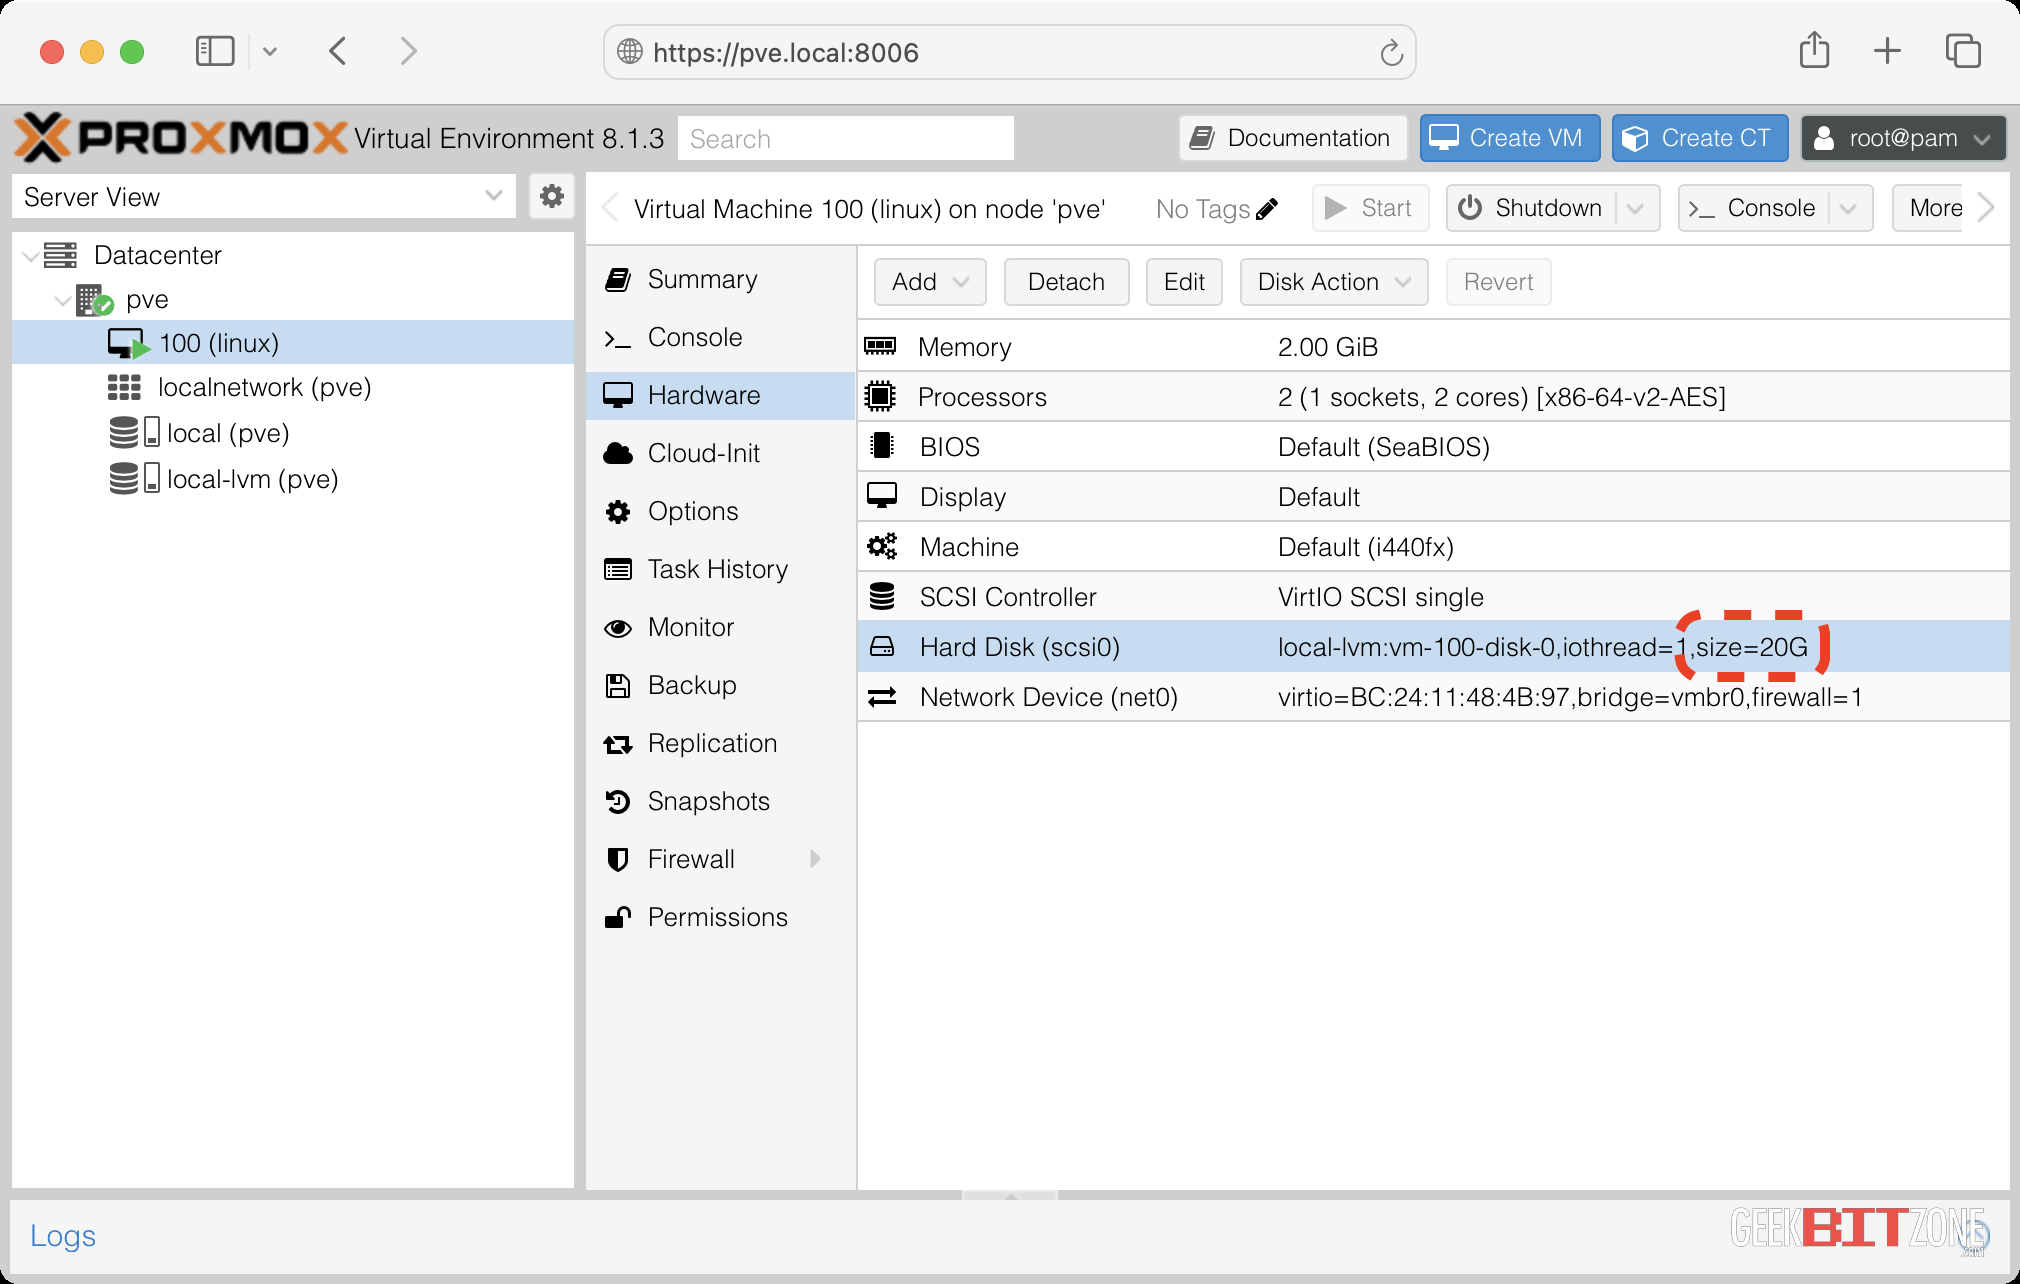
Confirm that the disk increased by the value you just entered.
Return to the Console and run lsblk -p again to confirm the new size on /dev/sda.
lsblk -p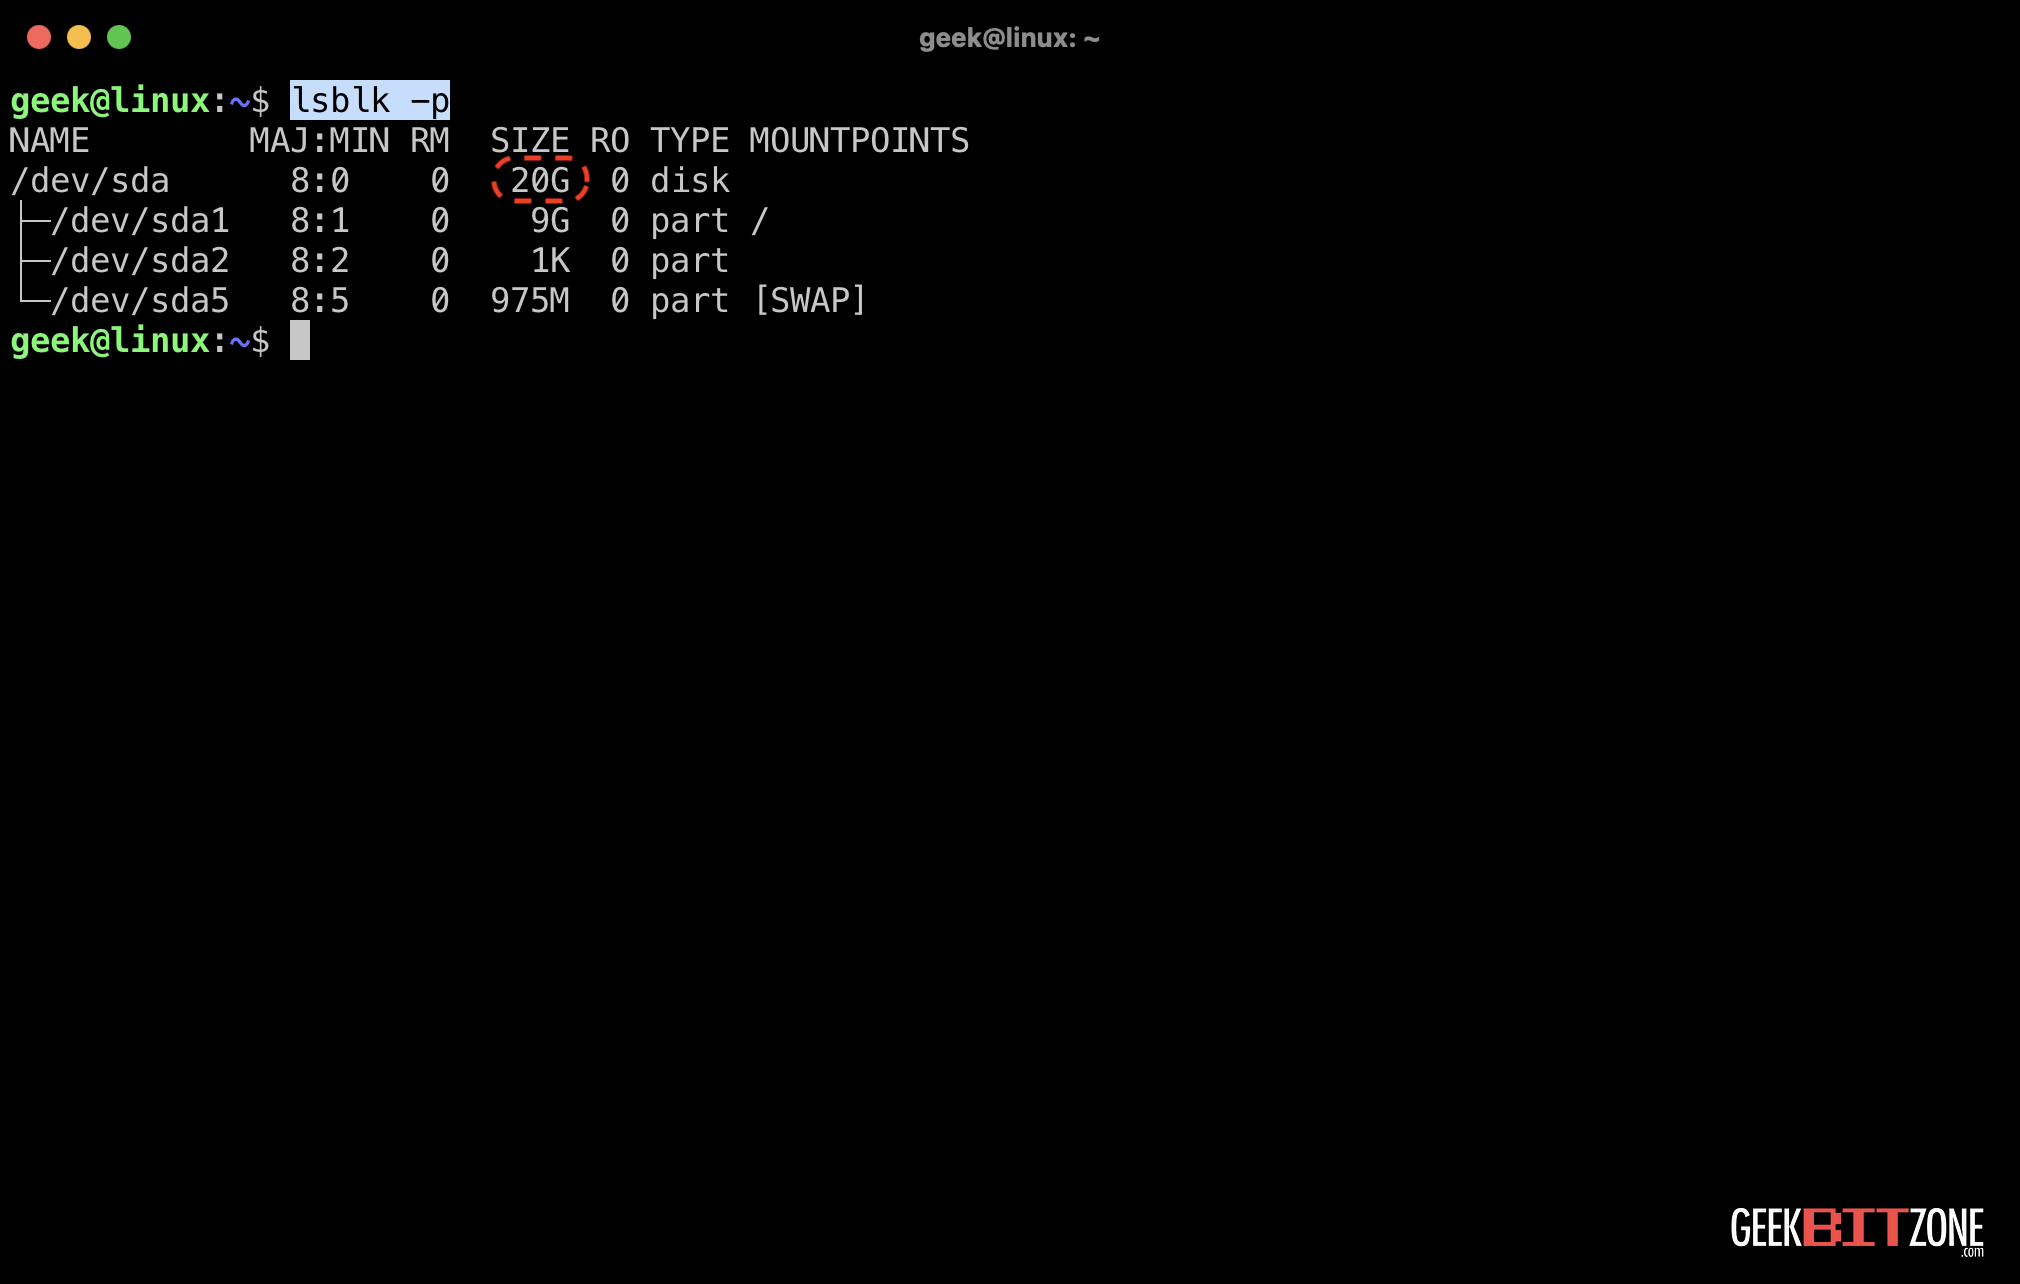
💡 The total disk size should now show 20G.
One might think that this is all that’s required to resize a Linux partition in Proxmox, but unfortunately, it’s not that simple.
Enabling the root user
Let’s take off our gloves and log in as root using the su - command.
su -Enter your password when prompted.

💡 It is also possible to execute commands in the next section as a regular user using the sudo command.
Disabling the swap partition
We need to turn off the swap file before modifying the partitions. Double-check the device your swap partition resides on and then run the swapoff command.
💡 The swap resides on /dev/sda5 in this example.
swapoff /dev/sda5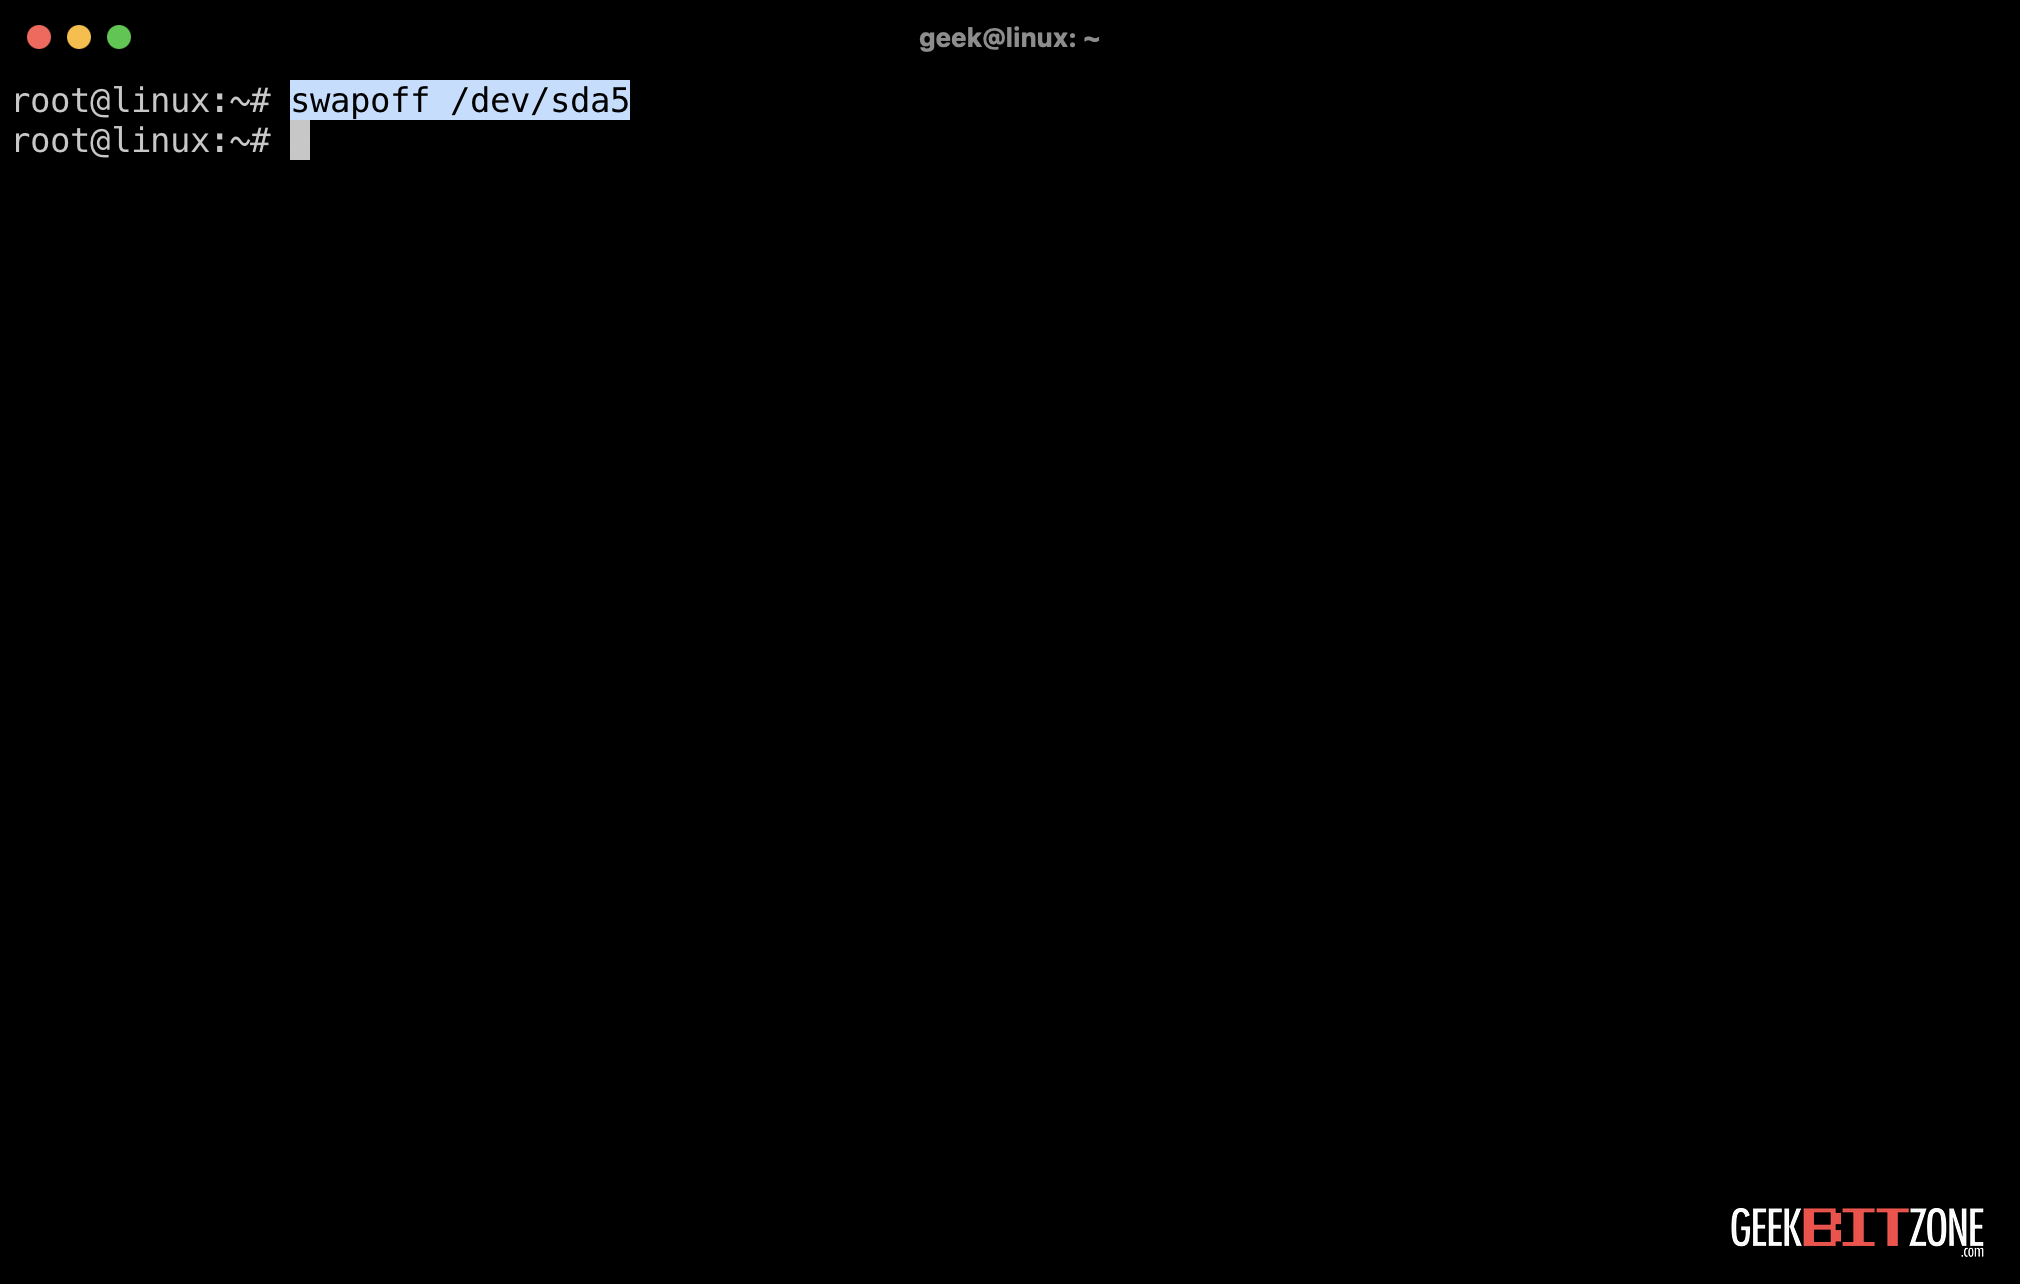
Confirm that [SWAP] has disappeared from /dev/sda5 under the MOUNTPOINTS column by running the lsblk -p command again.
lsblk -p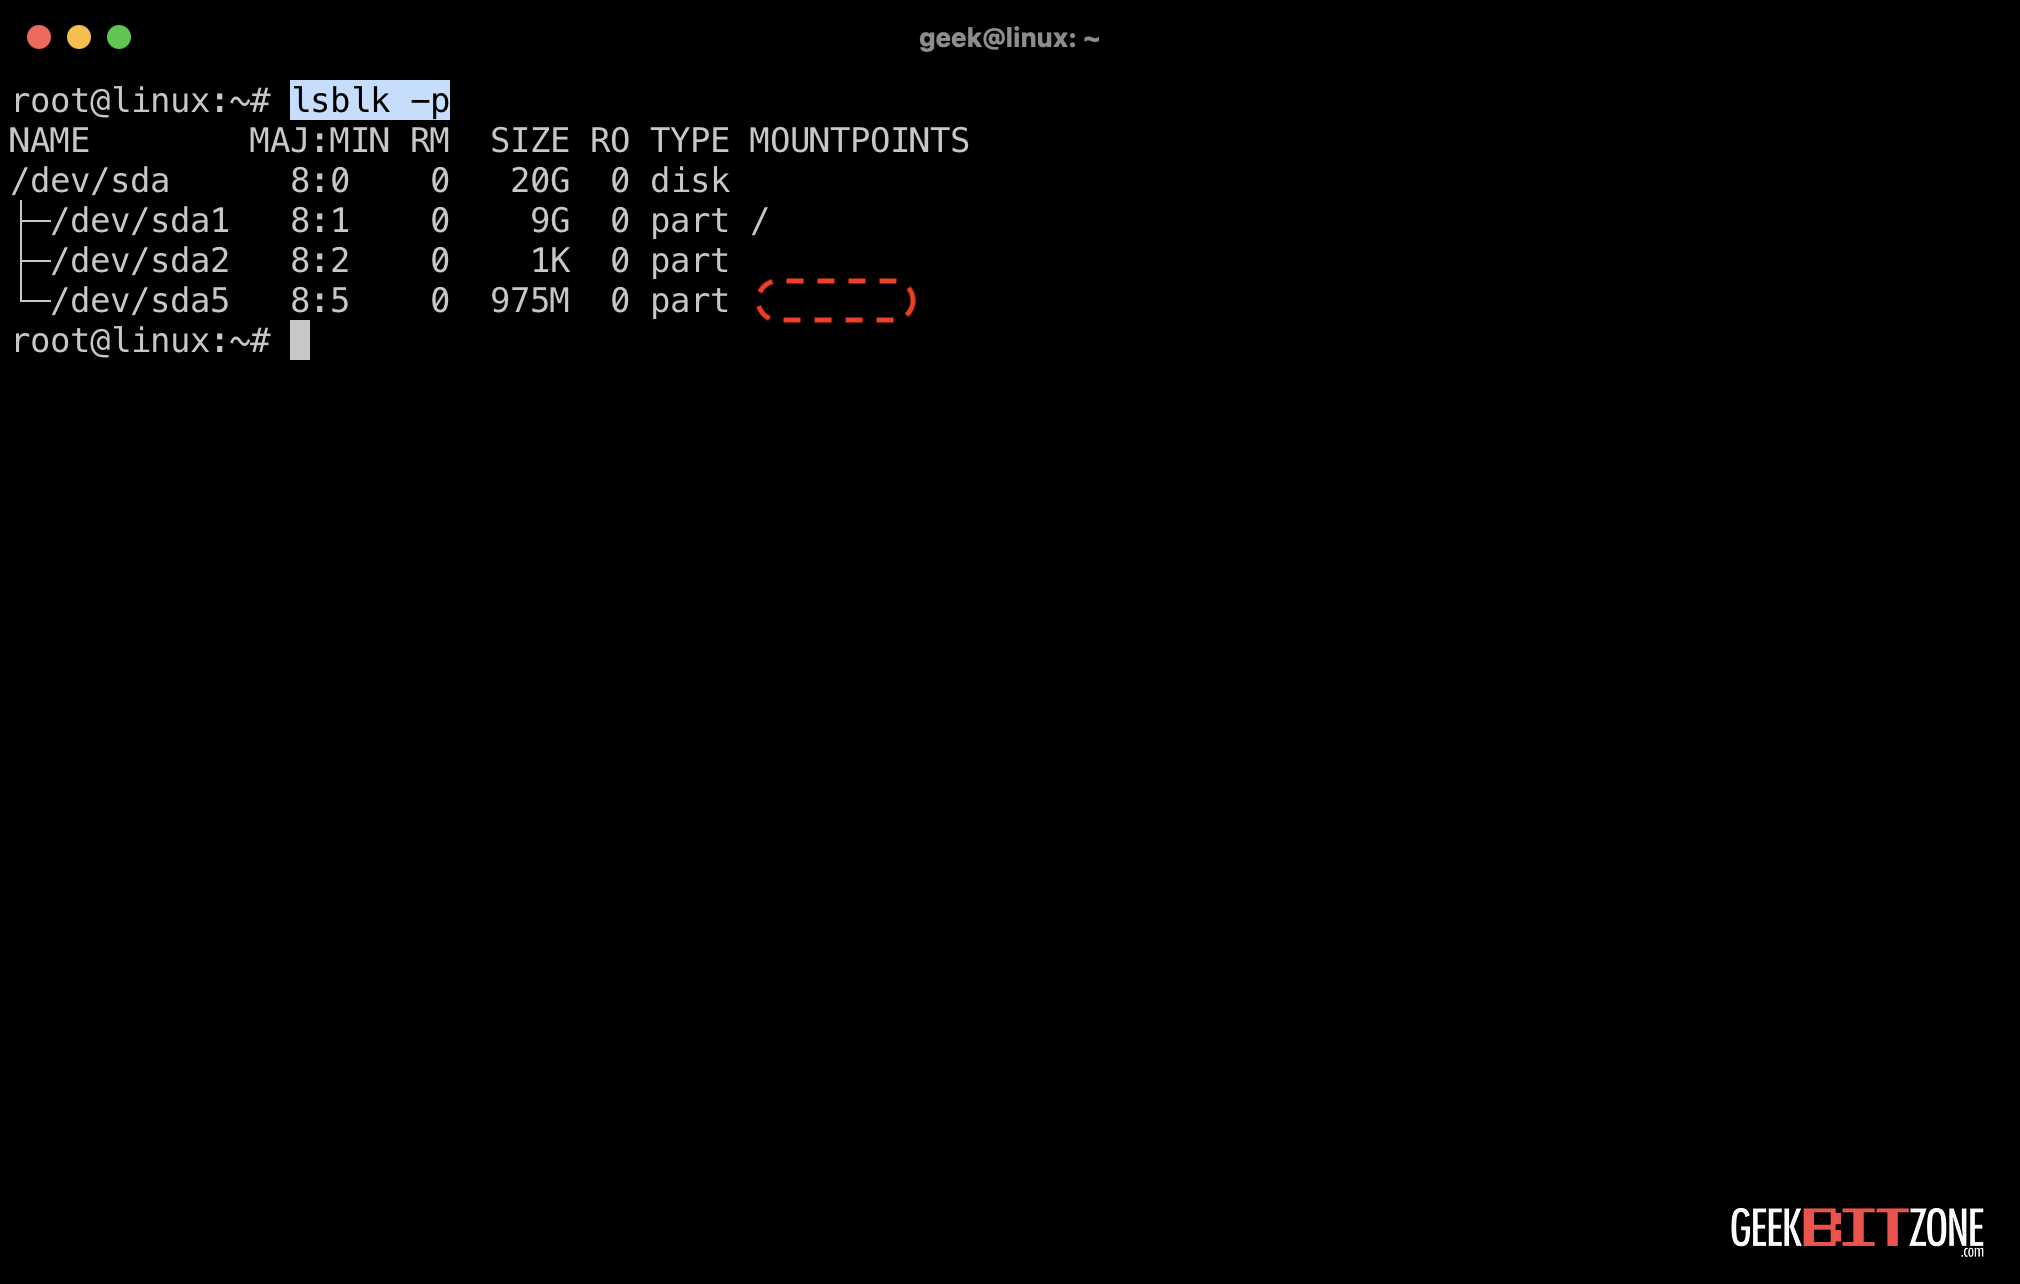
cfdisk: a Linux partition editor
Now, let’s launch cfdisk, a Linux partition editor similar to fdisk, but with a more user-friendly interface.
cfdisk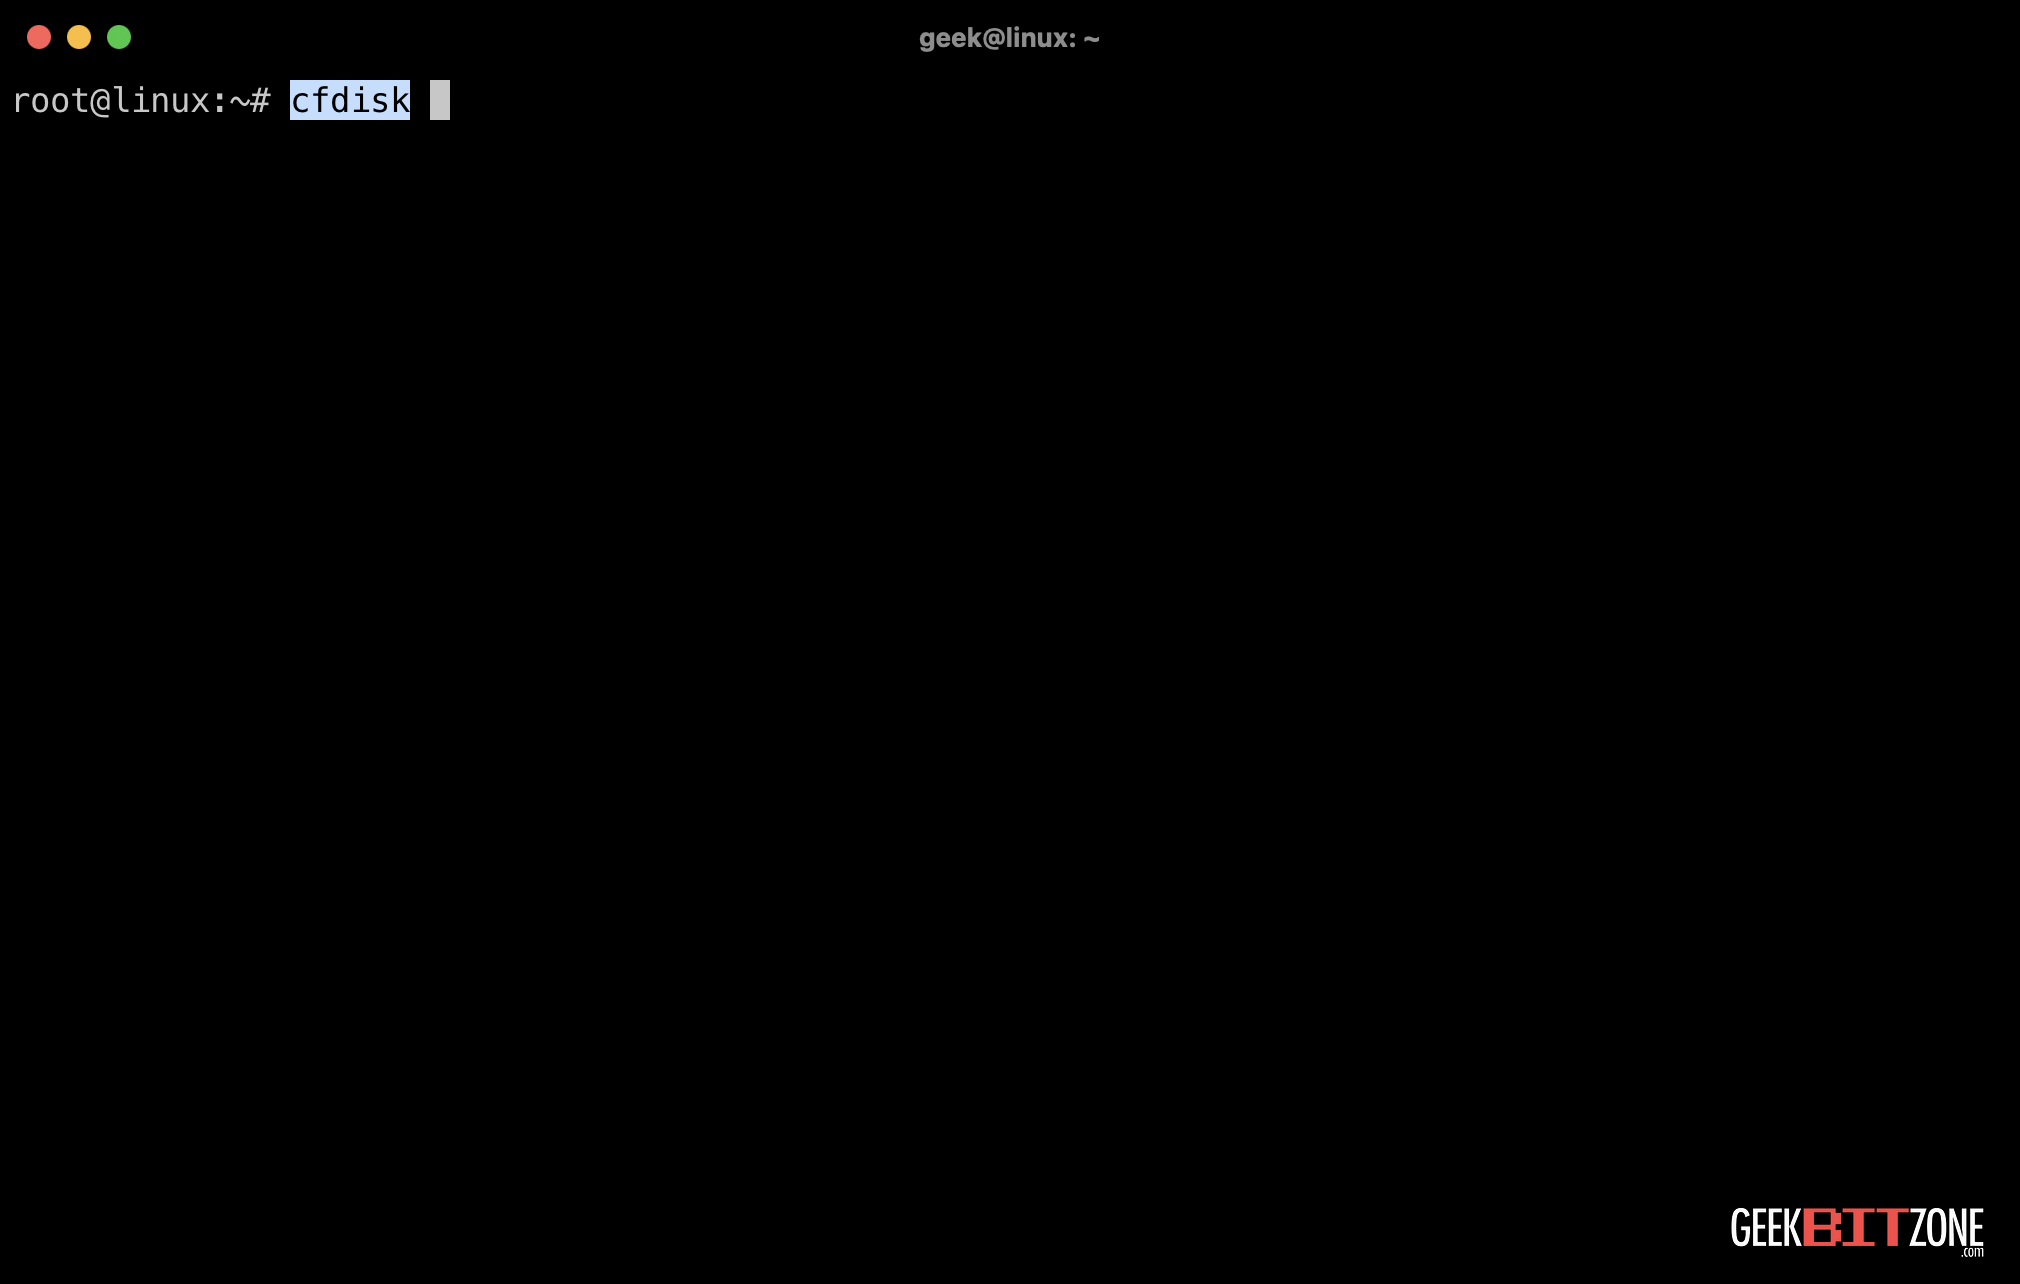
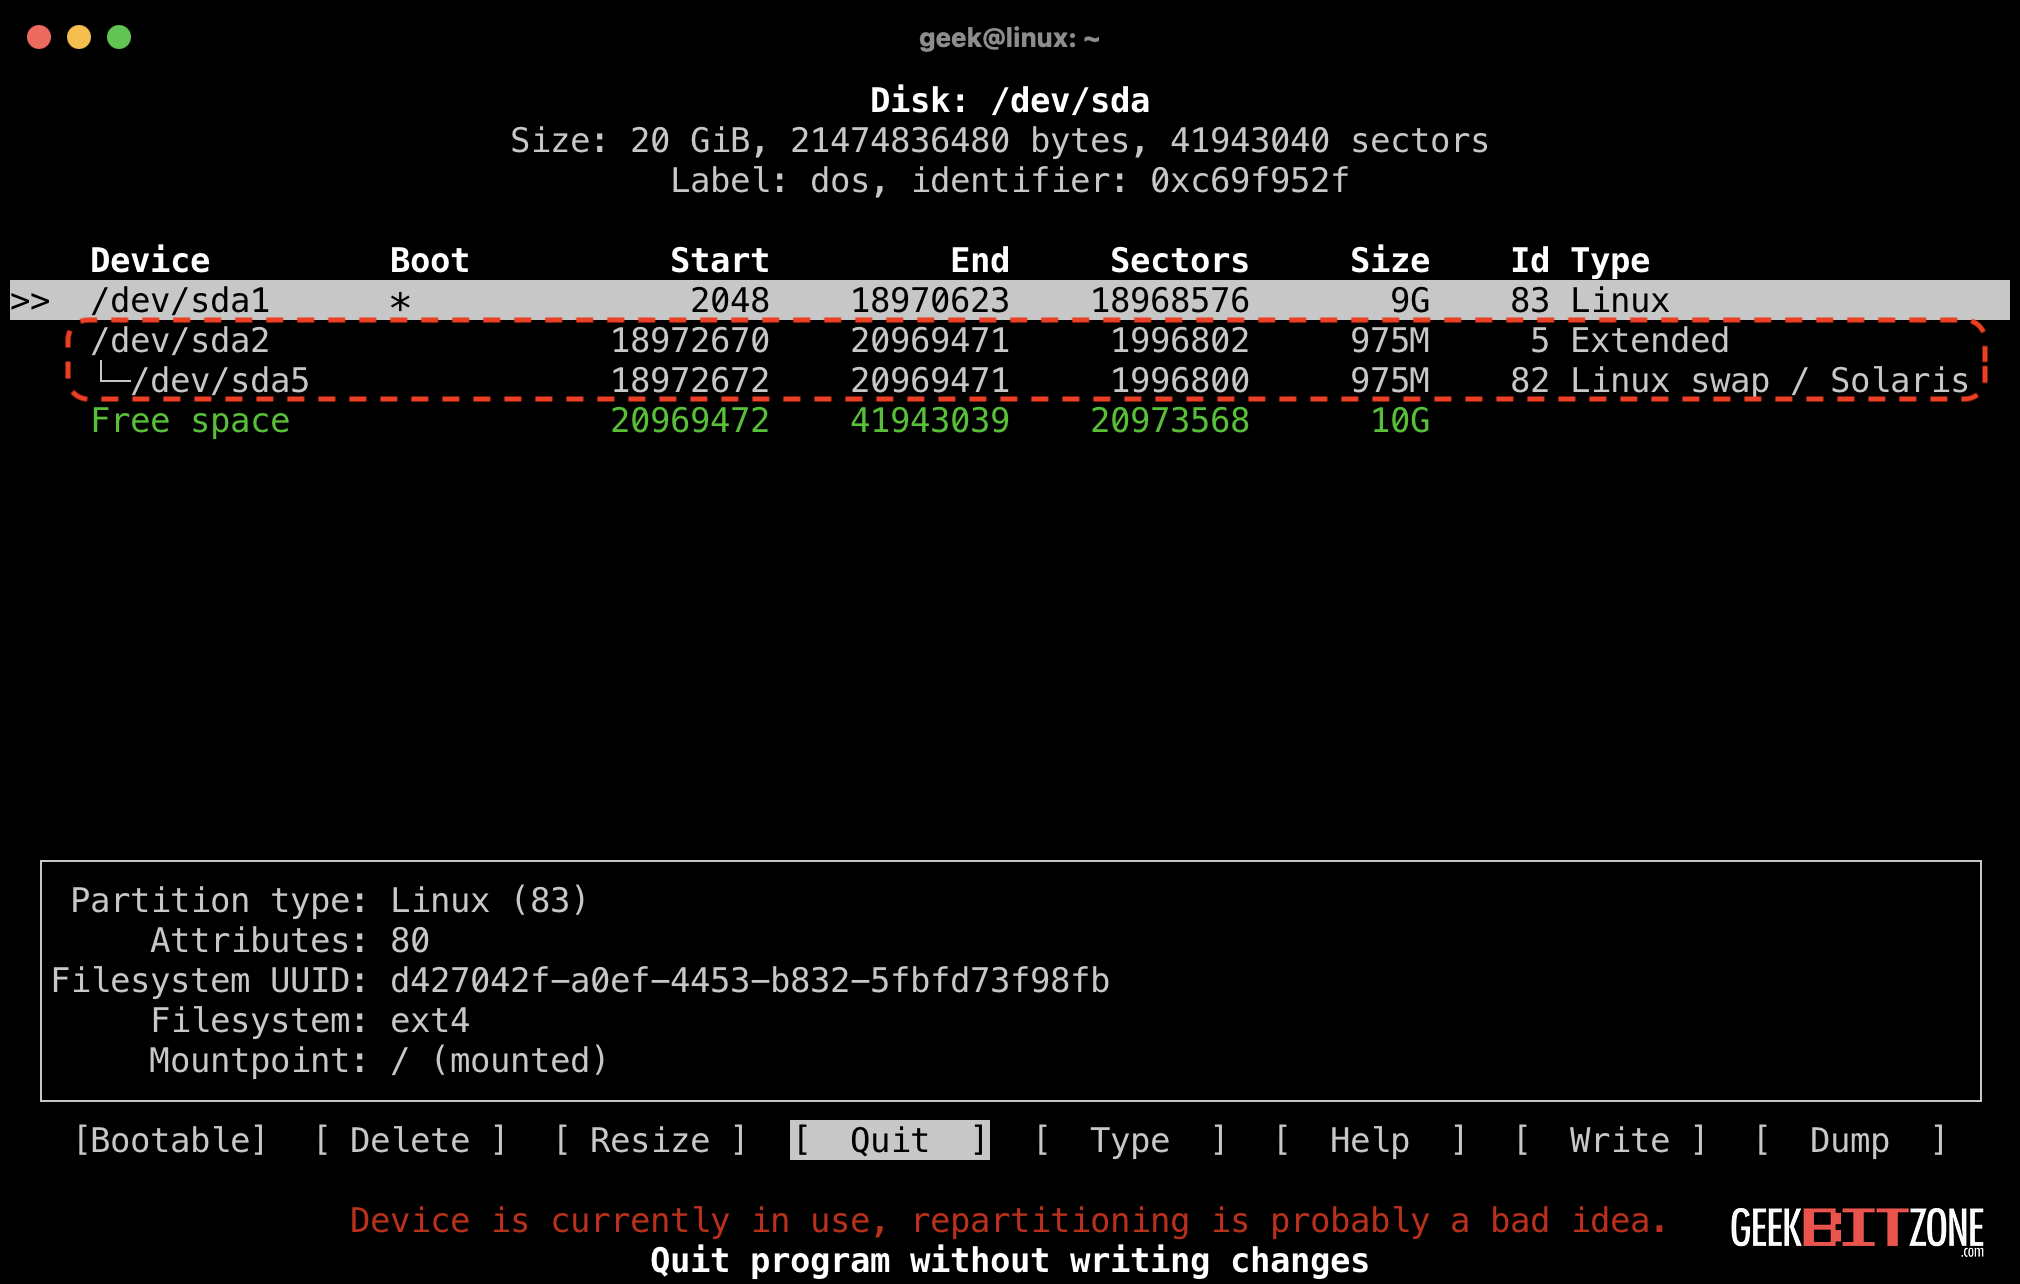
Let’s pause for a moment to look at our current partition layout.
We want to increase the size of /dev/sda1, but cannot do this yet because the extended partition /dev/sda2 is blocking our way.
The only solution is to delete the extended partition along with its swap file, then resize our primary partition at /dev/sda1, and finally, re-create the extended swap partition.
To recap, we will delete /dev/sda2, which will automatically delete /dev/sda5 as well.
⚠️ Warning: The upcoming actions are highly destructive, and there is a risk that your VM may become unbootable. It is crucial that you take a snapshot and/or a backup before proceeding any further. Any mistakes during this process may result in the inability to boot up your VM again.
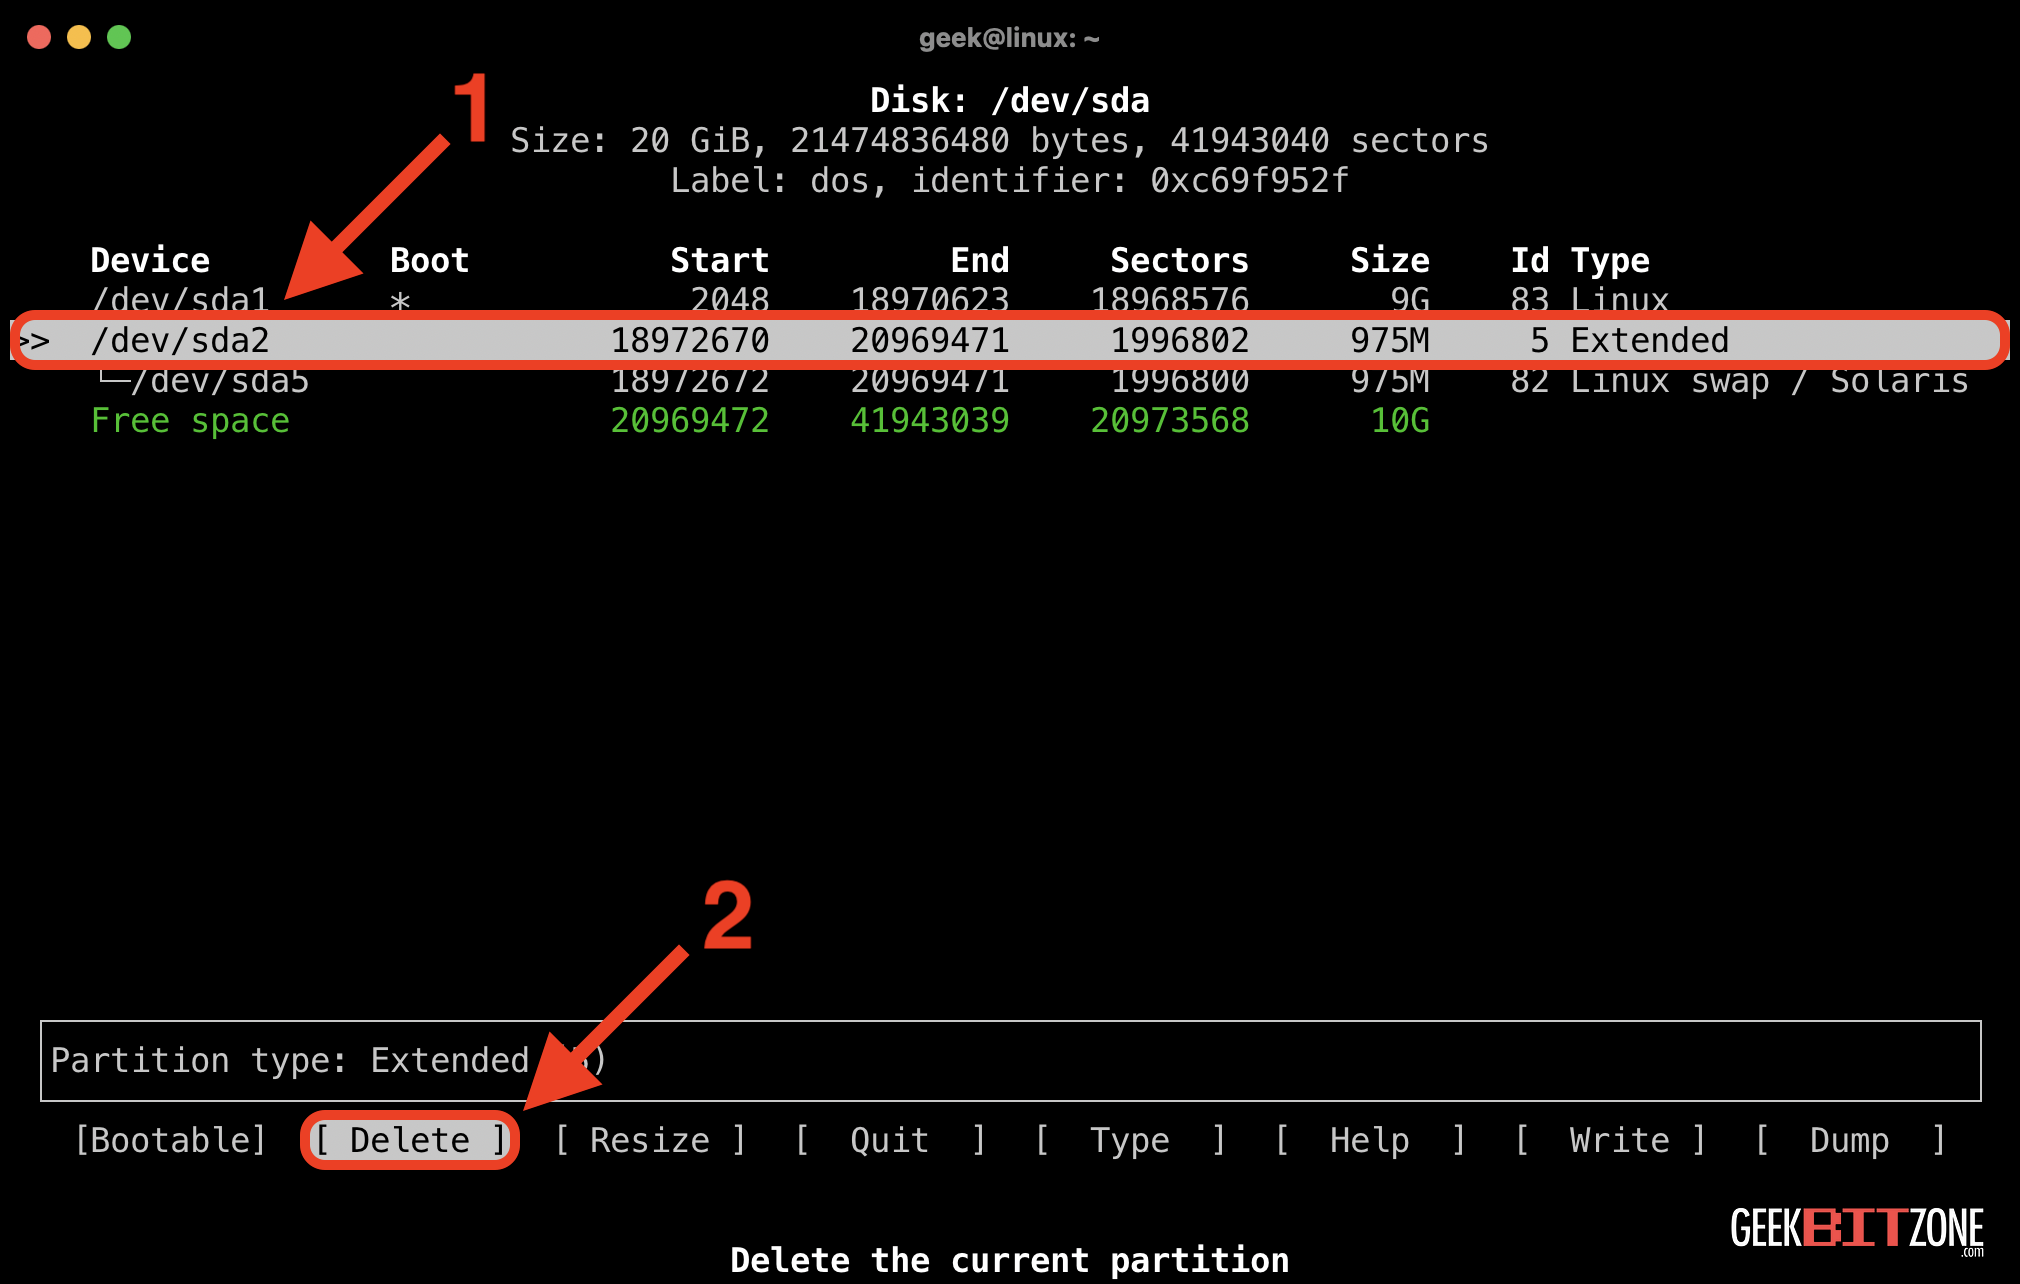
Deleting the extended partition
With the precautions out of the way, let’s delete the extended partition. Press the arrow key down to highlight the row labelled /dev/sda2 [1].
Navigate to the Delete [2] menu option using the arrow keys.
Press Enter.
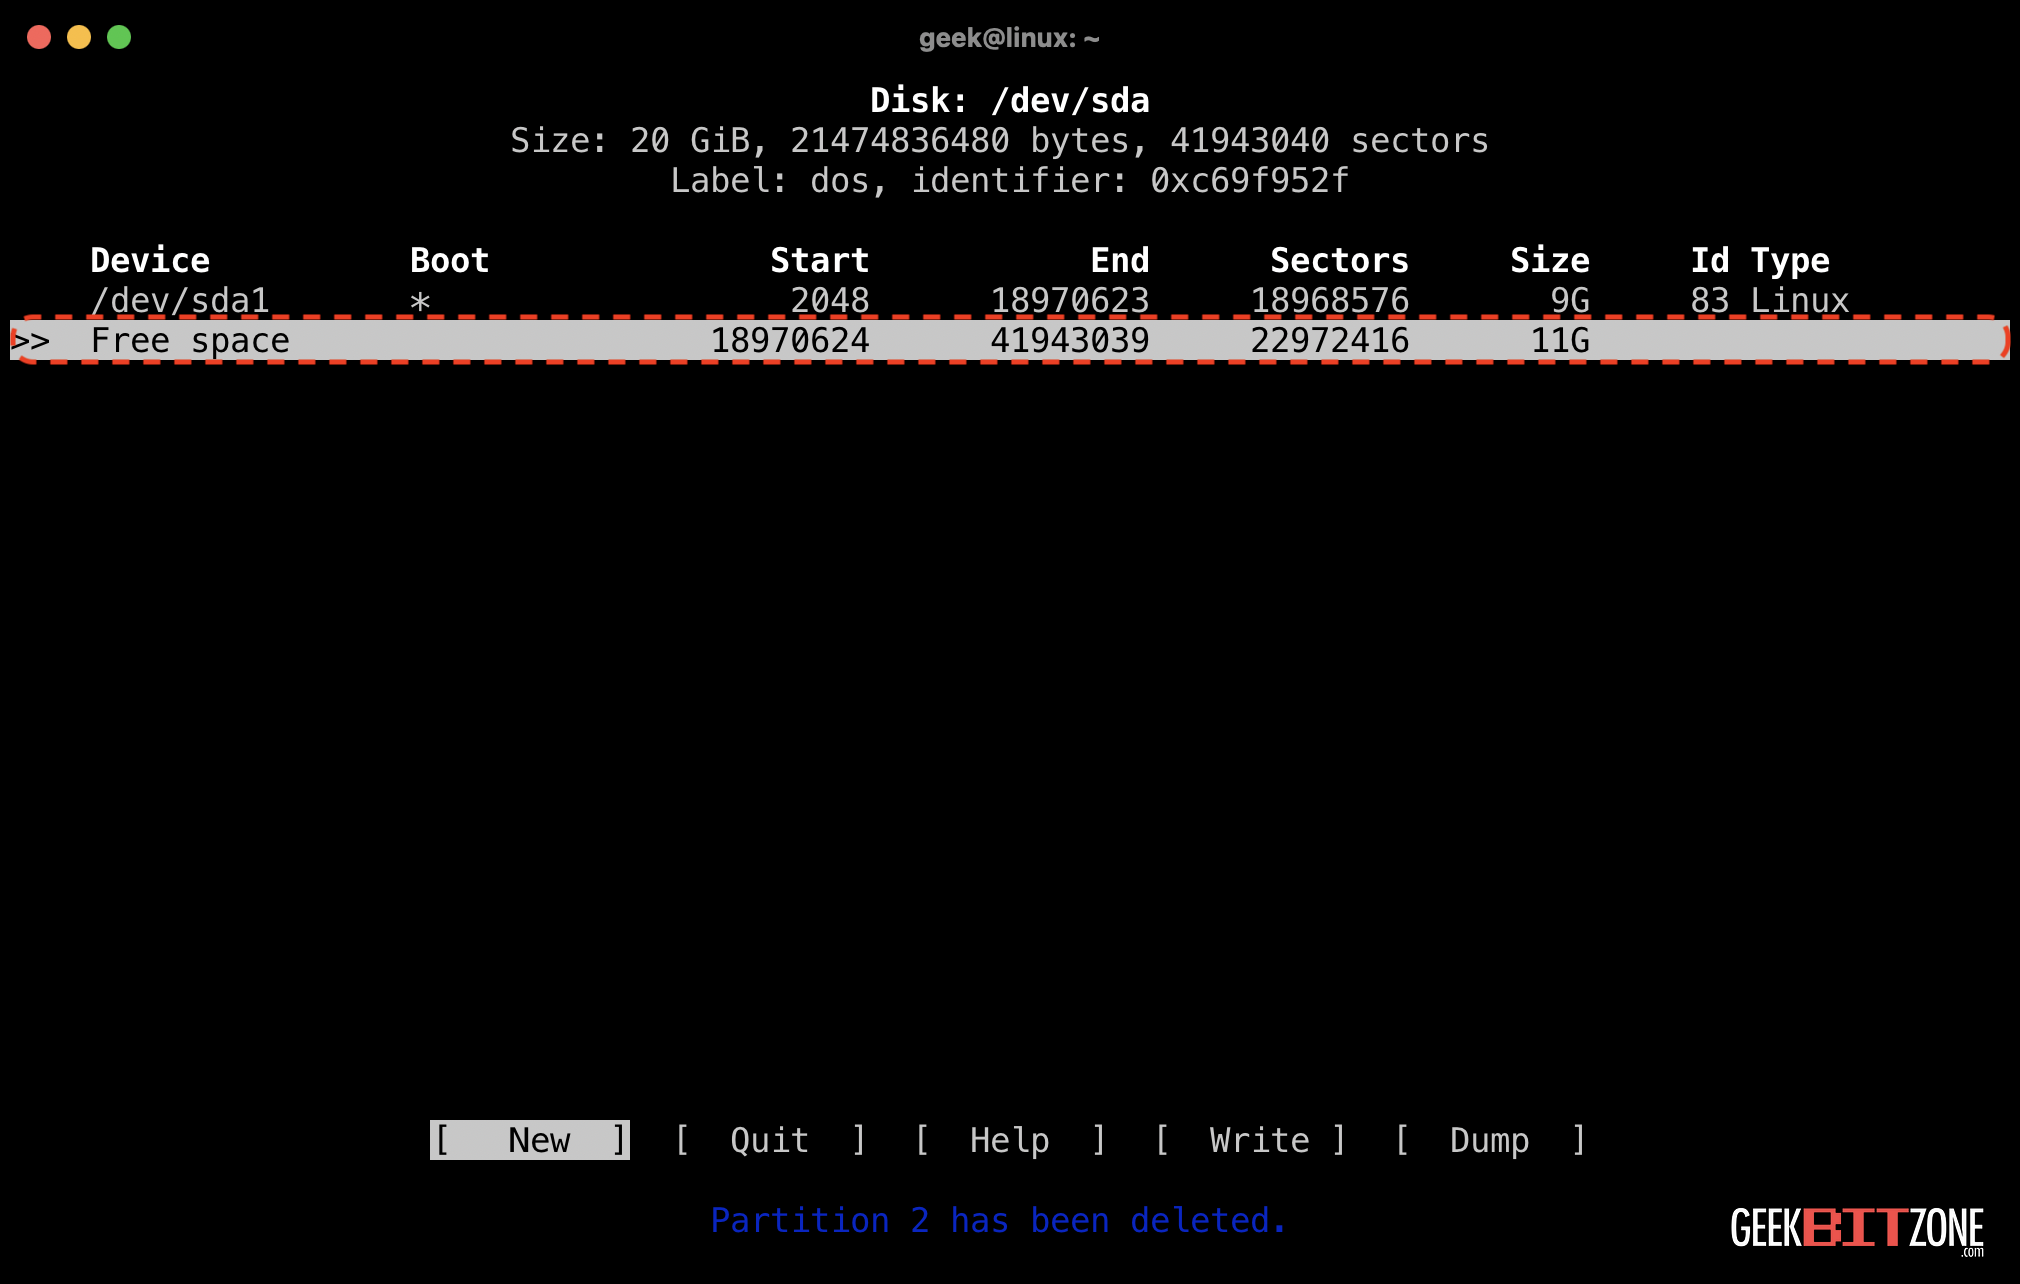
Confirm that the partition has been deleted.
Resizing the primary partition
Now, we are free to resize our primary partition.
Move the arrow up key to /dev/sda1 [1]. Select the Resize [2] menu option and press Enter.
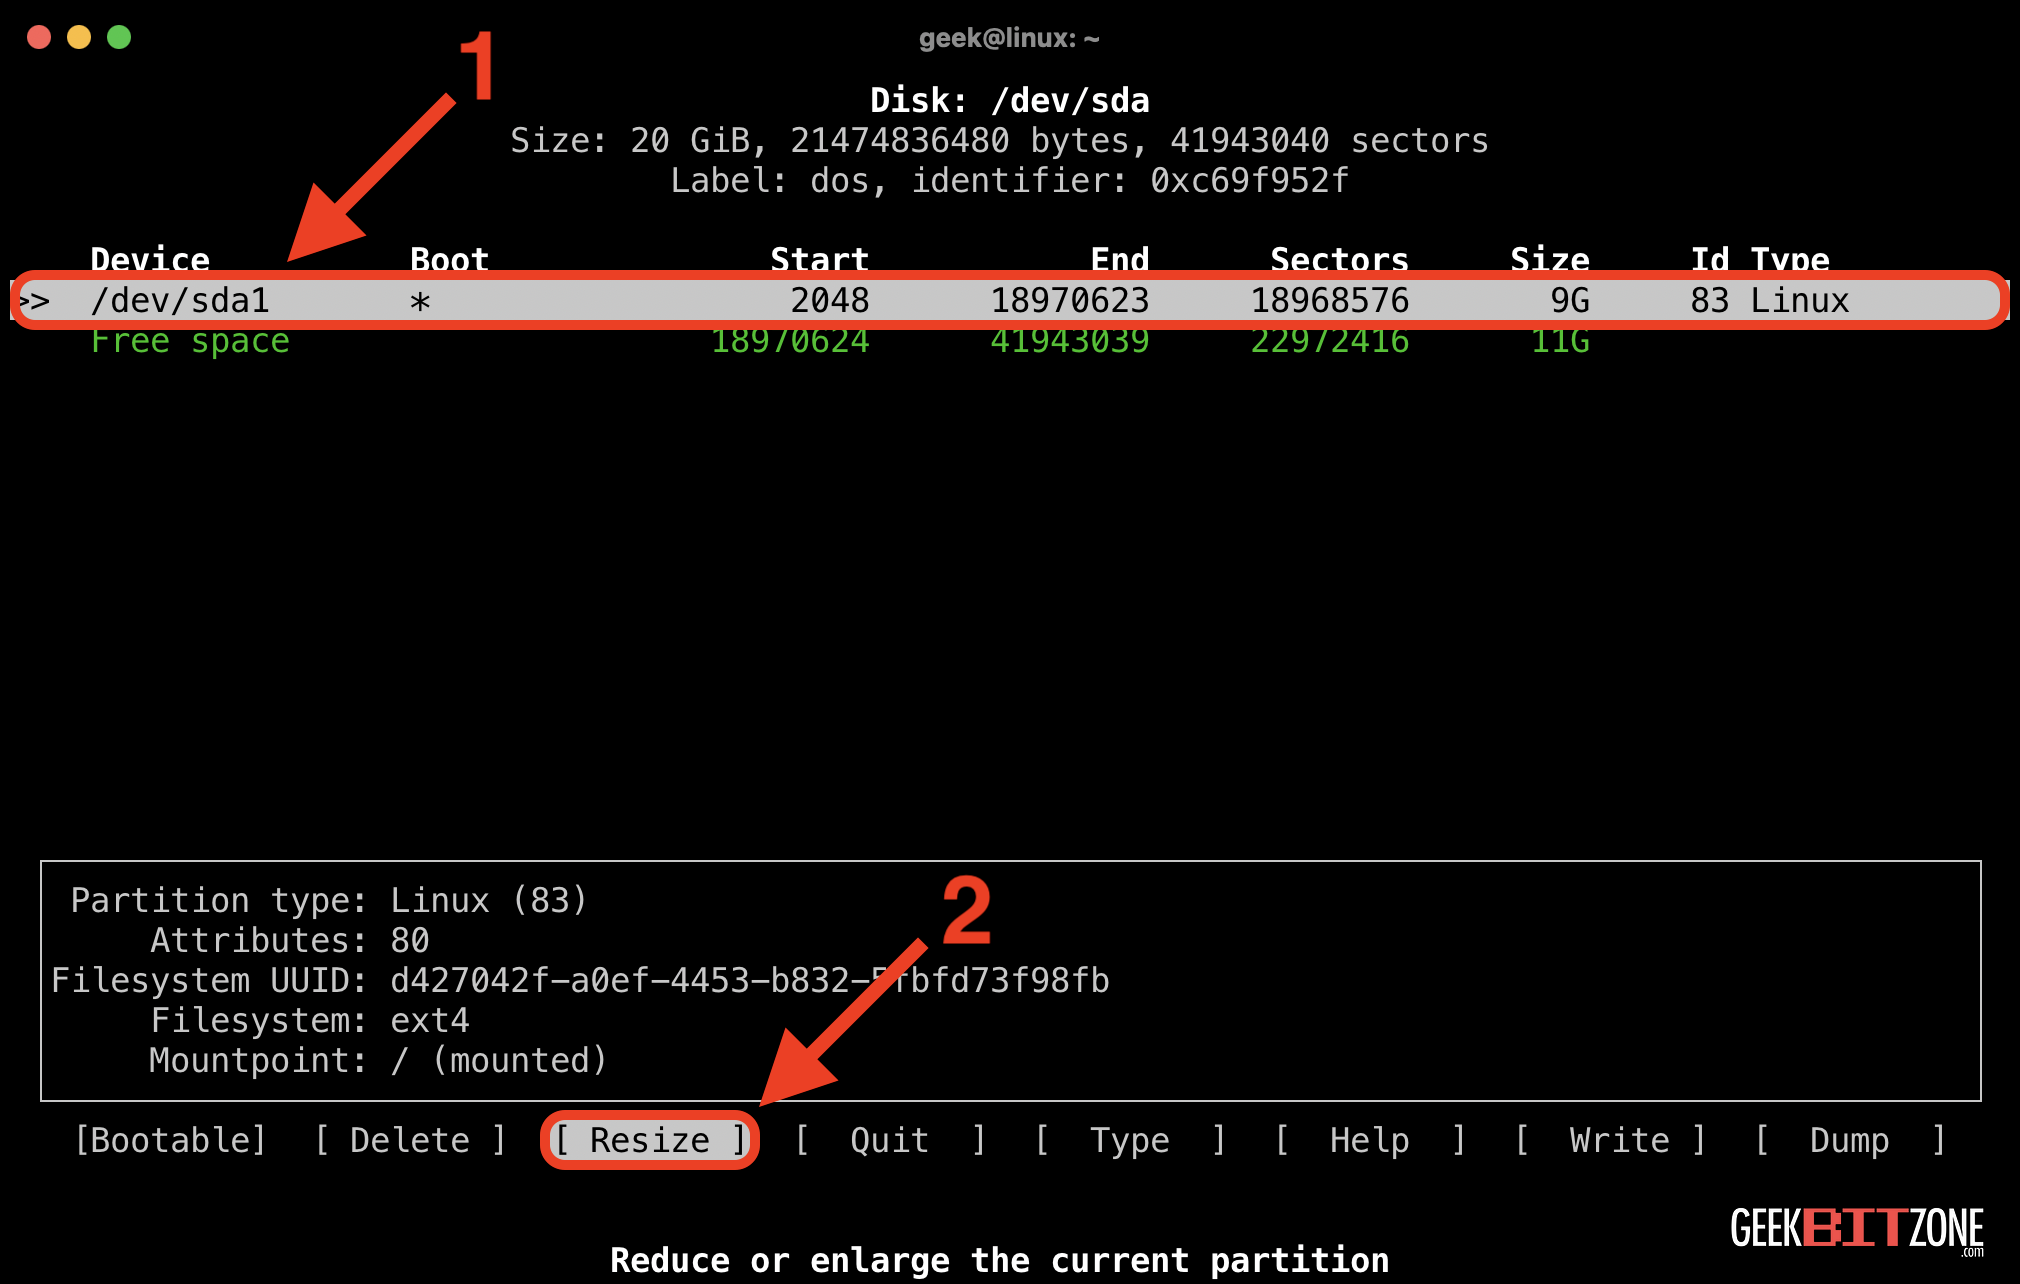
Take note of the suggested New size size that the partition can be resized to.
⚠️ Stop: We do not want resize to this maximum amount of 20G because we still need to leave some space for the swap partition!
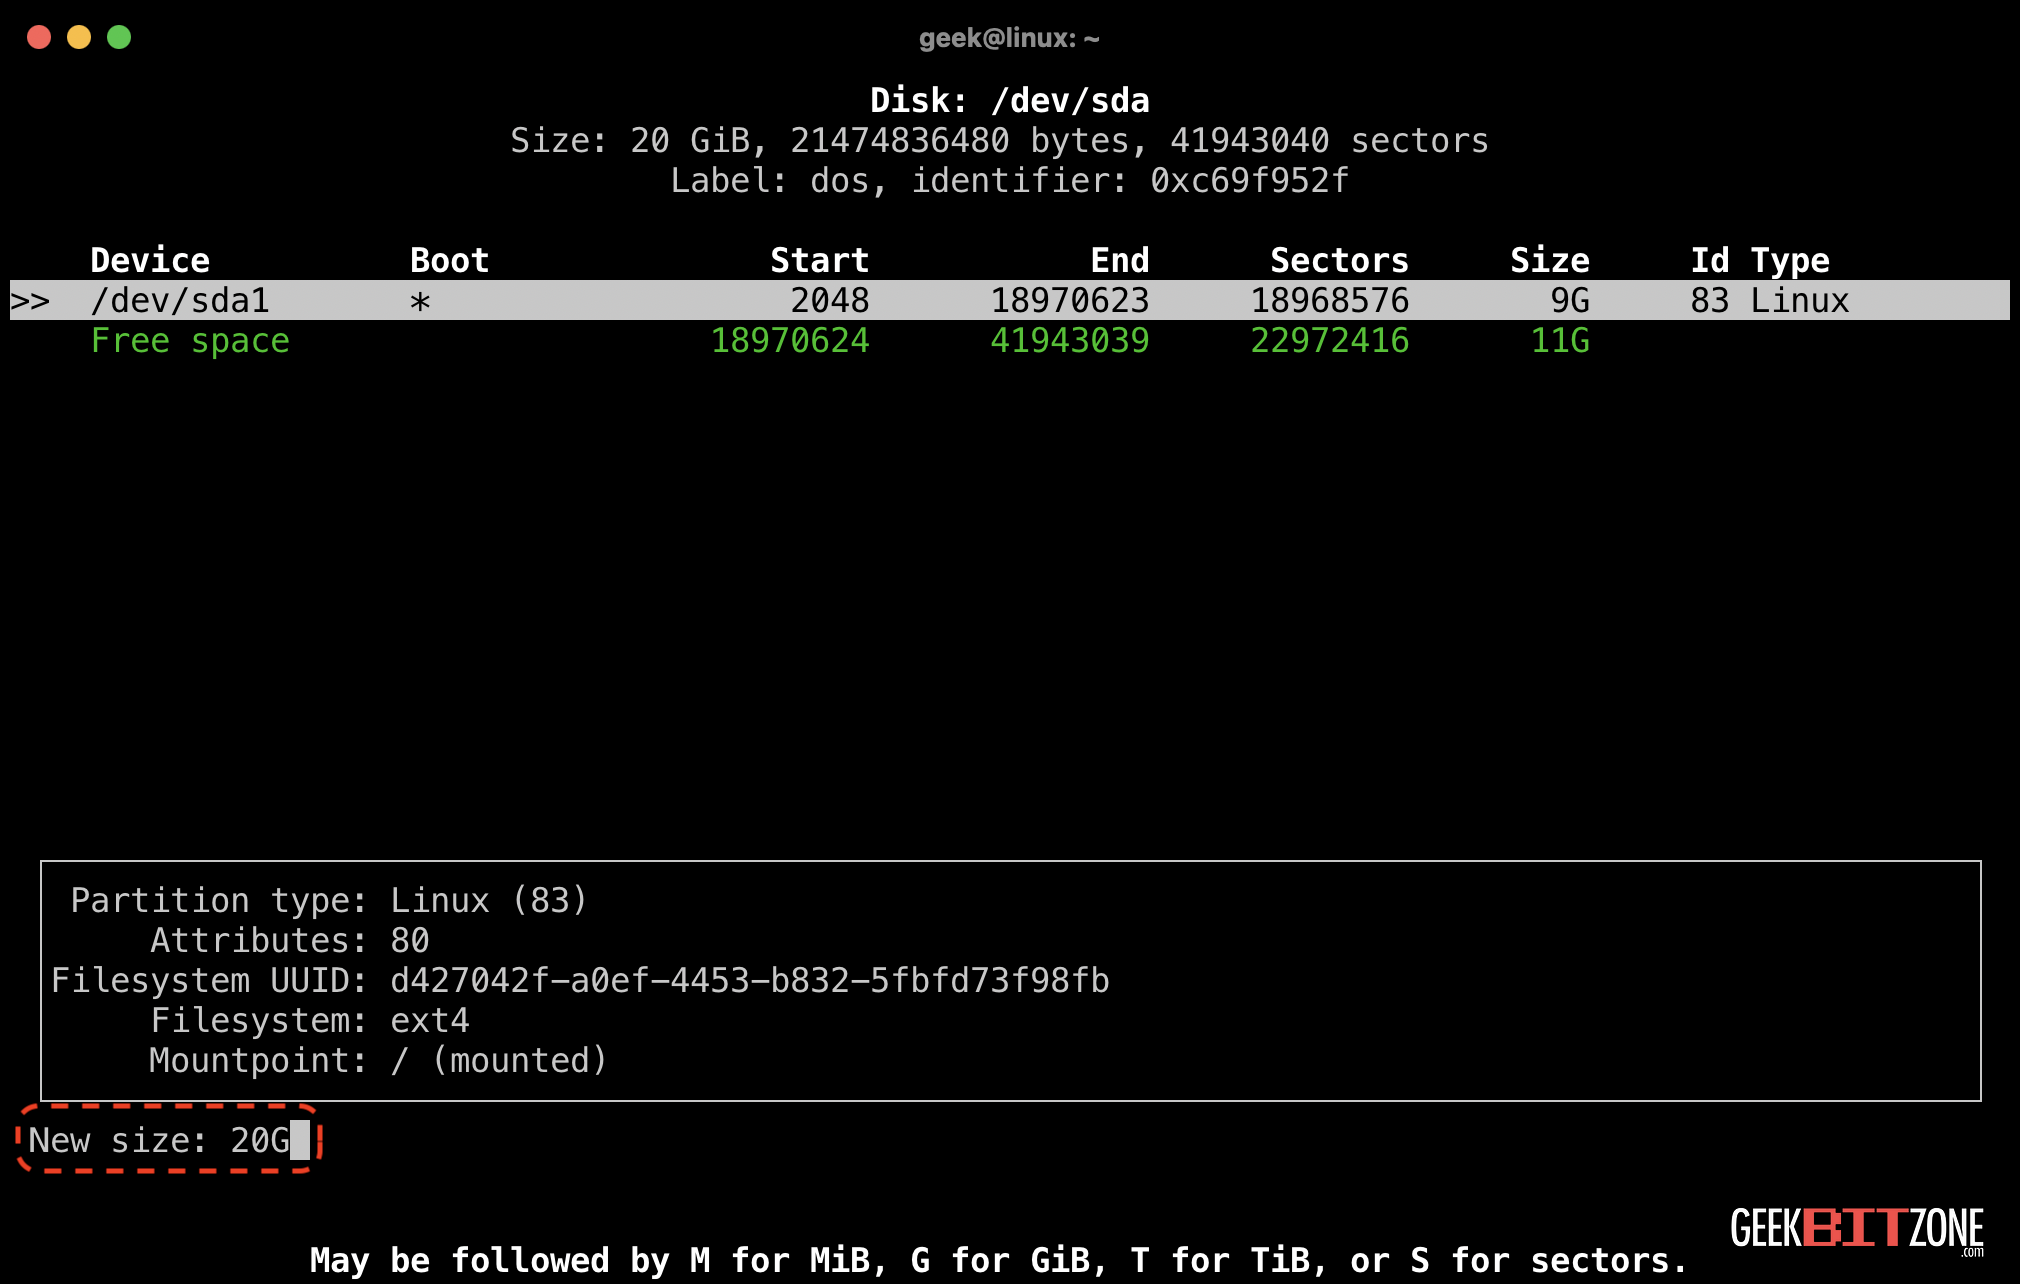
The recommended size for a swap partition in Linux is often suggested to be equal to or double the size of your system’s RAM. However, this recommendation can vary depending on factors like the amount of RAM available and the specific use case.
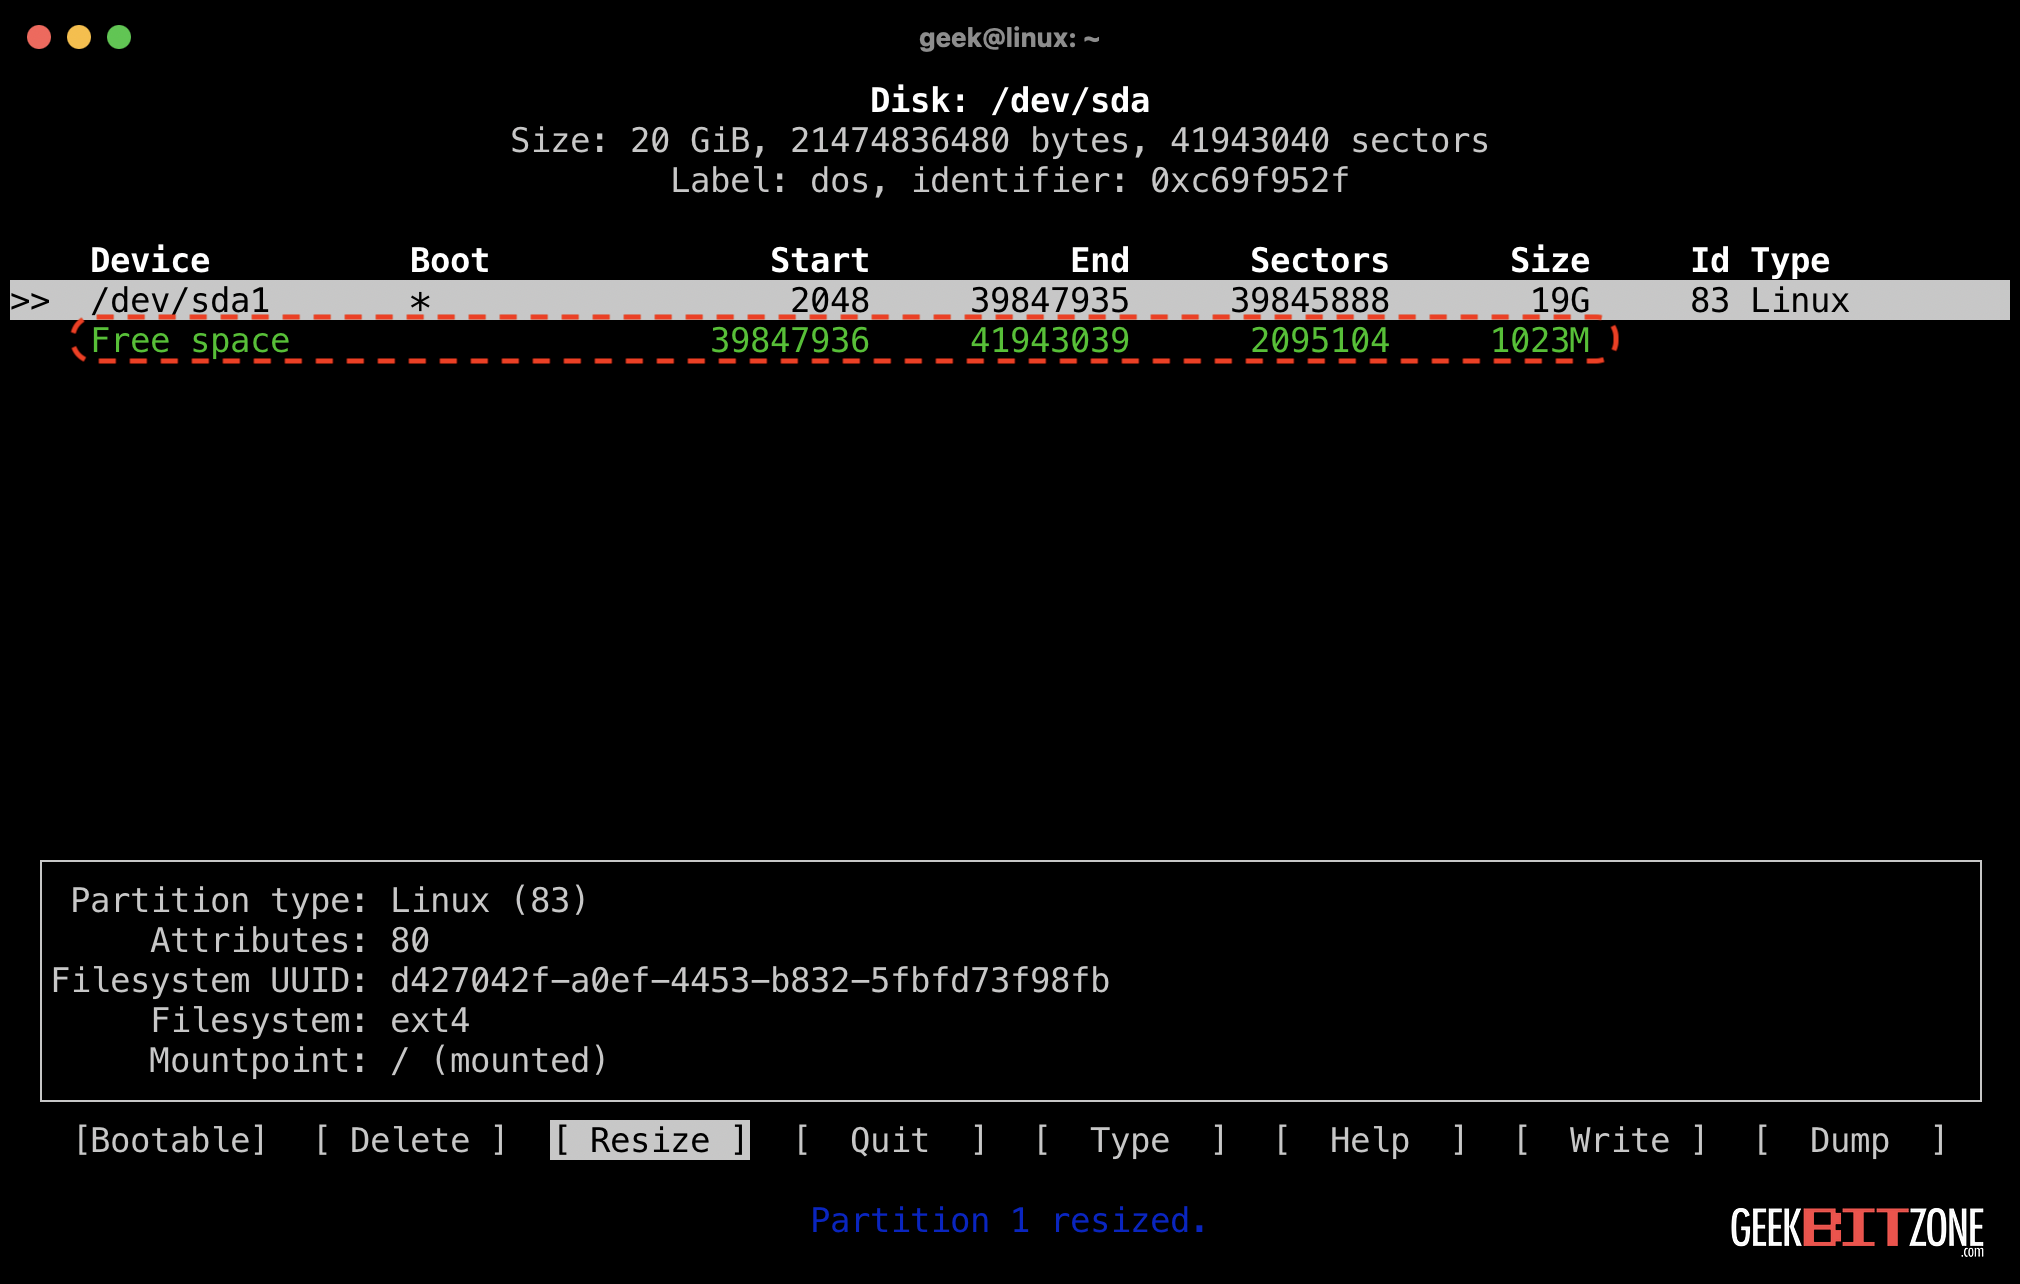
Let’s change the suggested value from 20G to 19G and press Enter.

This leaves around 1GB free for the extended partition and its swap.
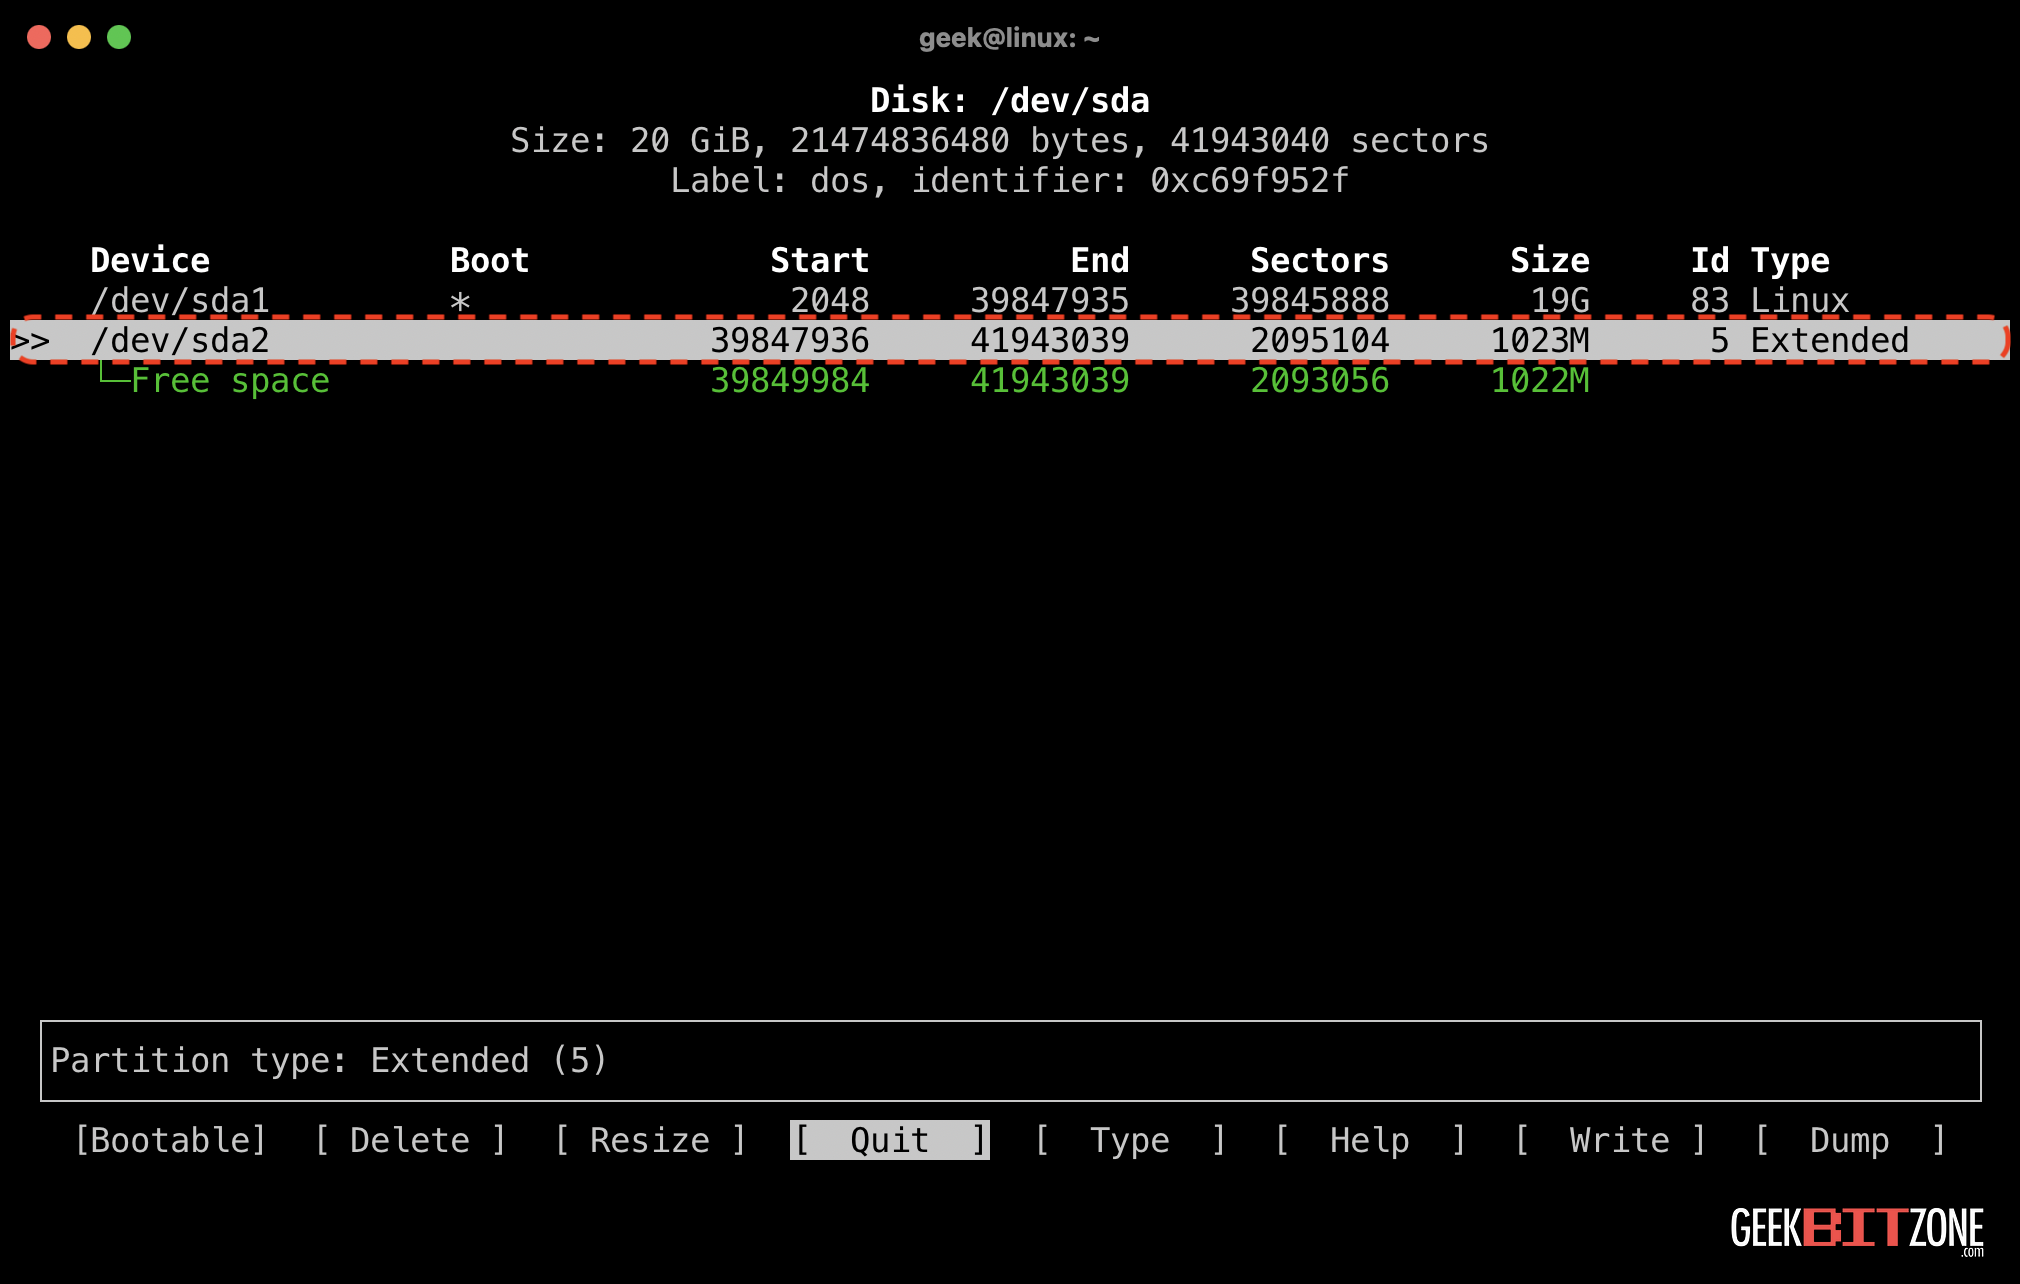
Recreating the extended partition
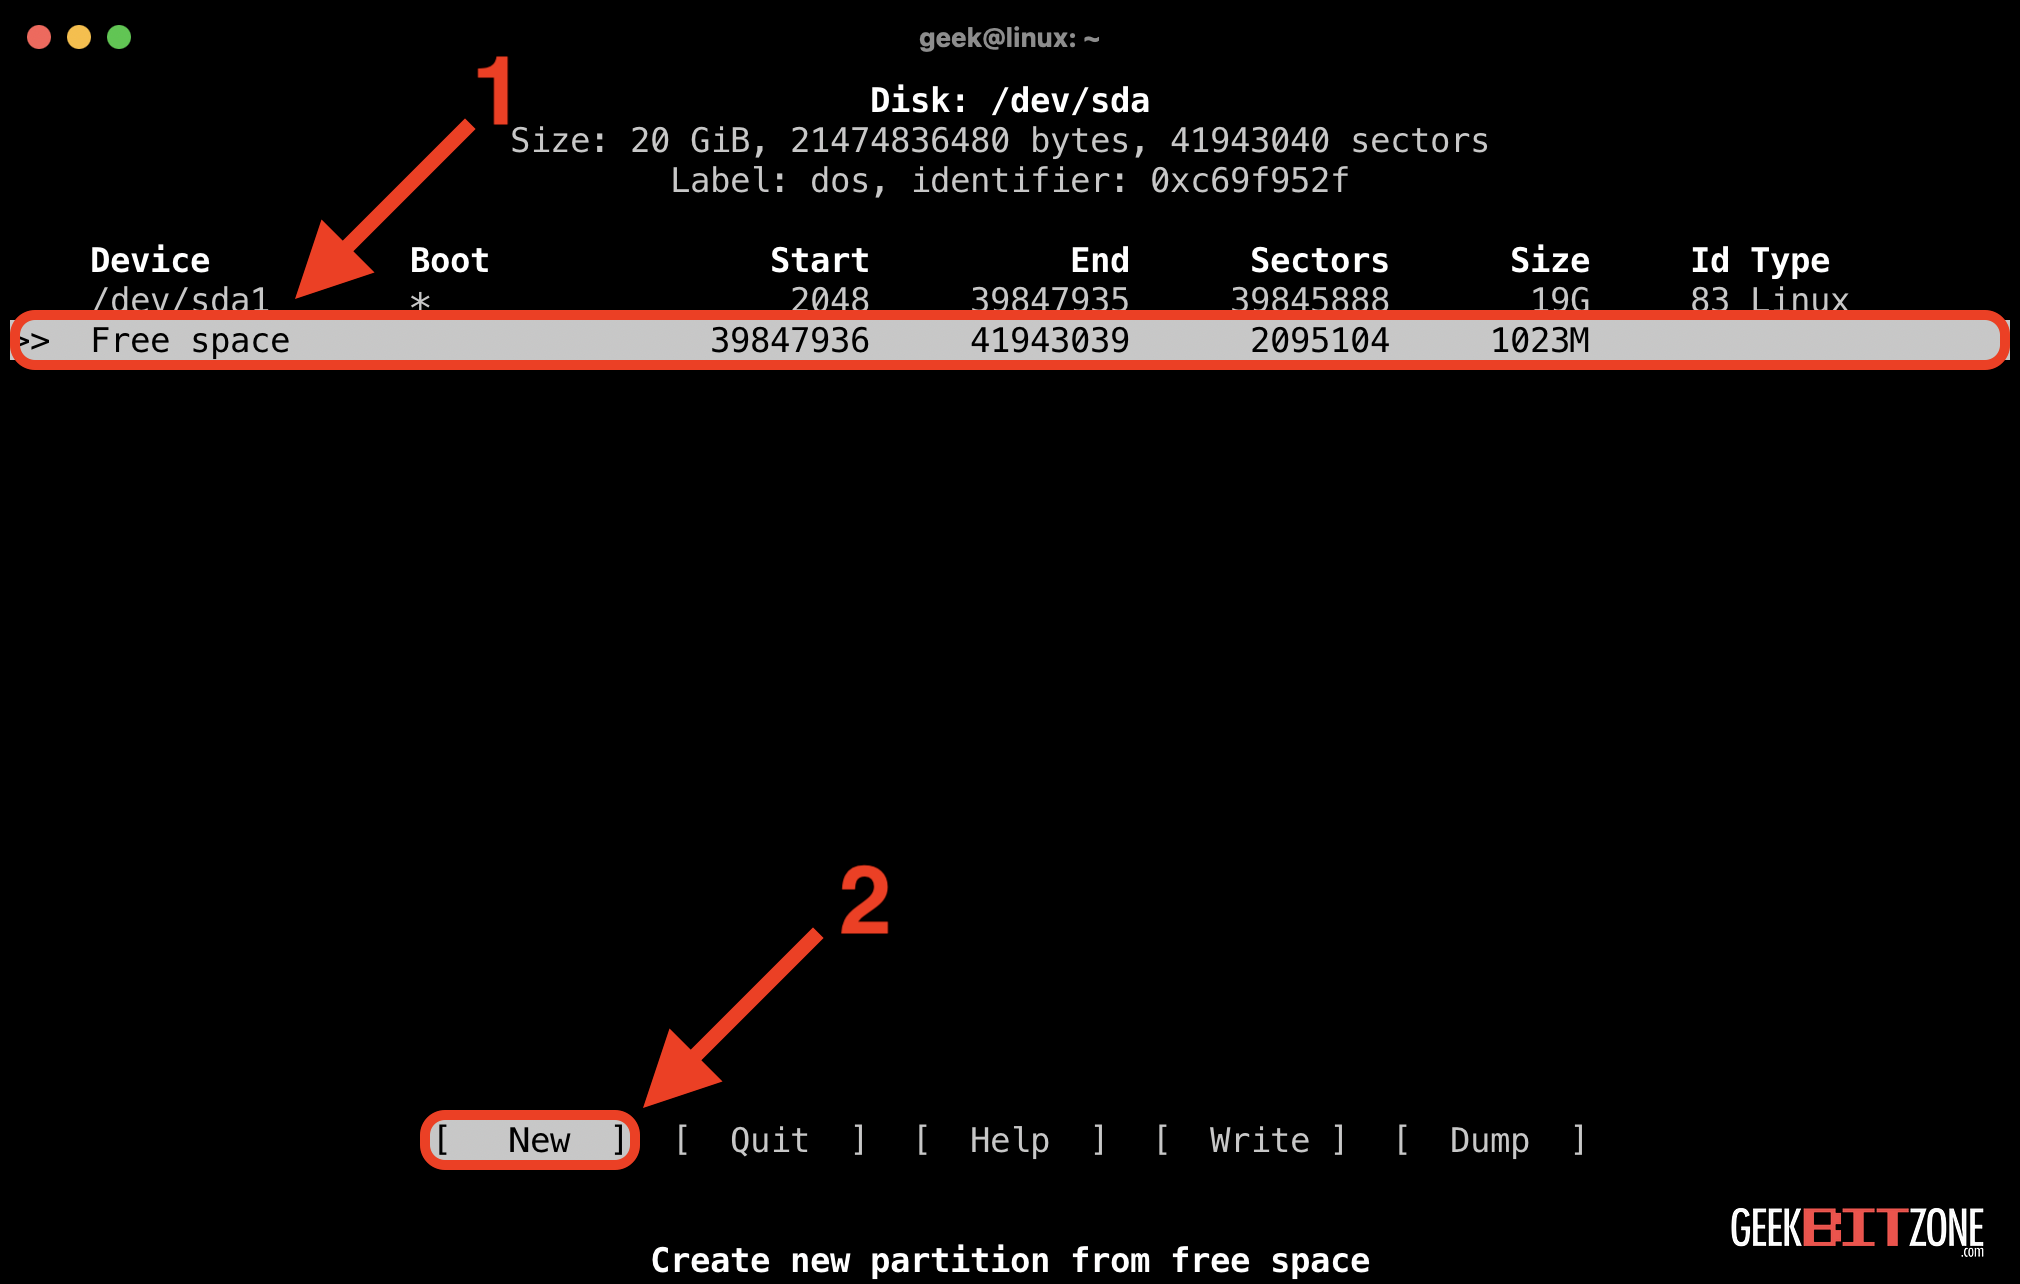
Press the down arrow key to highlight the Free space [1] row, move left to the New [2] menu option, and press Enter.
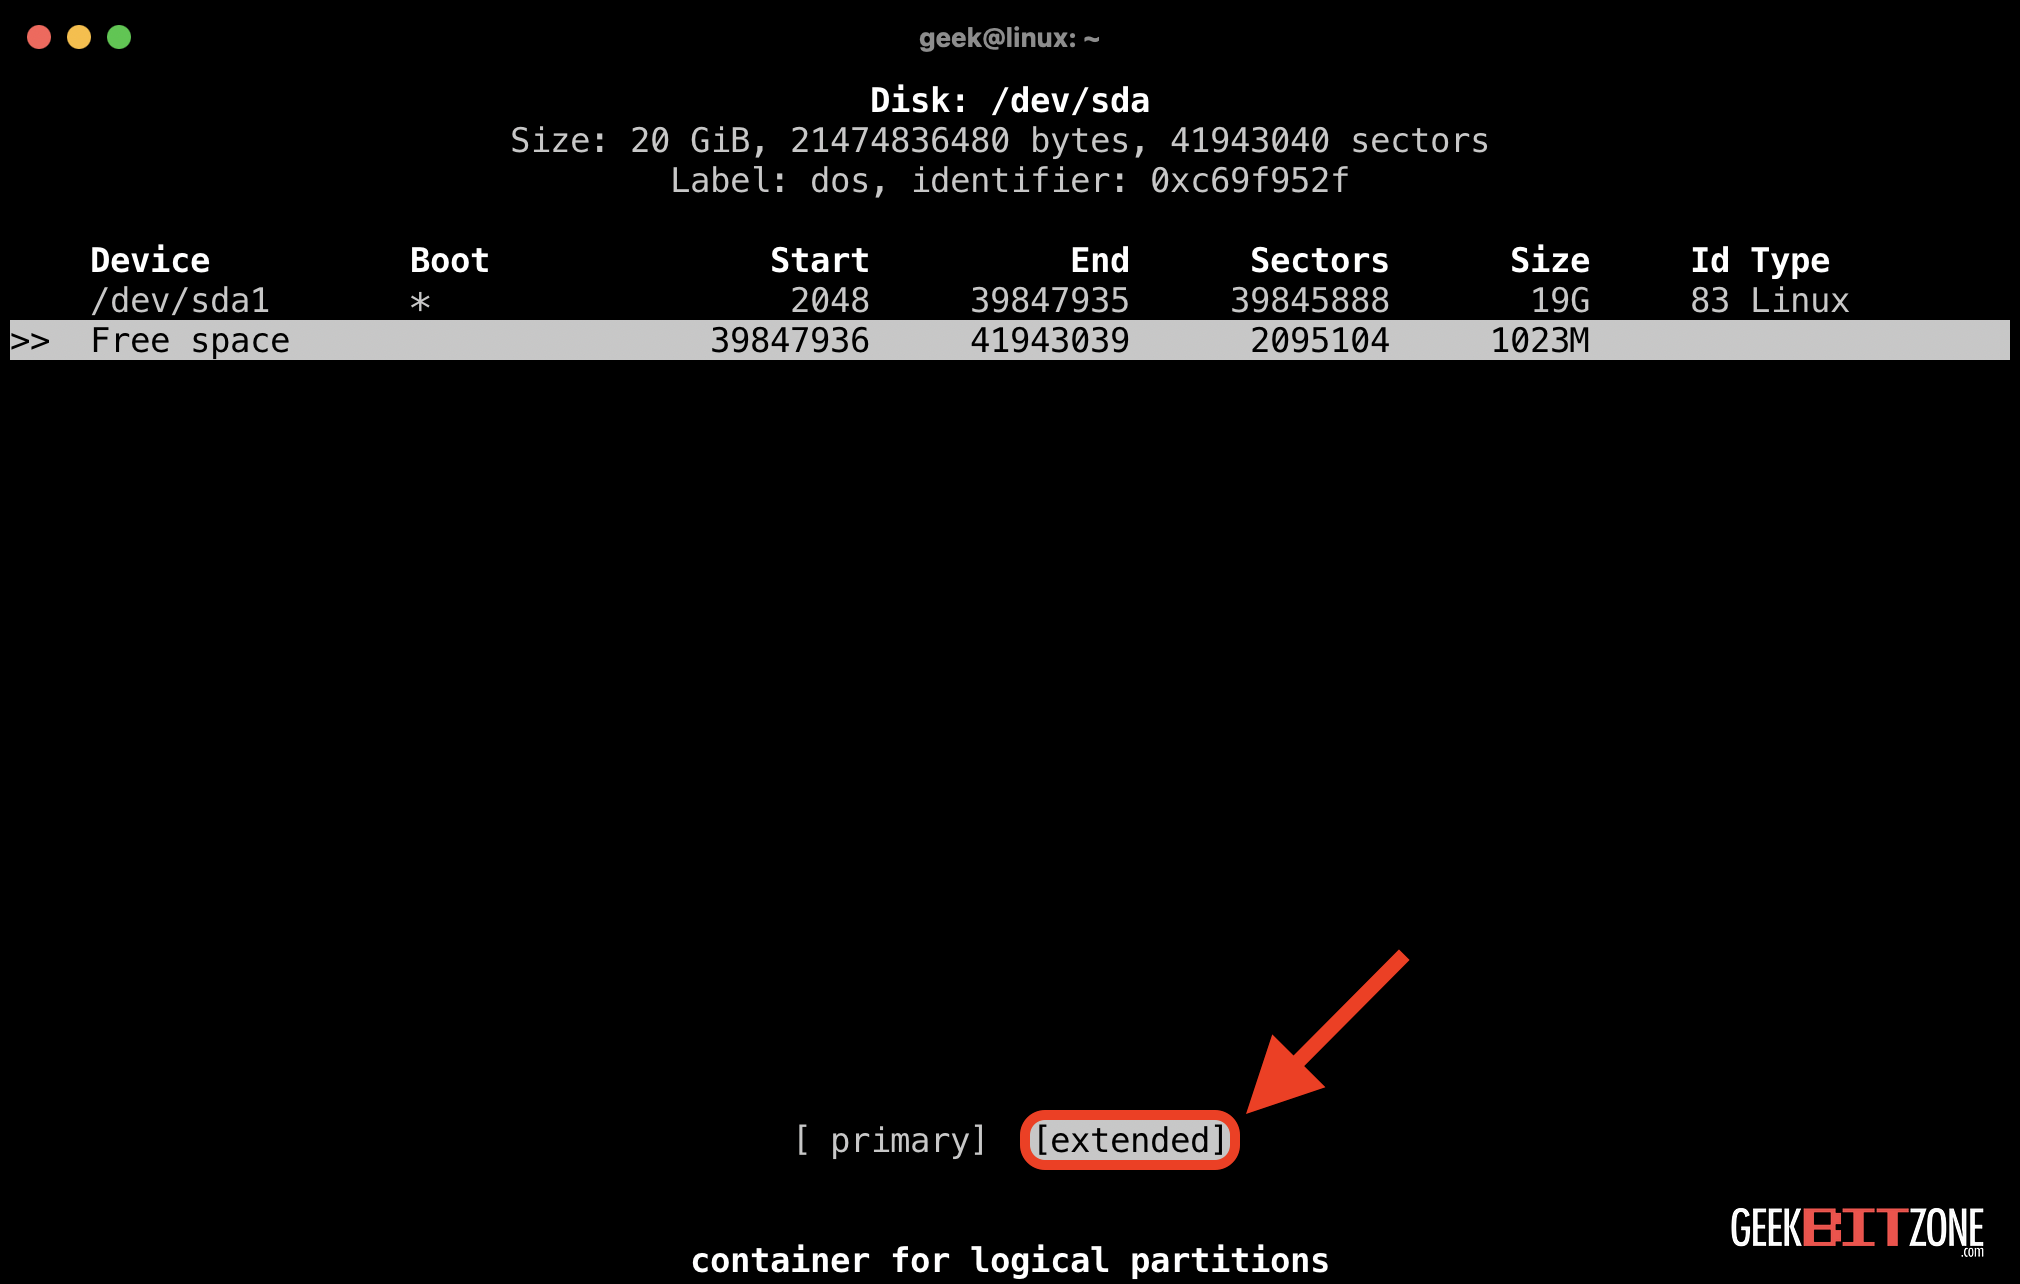
Accept the suggested Partition size by pressing Enter.

Choose Extended as we are re-creating our existing partition layout.
Press Enter.
Confirm that the extended partition /dev/sda2 has been created.
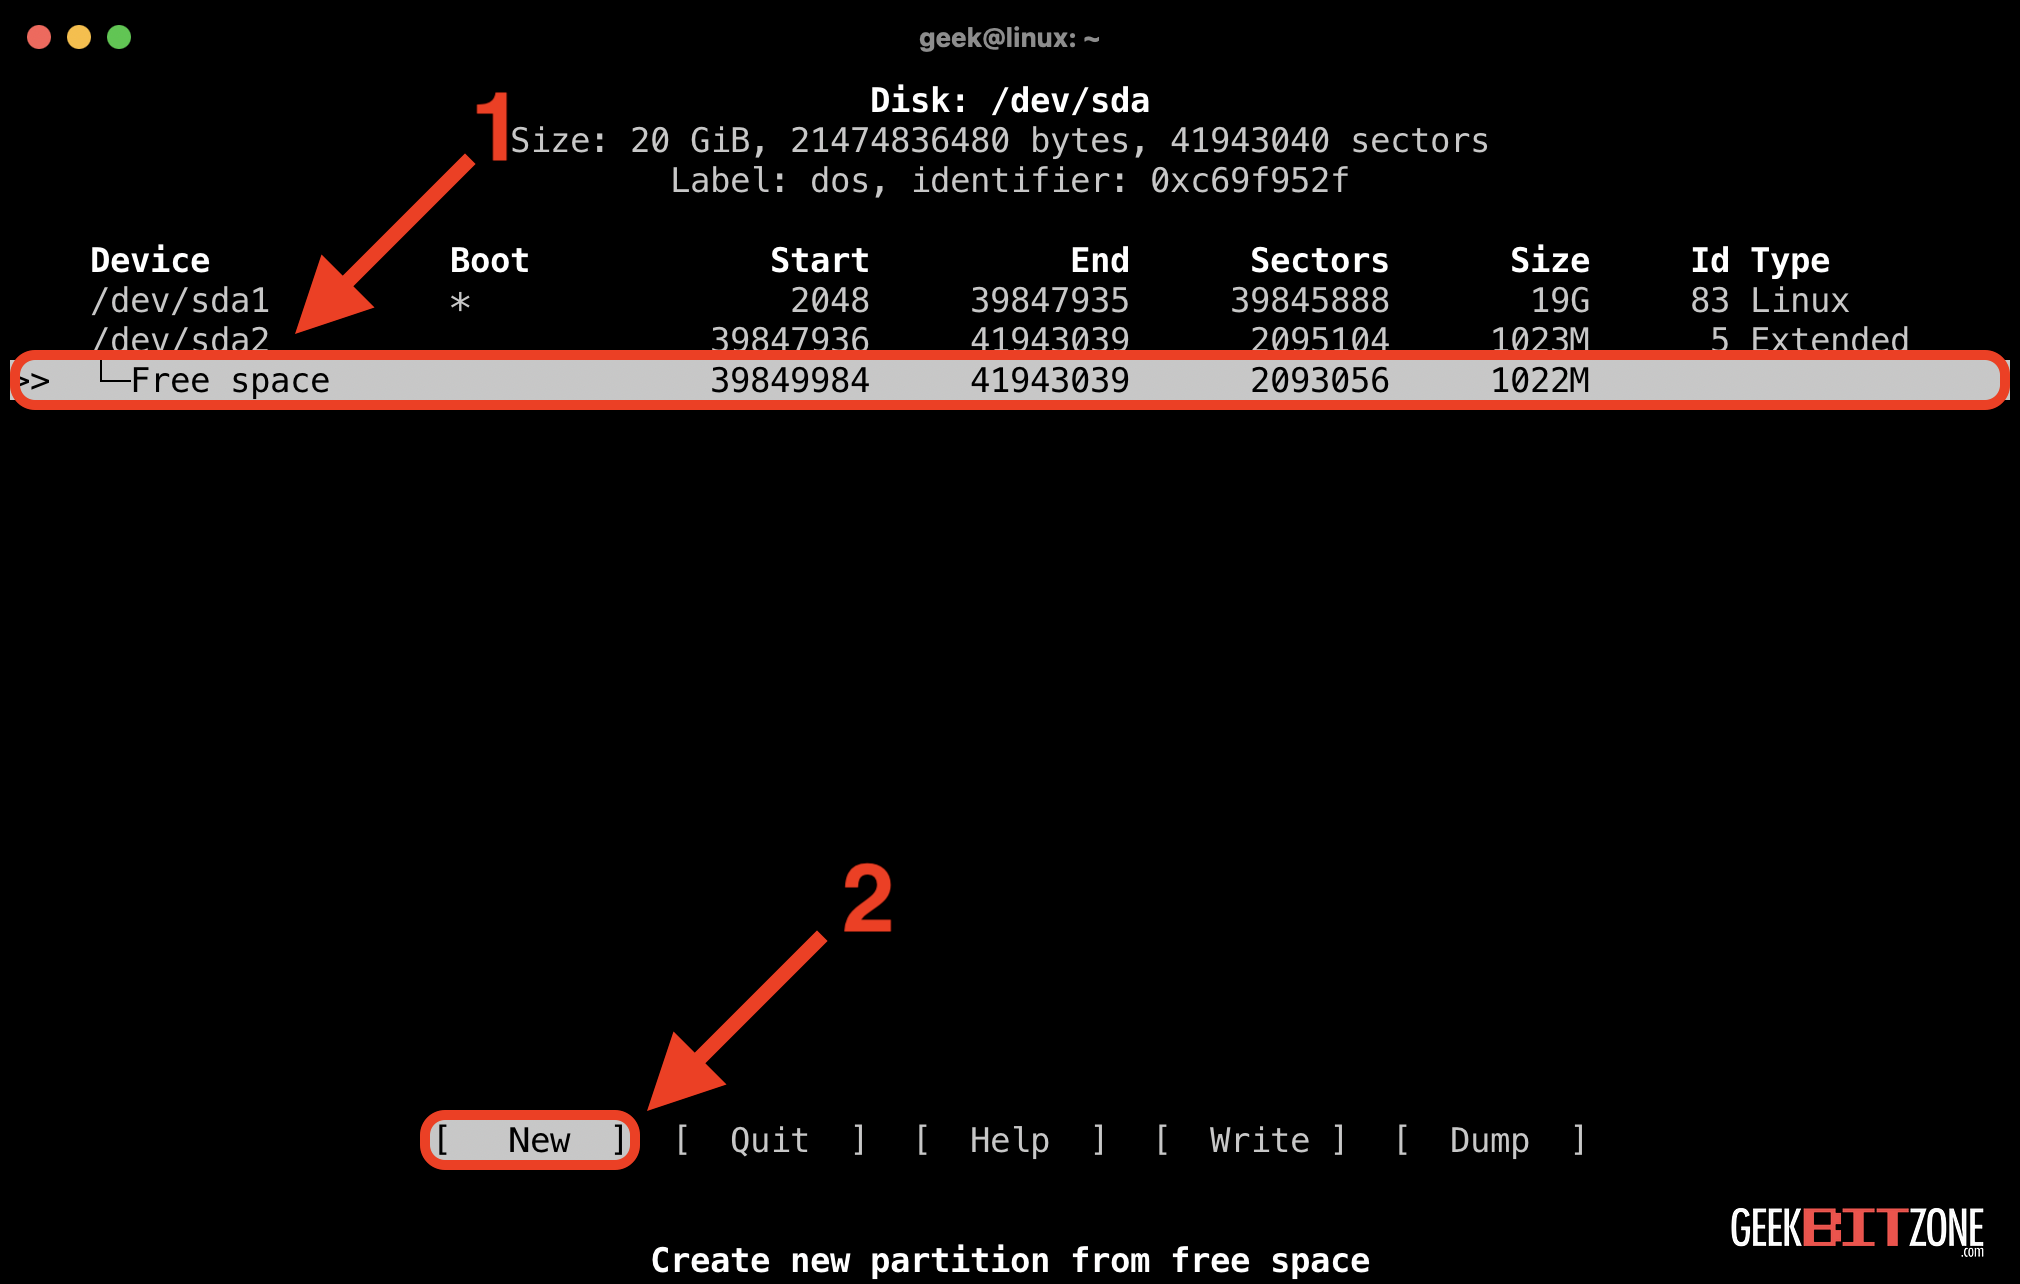
Recreating the swap partition
Now create the swap partition inside the newly created extended partition.
Press the down arrow key to highlight the Free space [1] row, move left to the New menu option, and press Enter.
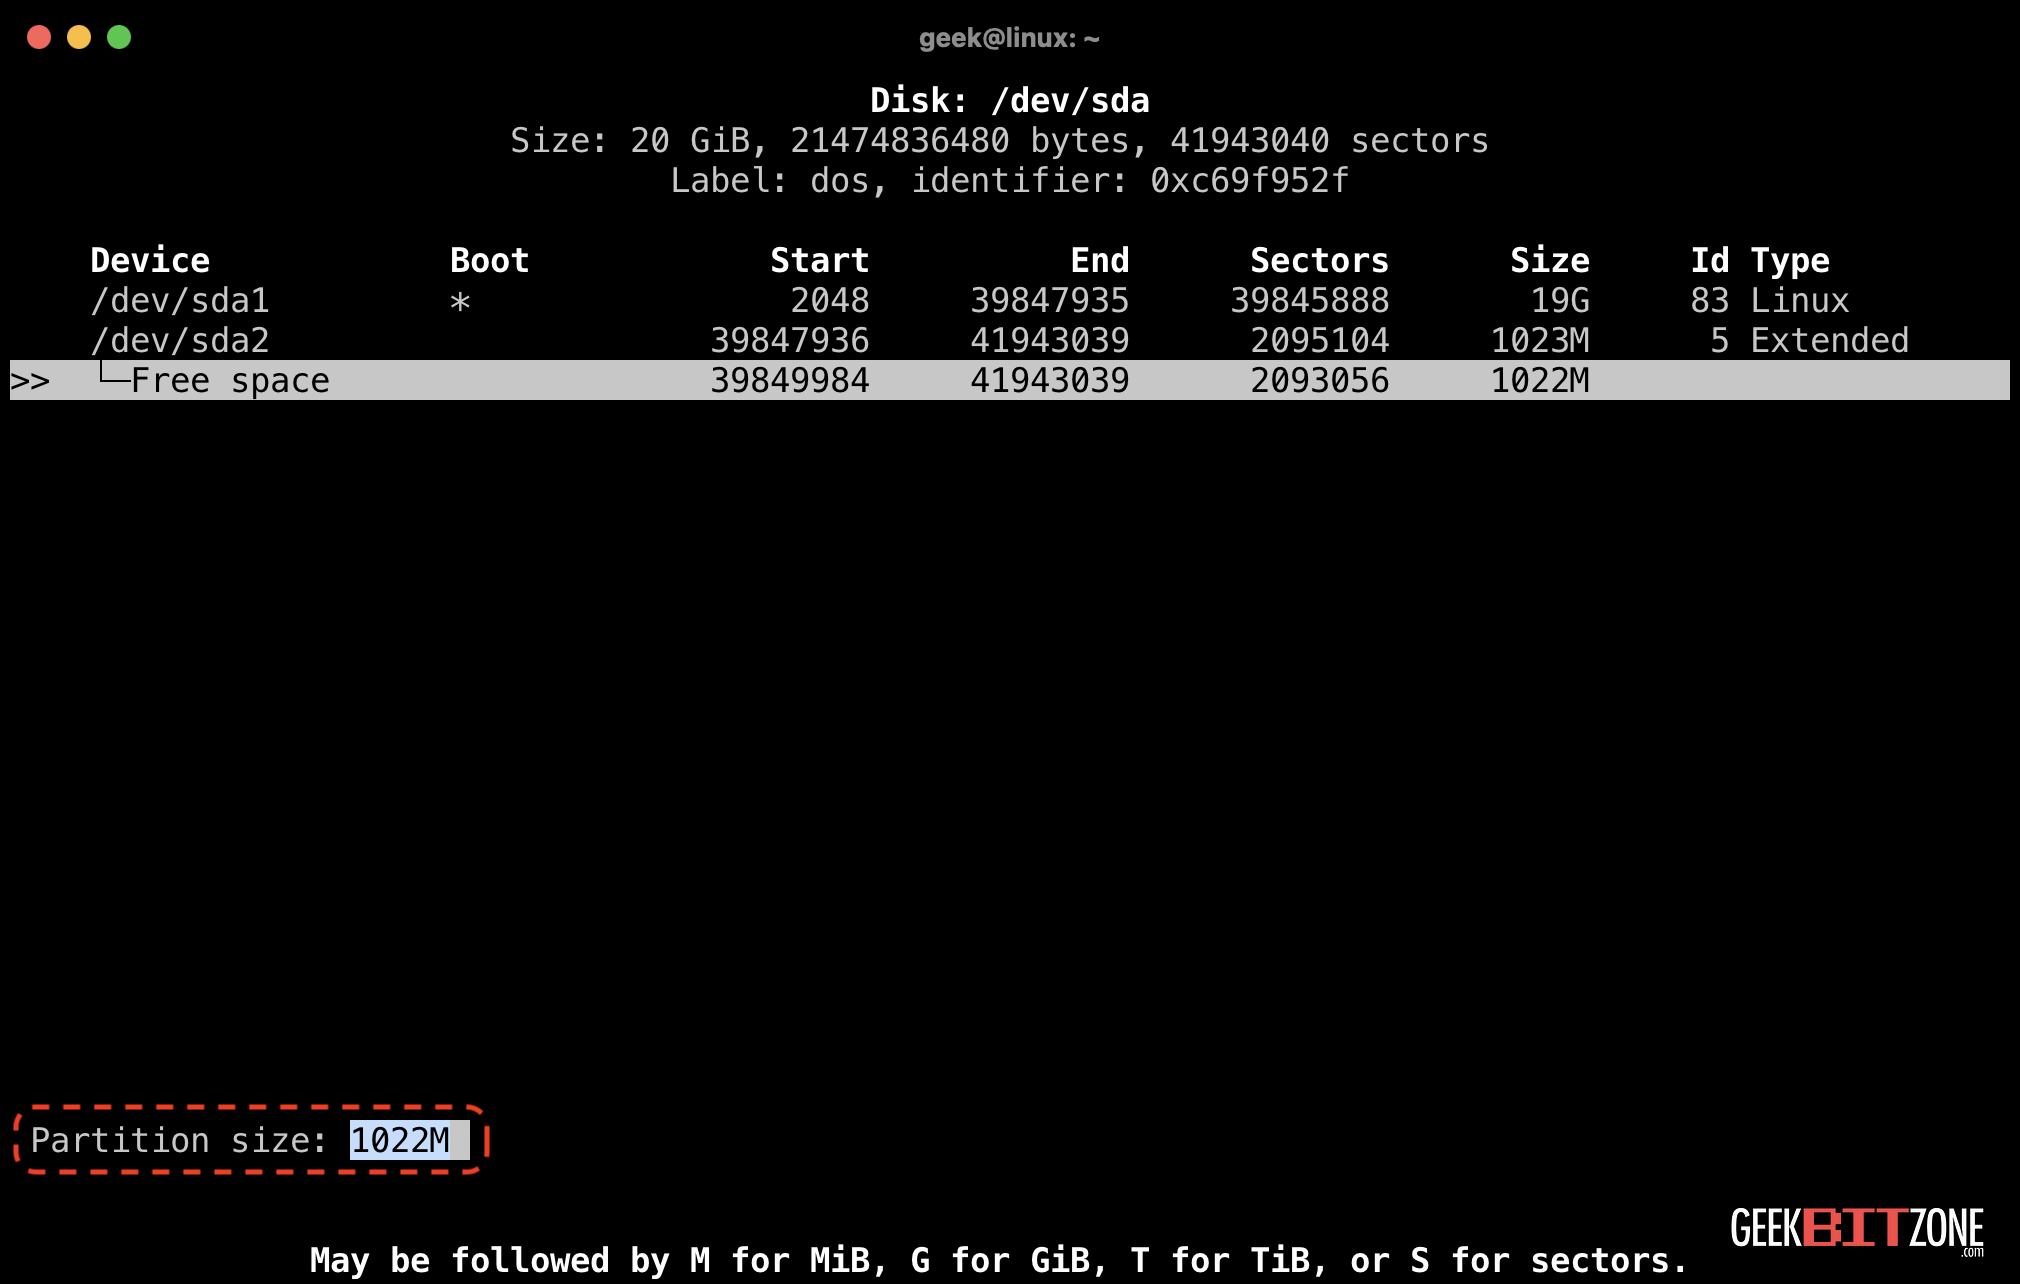
Confirm the suggested Partition size by pressing Enter.
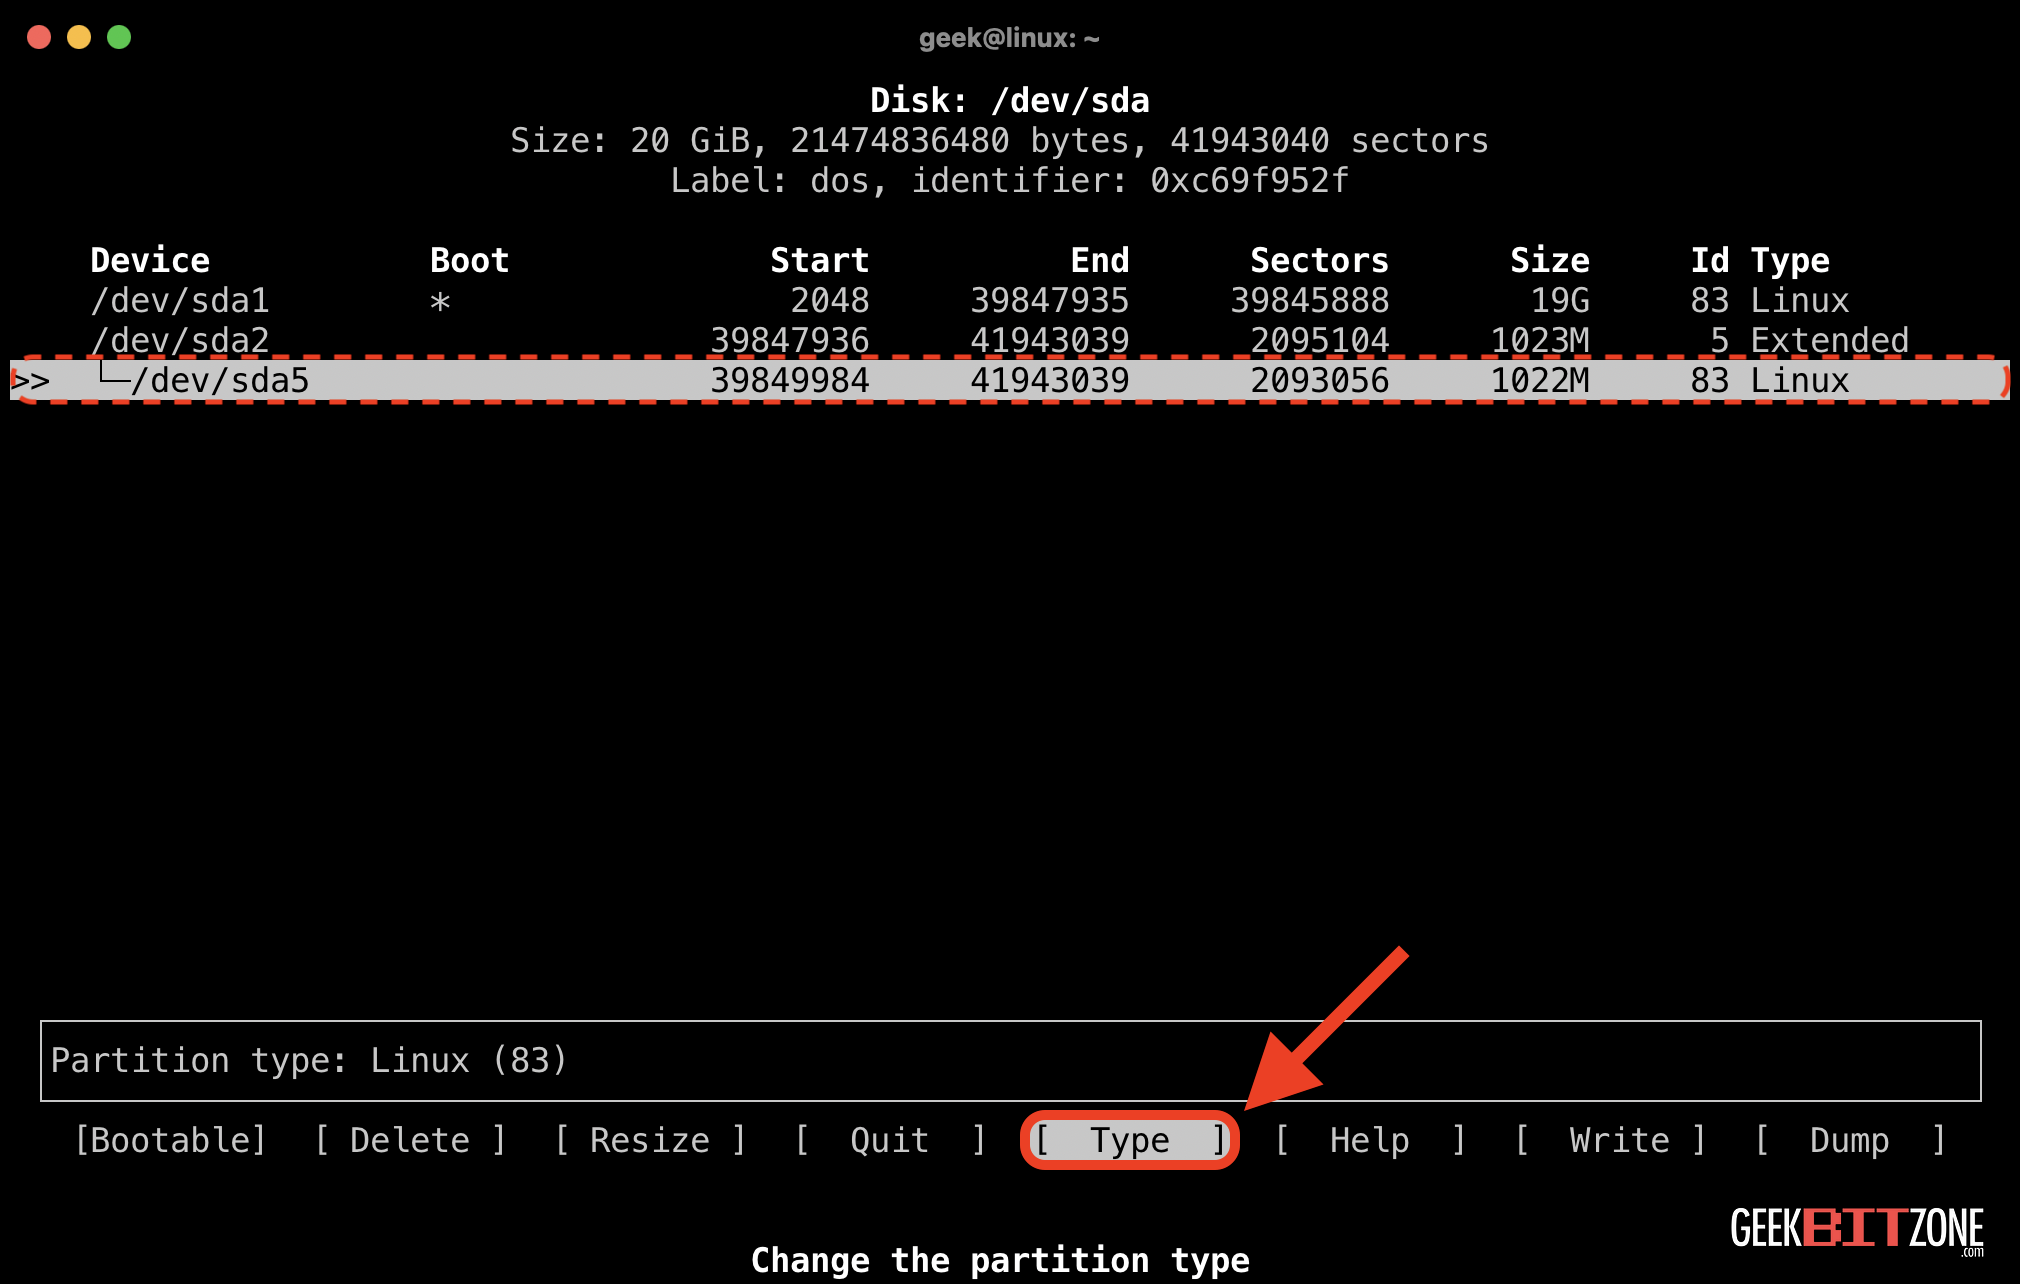
Confirm that the newly created partition at /dev/sda5 has been created. However, on the right-hand side, note that the partition type is currently set to Linux, which is not the desired configuration.
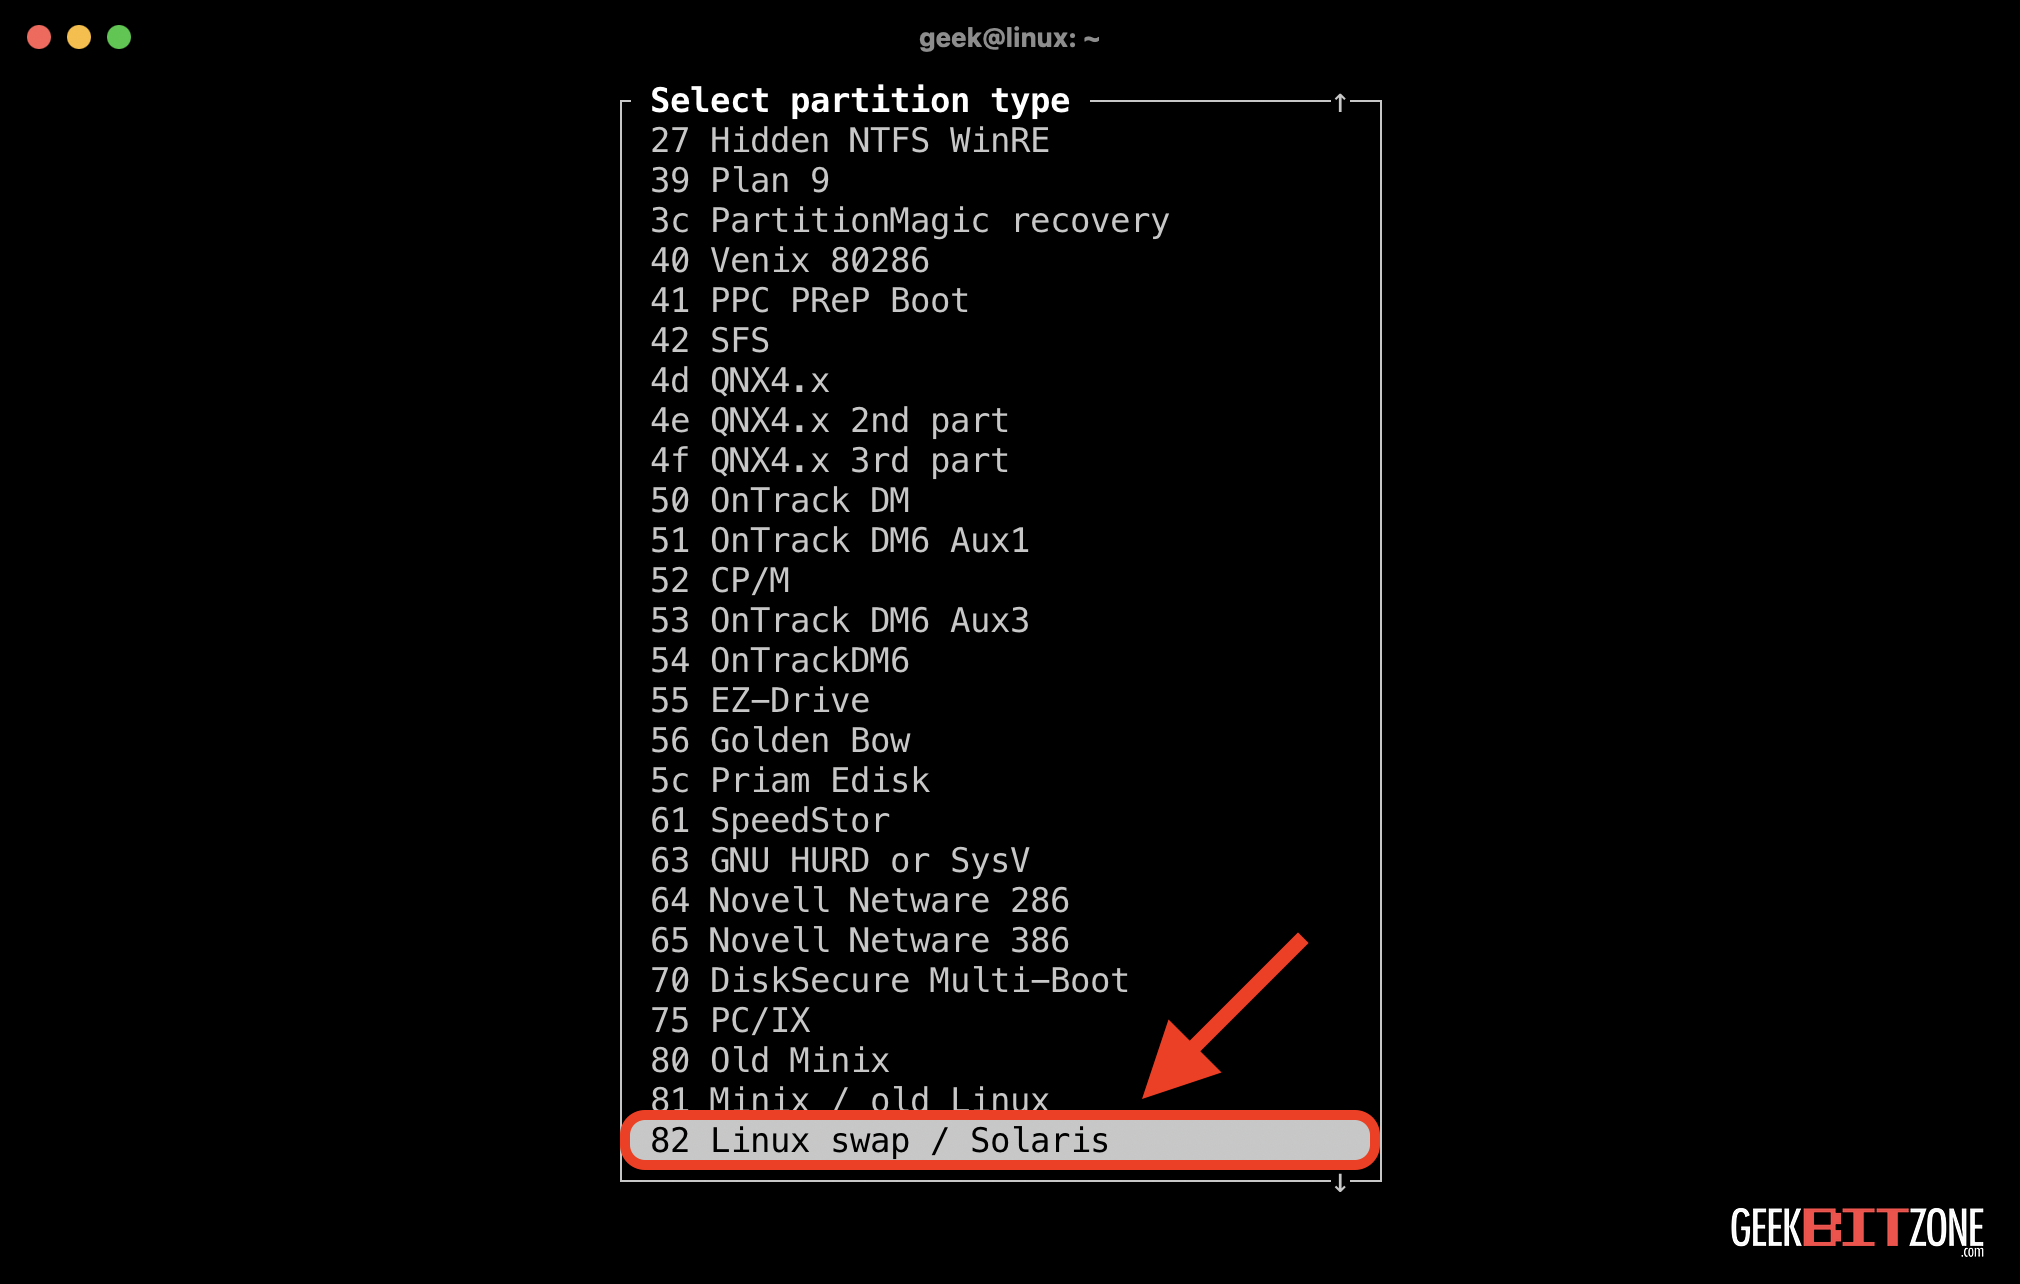
Change it by selecting Type from menu.
Press Enter.
Select 82 Linux swap / Solaris and press Enter.
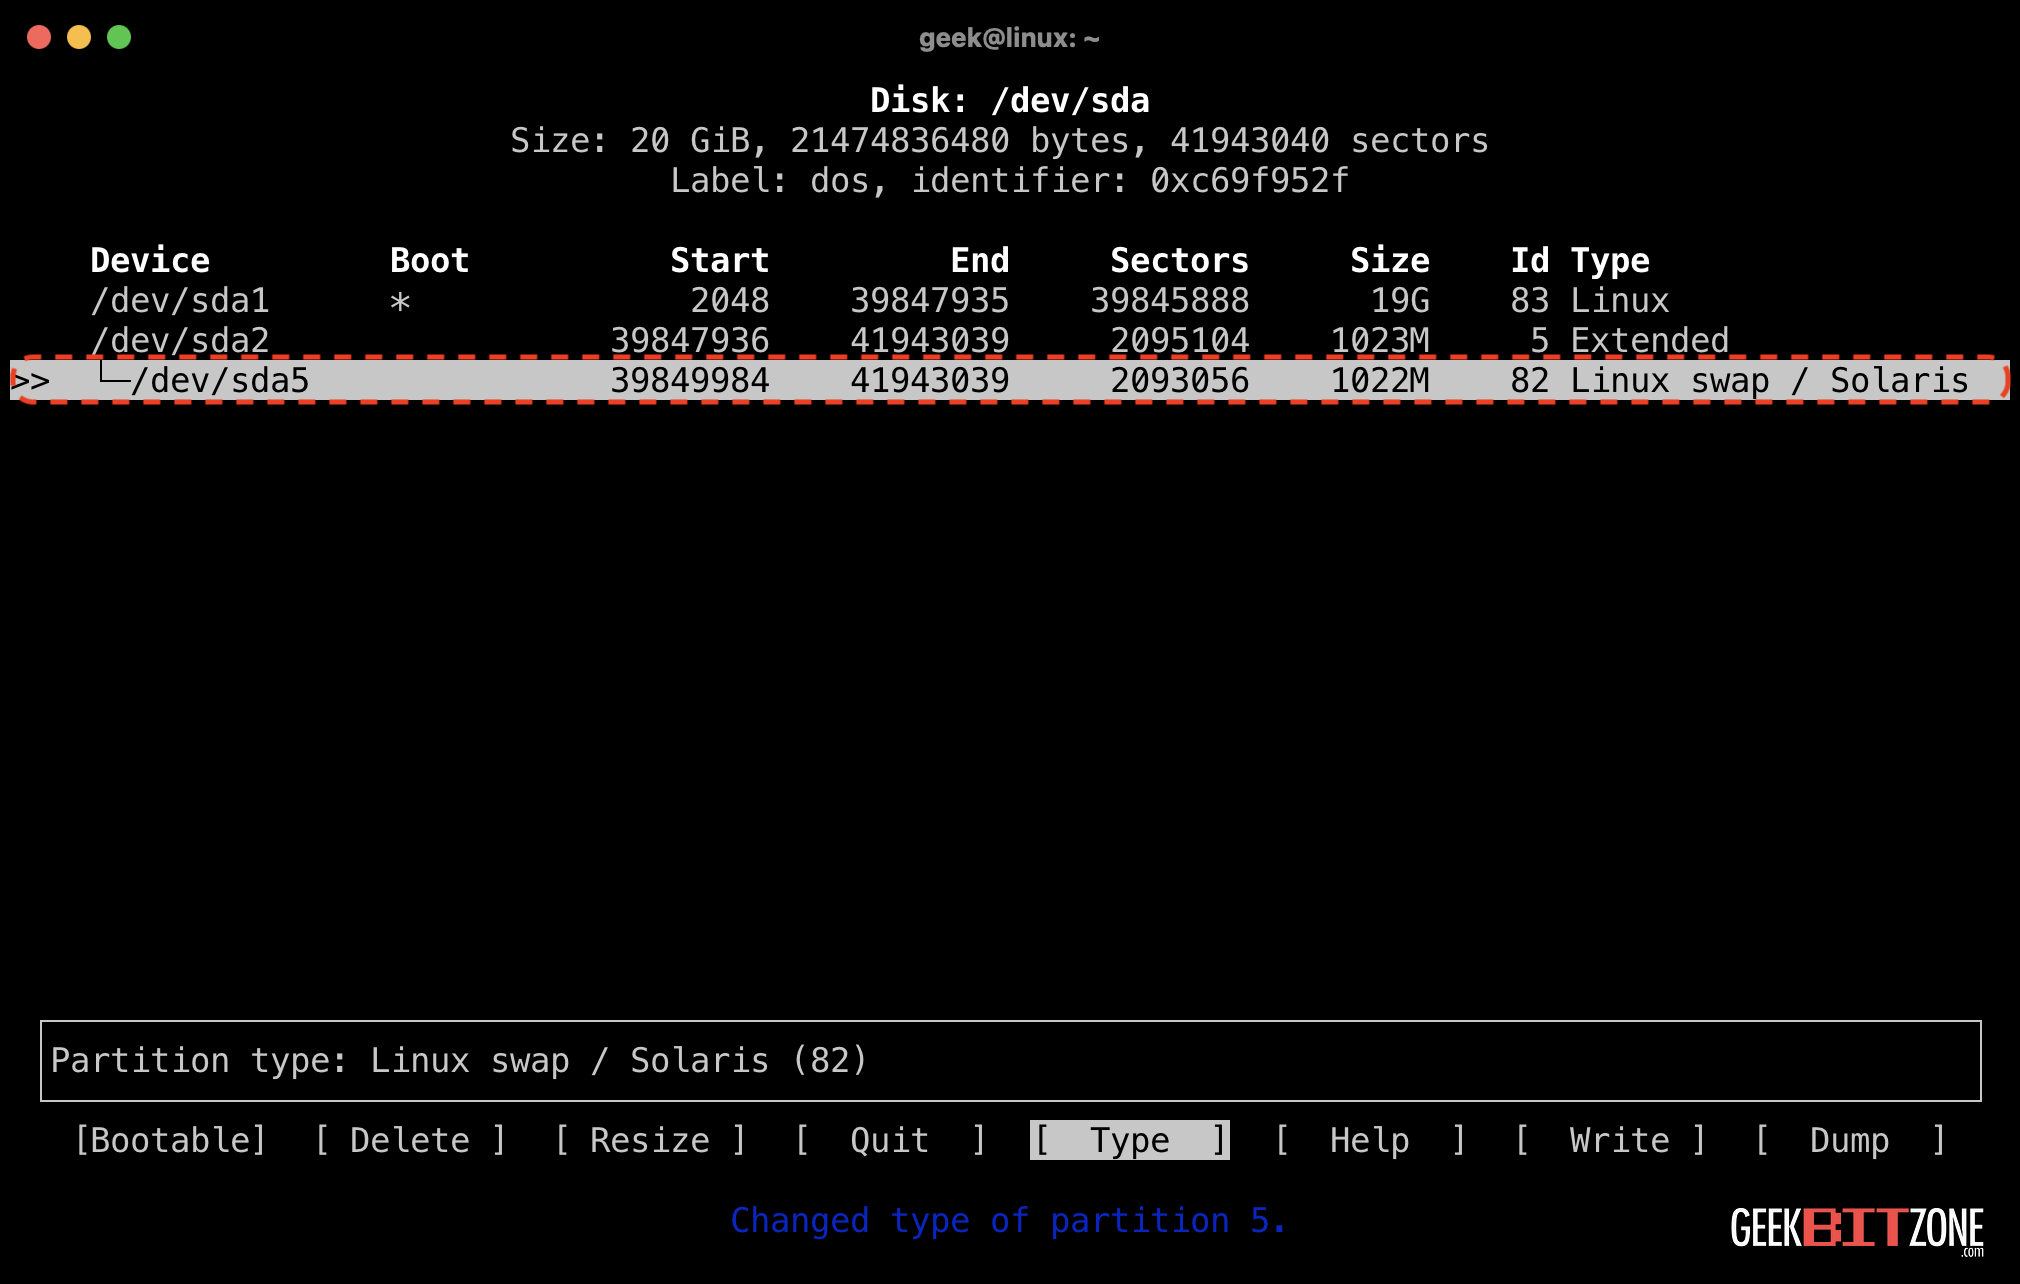
Confirm that the type now shows Linux swap / Solaris.
Writing changes to disk
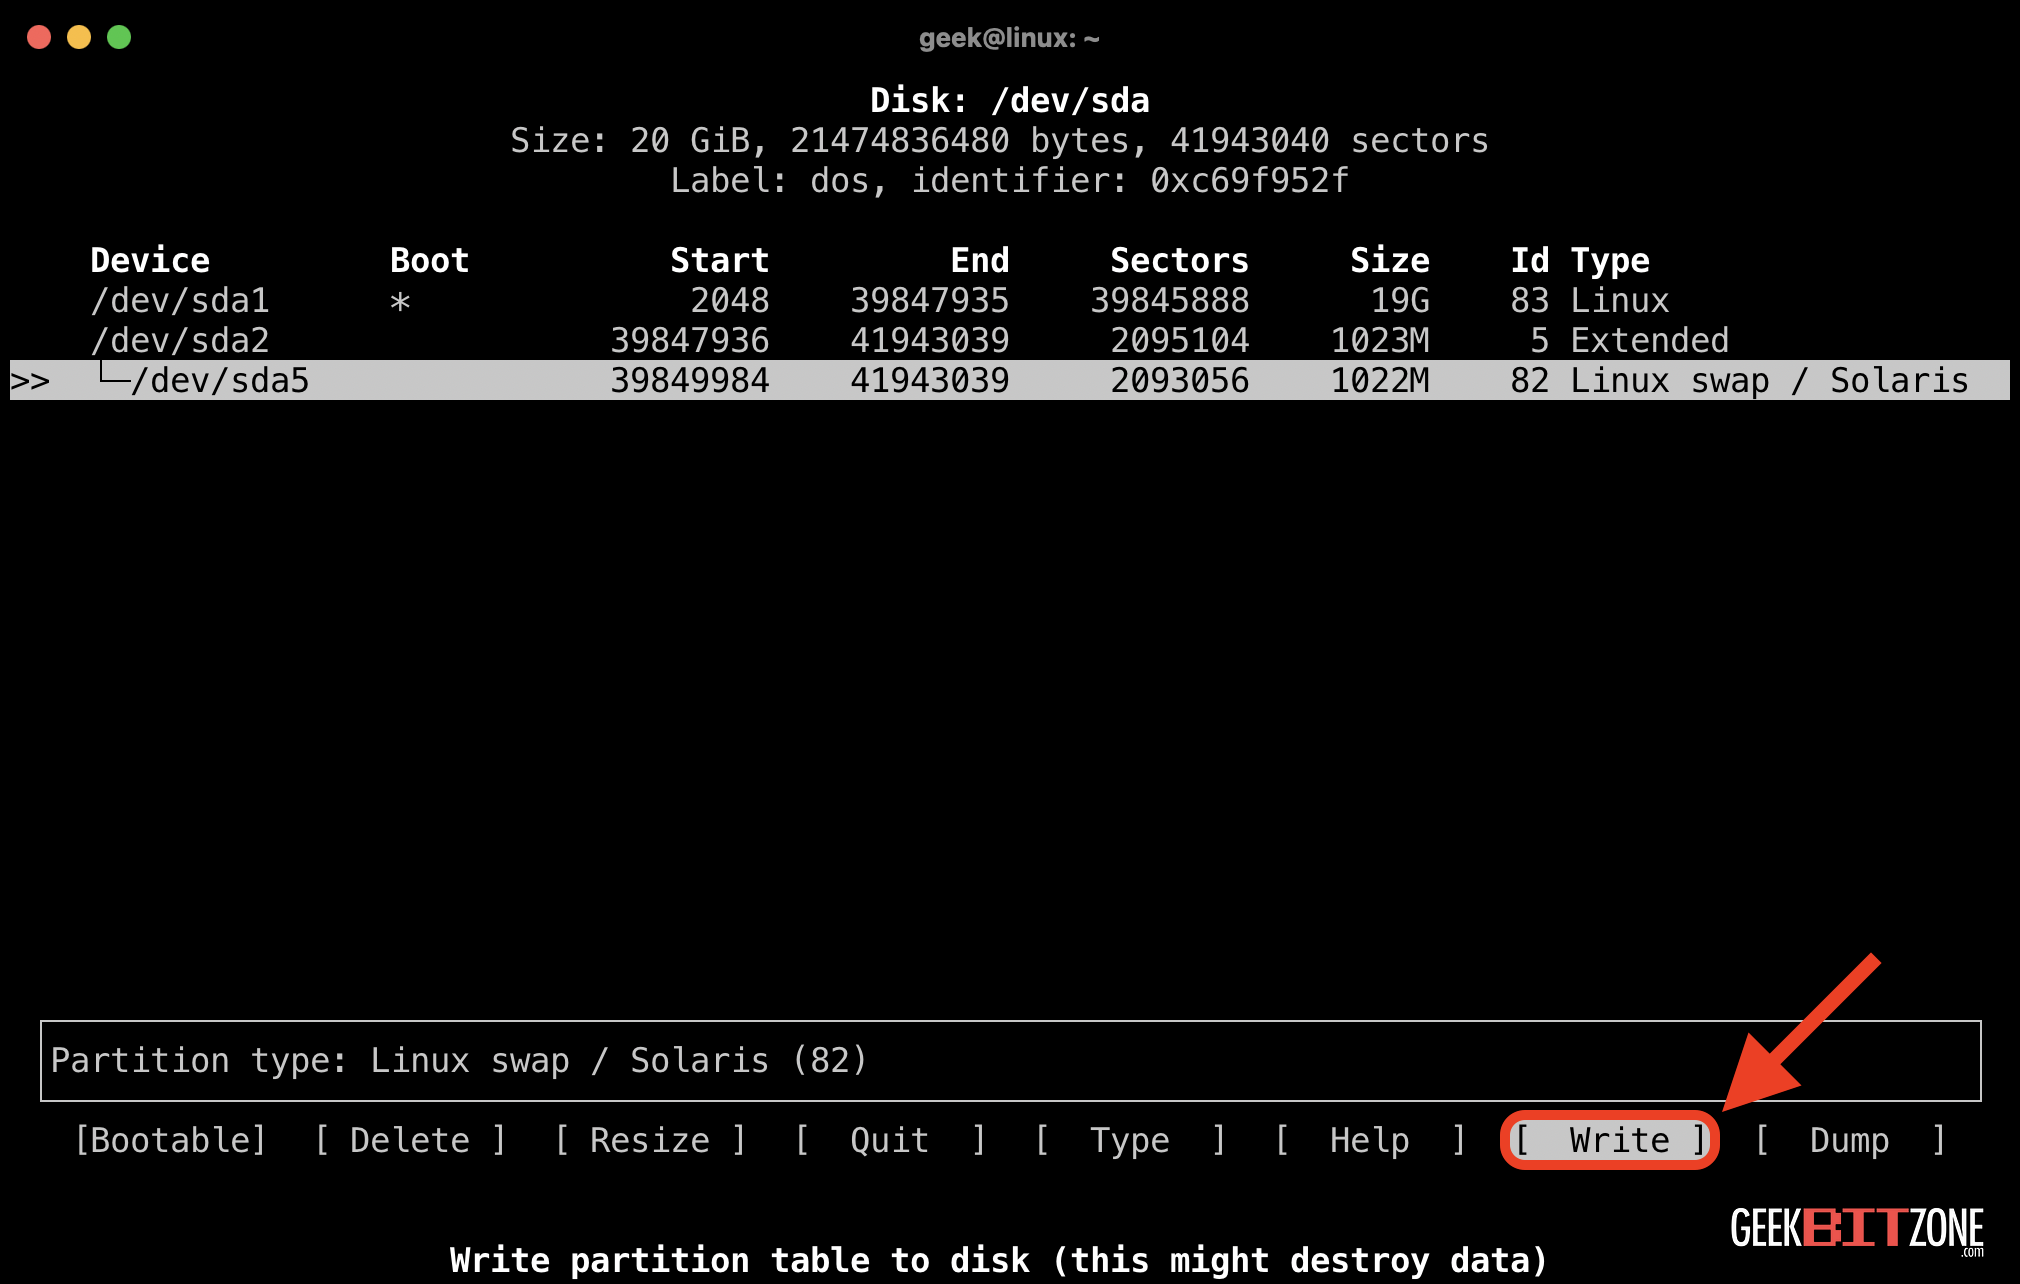
Now, let’s write the changes to disk.
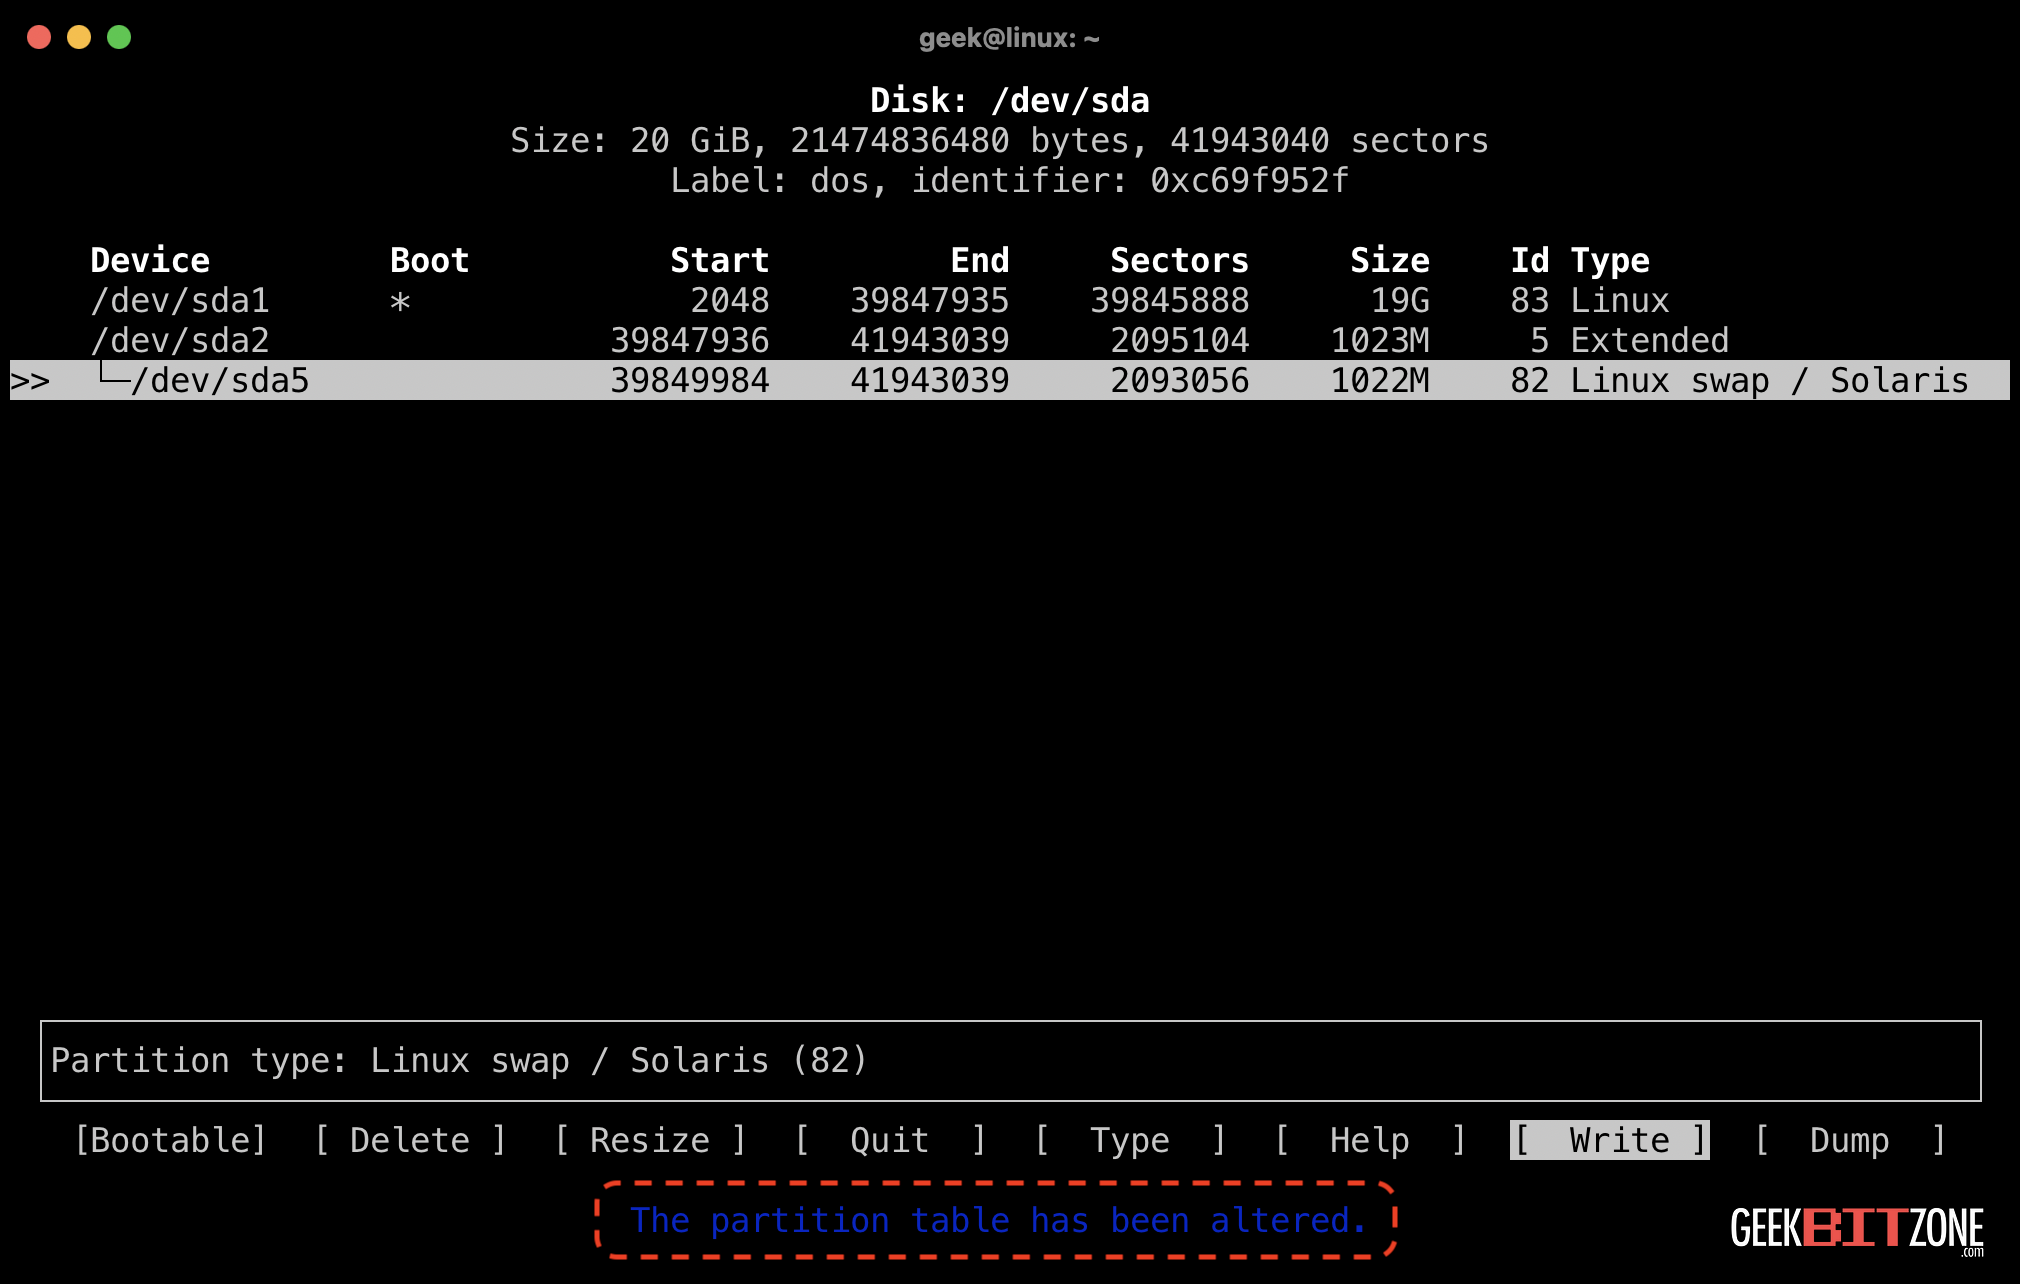
Take a final look at the suggested partition table. If everything looks good, select Write and press Enter.
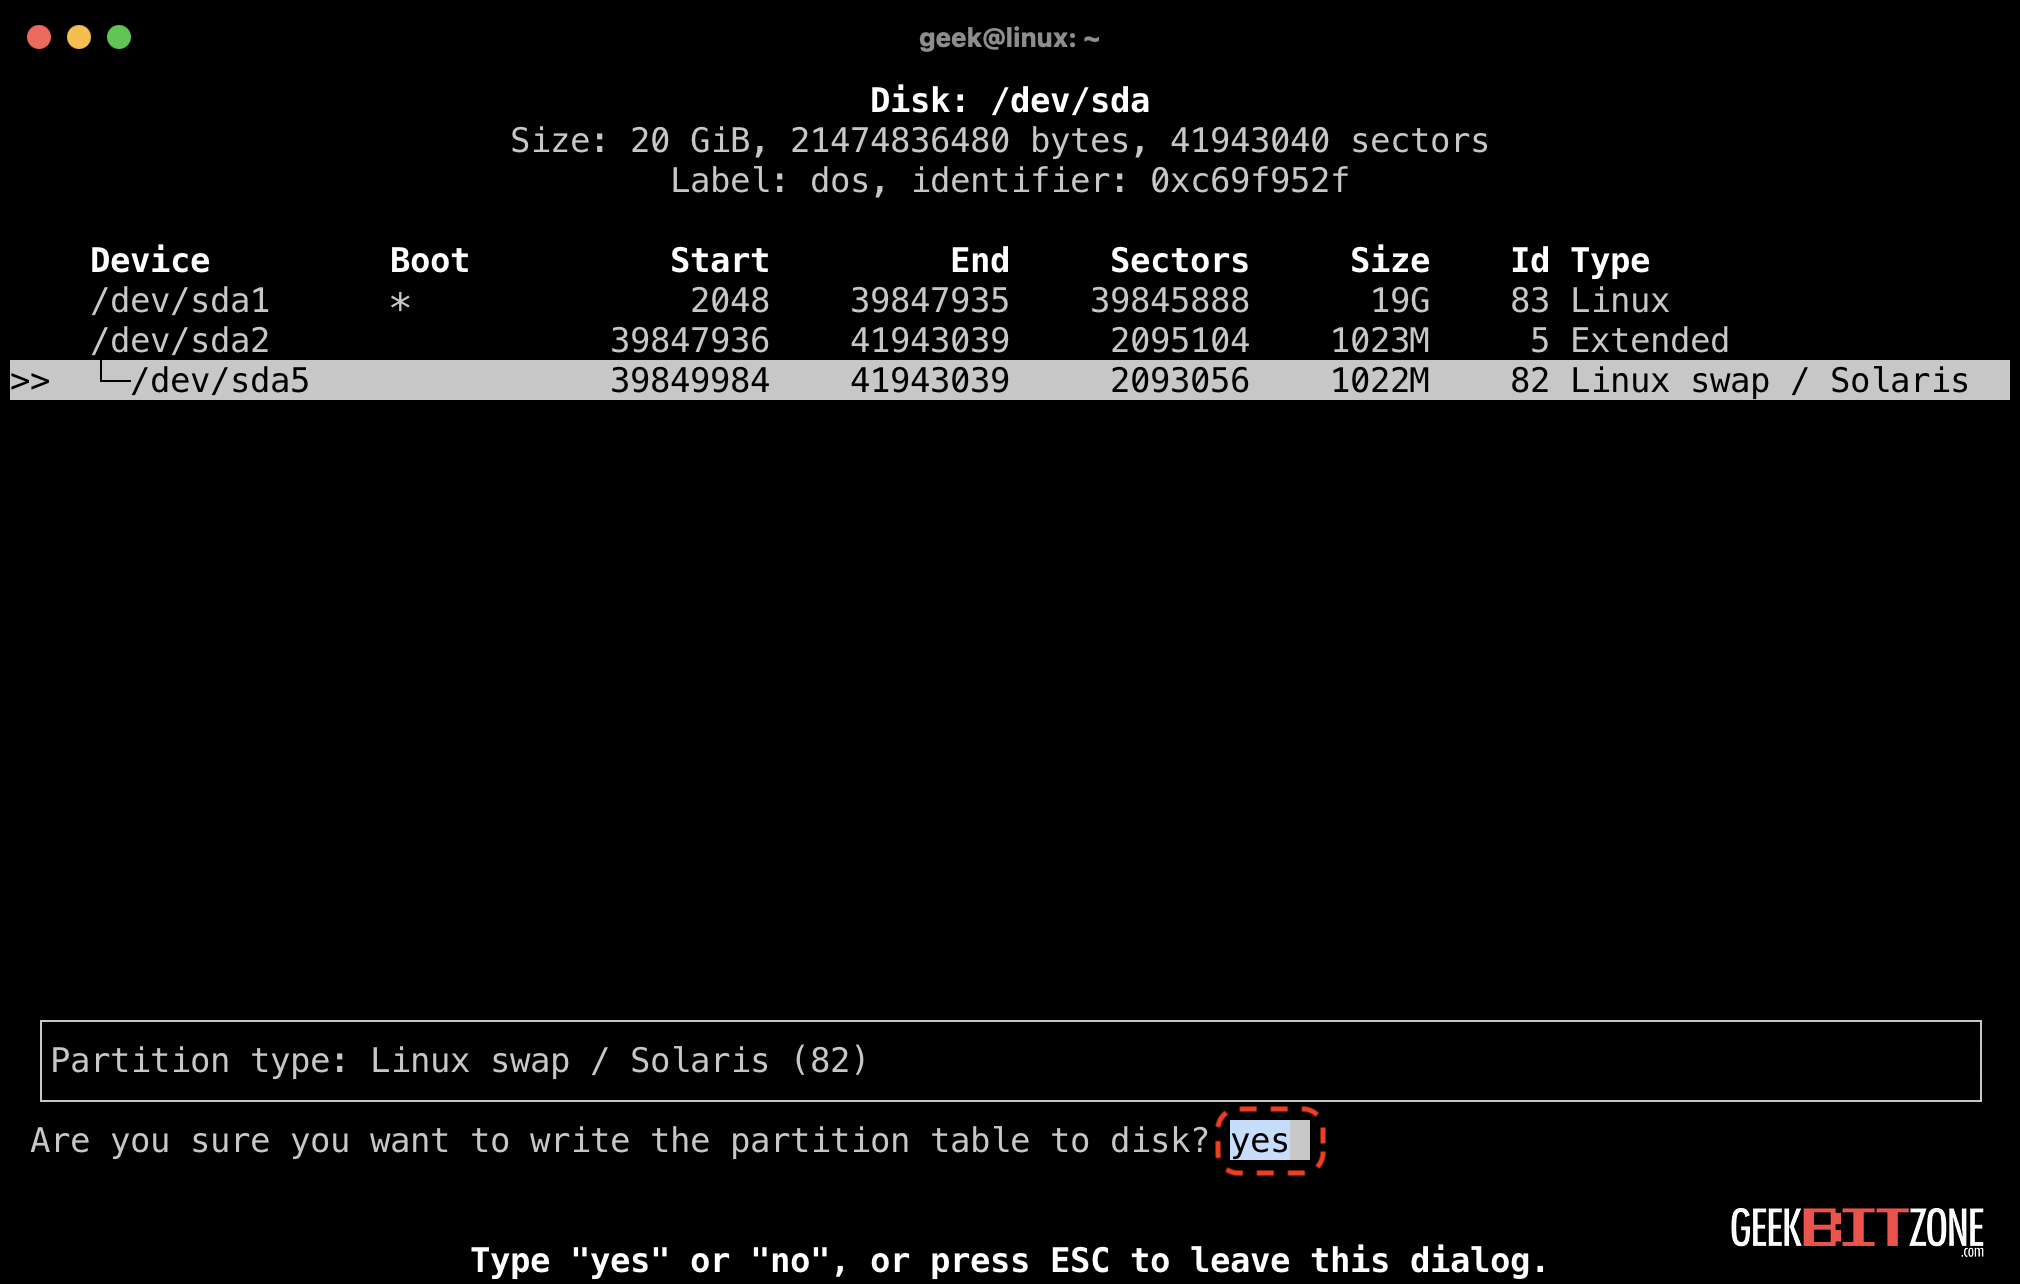
If you are absolutely that sure you want to proceed, type yes and press Enter.
⚠️ THERE IS NO GOING BACK NOW! ⚠️
Confirm that you see the message stating, “The Partition table has been altered.”
Exiting cfdisk
Partitioning is now complete.
Choose Quit and press Enter to exit the program.
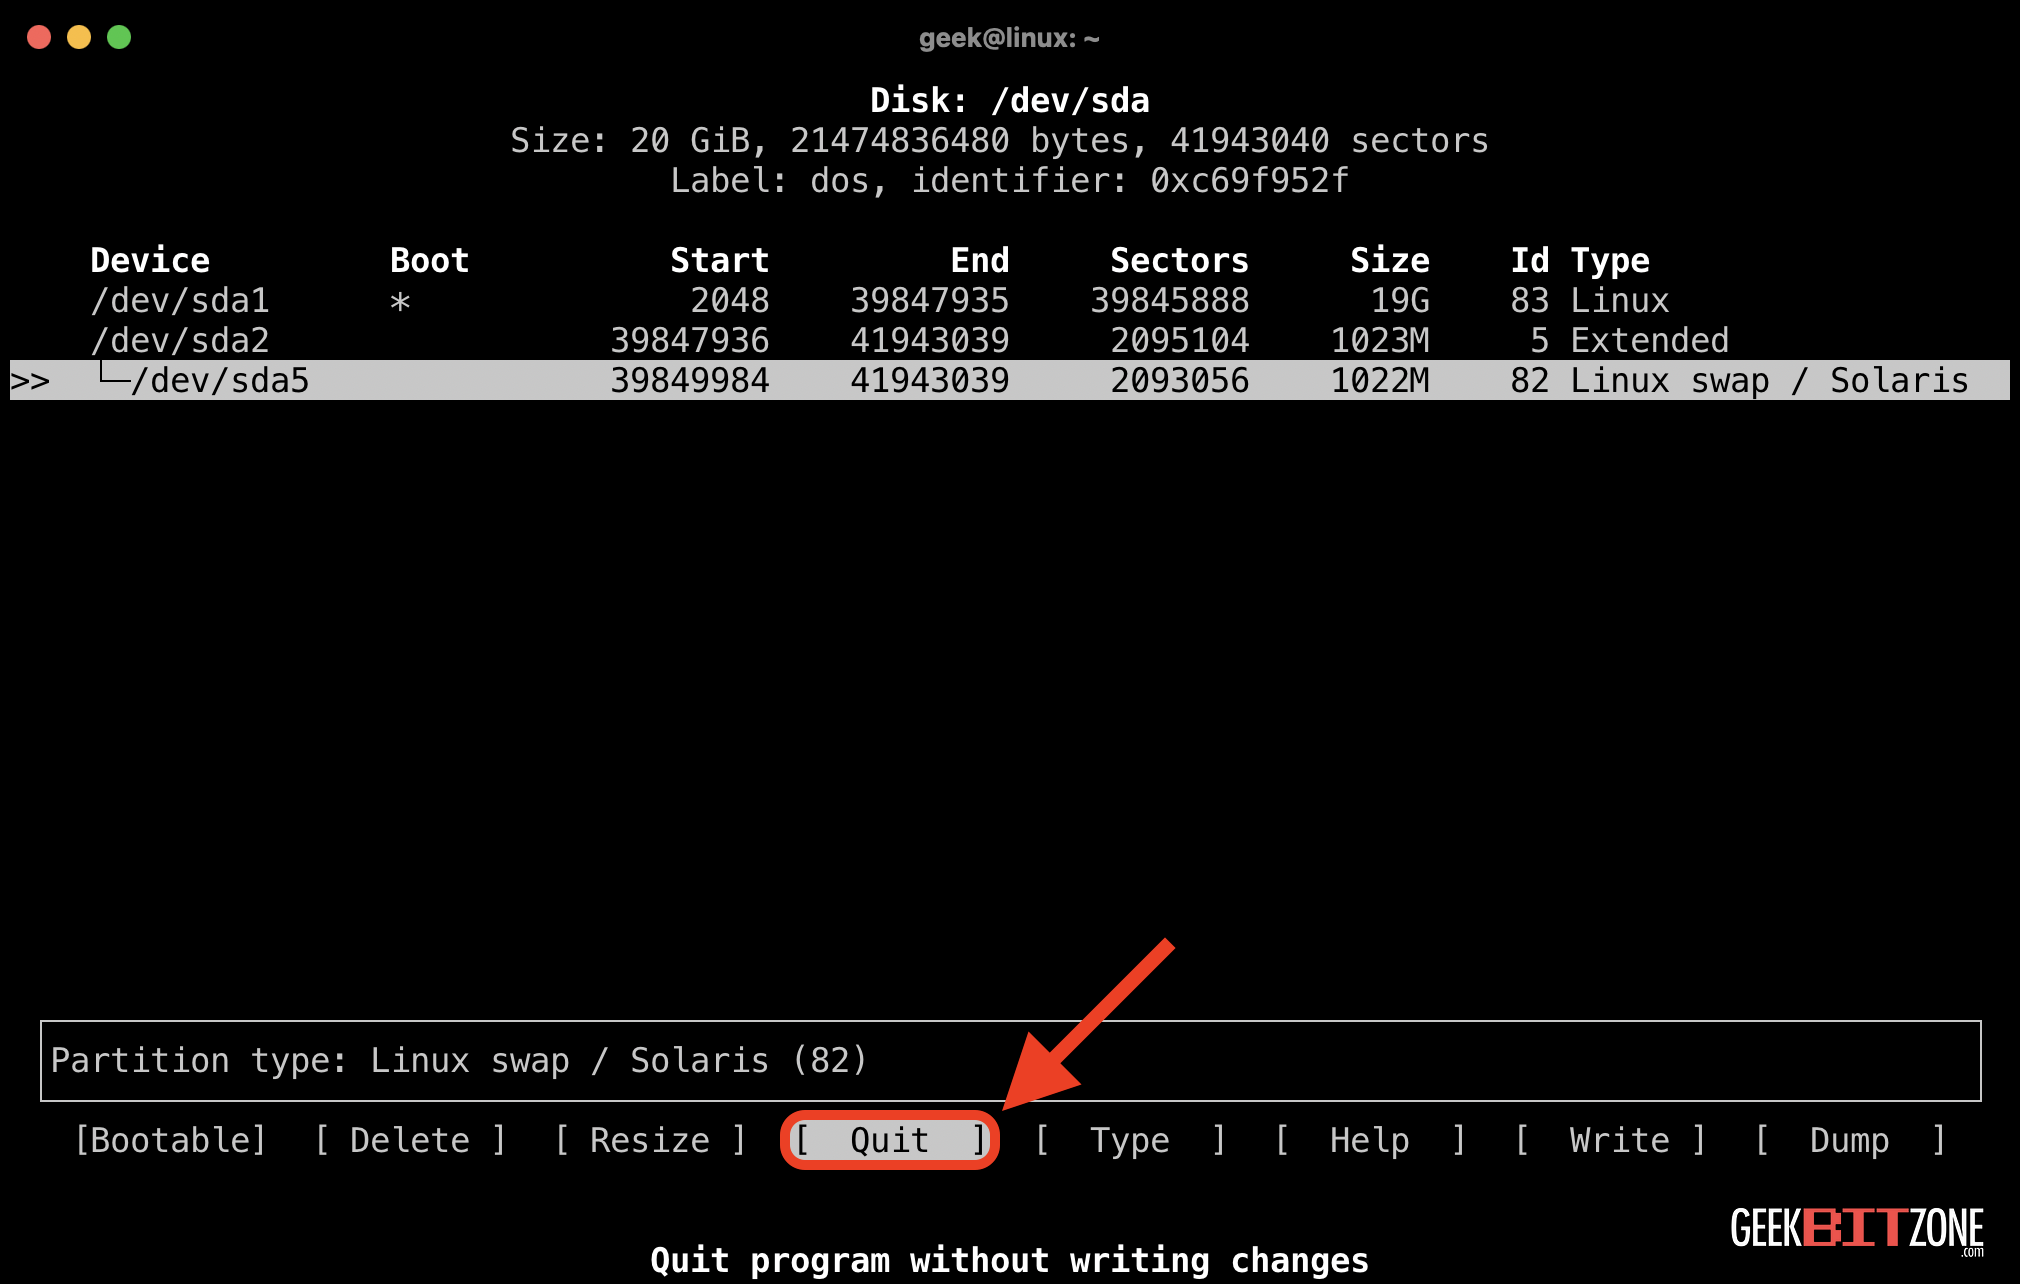
A message stating Syncing discs. will be shown in the lower-left corner.

Recreating the swap file
Run lsblk -p again to confirm the existence of the partitions. Everything looks good, except for the missing swap area on /dev/sda5.
lsblk -p
Set up the swap area using the mkswap command. Confirm that you see the message stating that the swap space has been set up.
mkswap /dev/<YOUR_DEVICE_ID>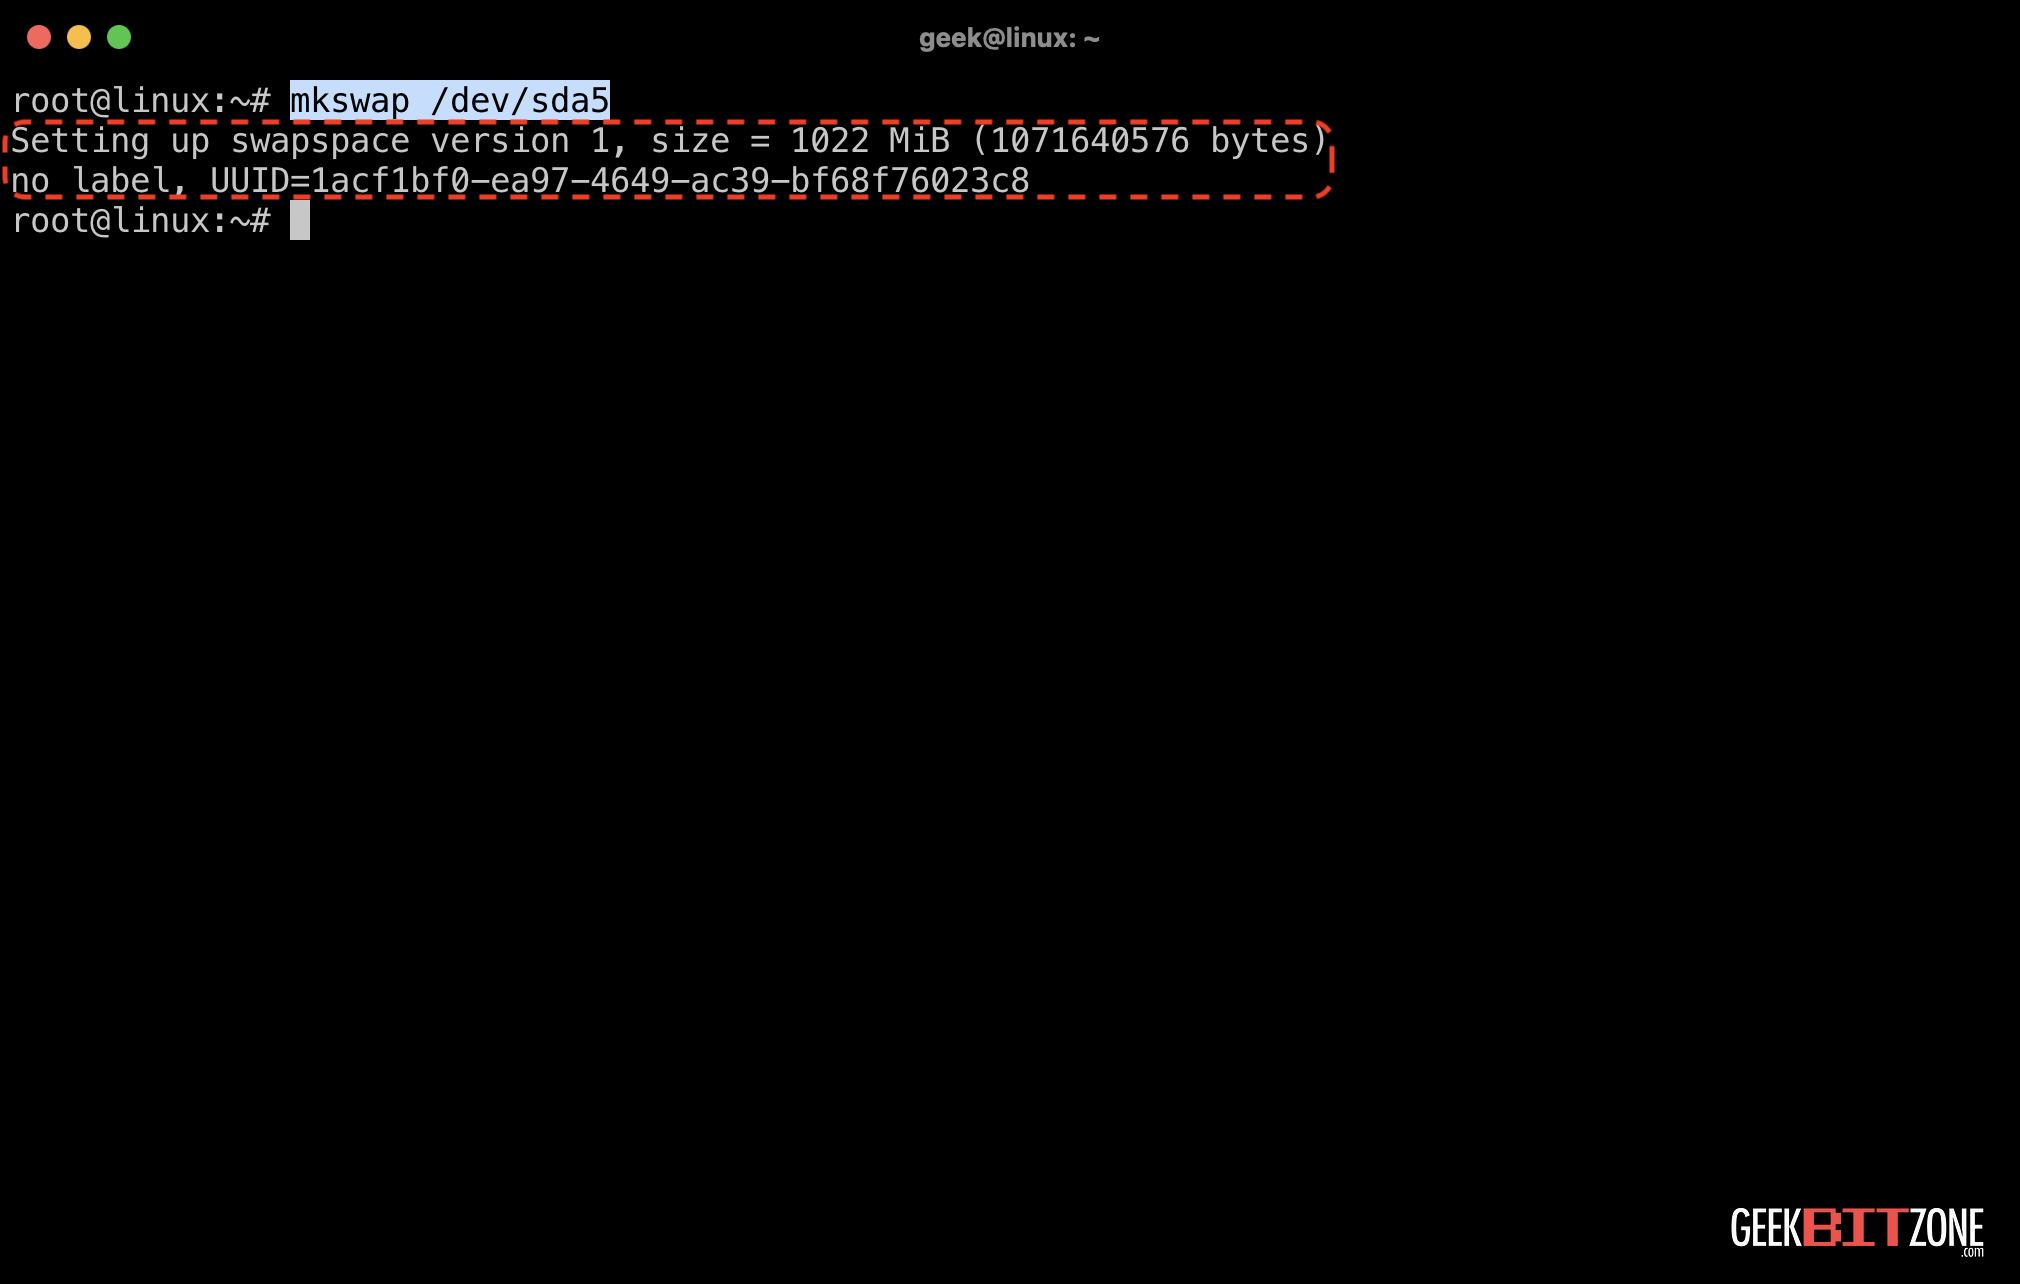
Renabling the swap file
The swap area now exists, but we have not yet turned it on. Let’s do this with the swapon command.
swapon /dev/<YOUR_DEVICE_ID>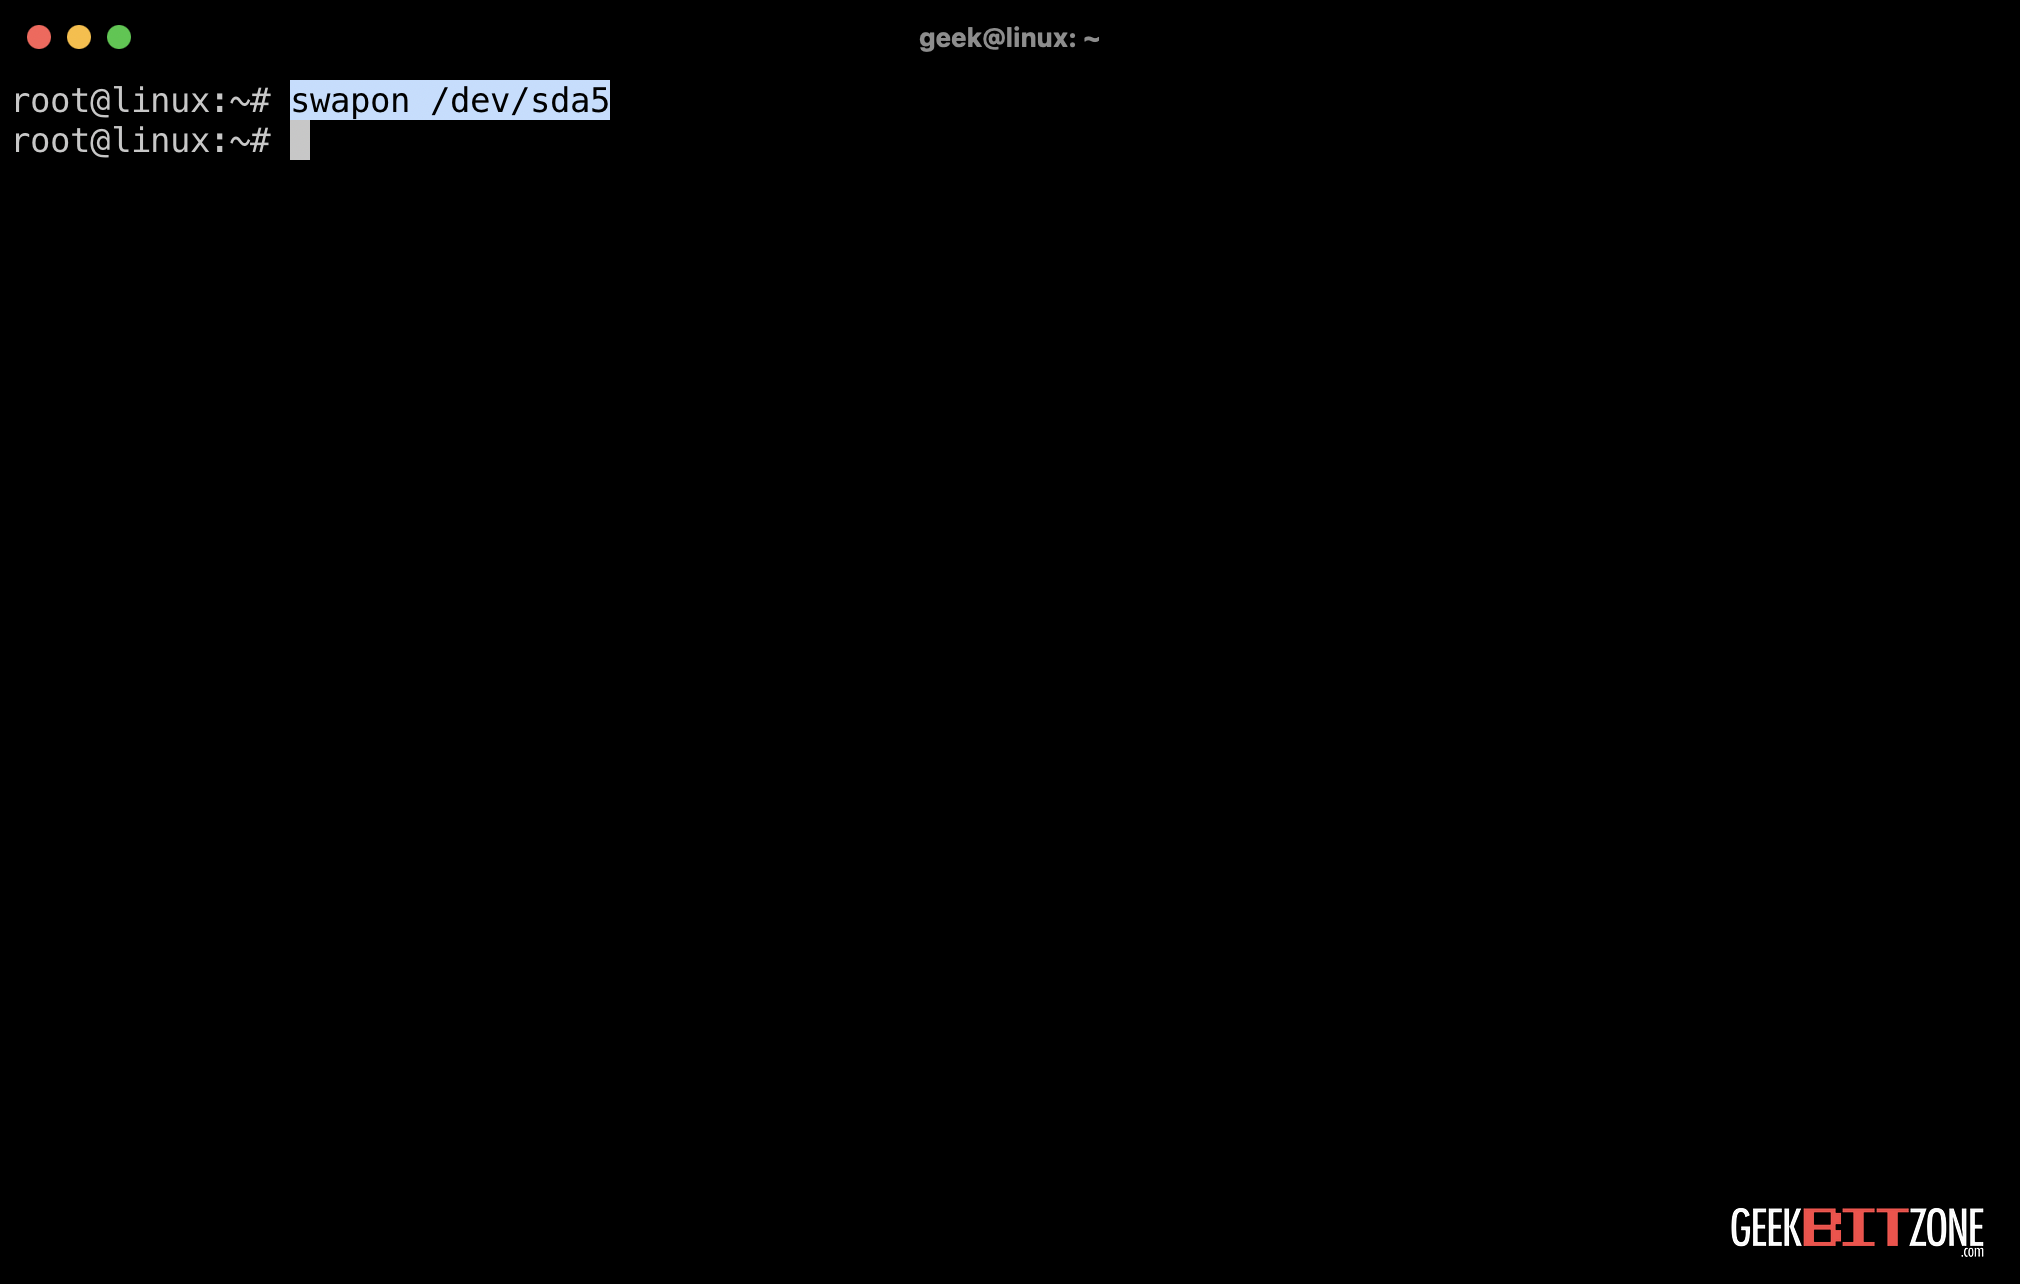
Updating fstab for swap configuration
With the swap partition re-enabled, let’s inspect its UUID using the lsblk -f command, as we will need to make some adjustments to the startup files.
lsblk -f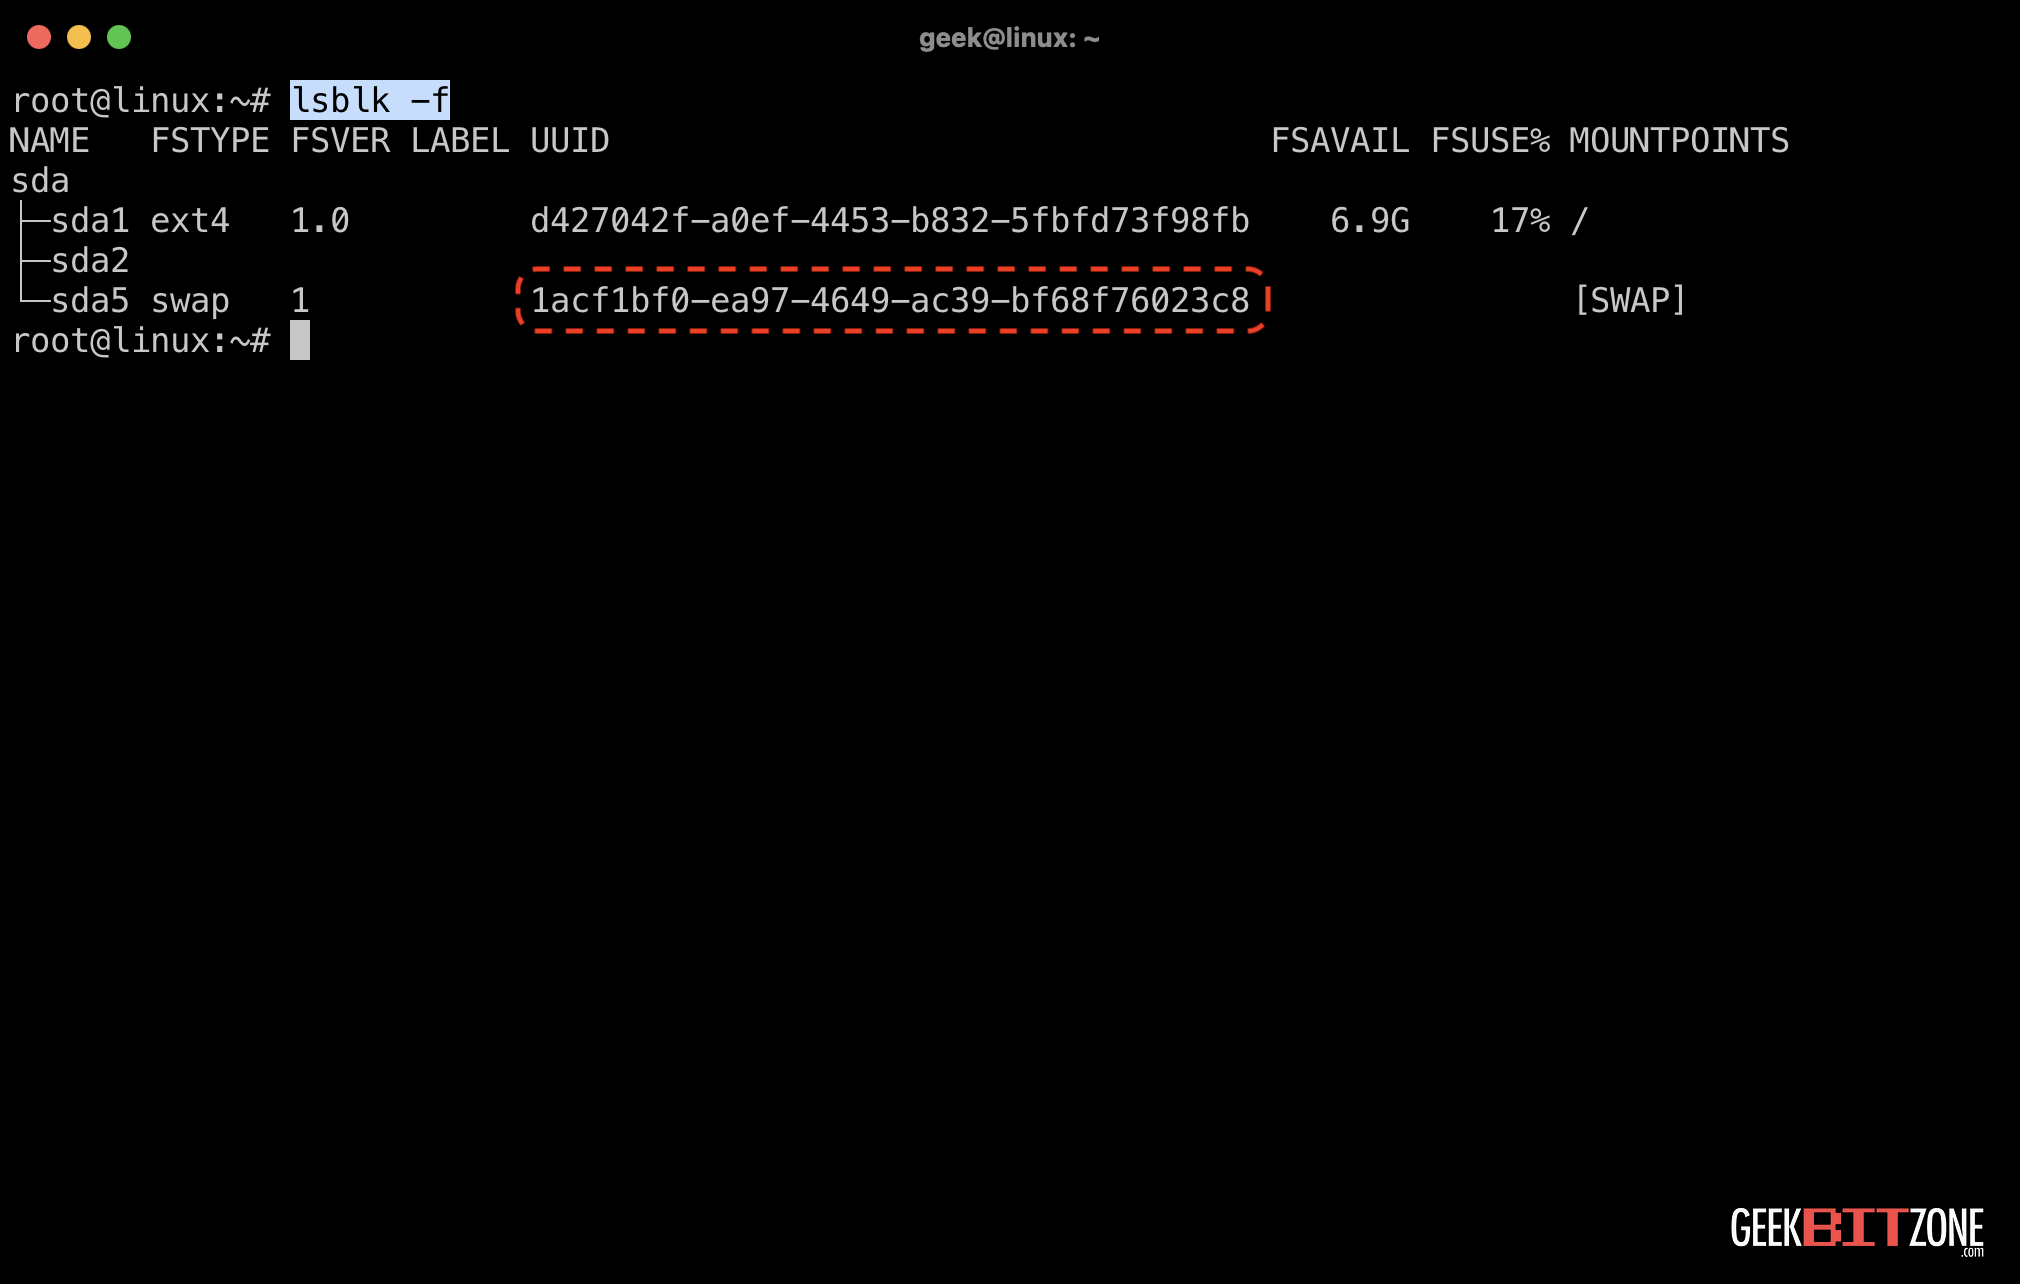
💡 Note: Every UUID is unique. Therefore, do not literally copy this UUID, but use the one printed in your terminal!
Edit the fstab (/etc/fstab) file with Debian’s default text editor, nano.
nano /etc/fstab
Locate the line referring to the swap partition and replace the existing UUID=xxxxxxxx-xxxx-xxxx-xxxx-xxxxxxxxxxxx string with the one you wrote down in the previous step.
Press Ctrl+O to save and Ctrl+X to quit nano.

Updating the hibernation file
We also need to update /etc/initramfs-tools/conf.d/resume with our own UUID string.
💡 The /etc/initramfs-tools/conf.d/resume file tells your computer where to find information when it wakes up from hibernation. It helps the computer locate the swap partition where it saved data before sleeping, so it can start up properly after hibernating.
nano /etc/initramfs-tools/conf.d/resume
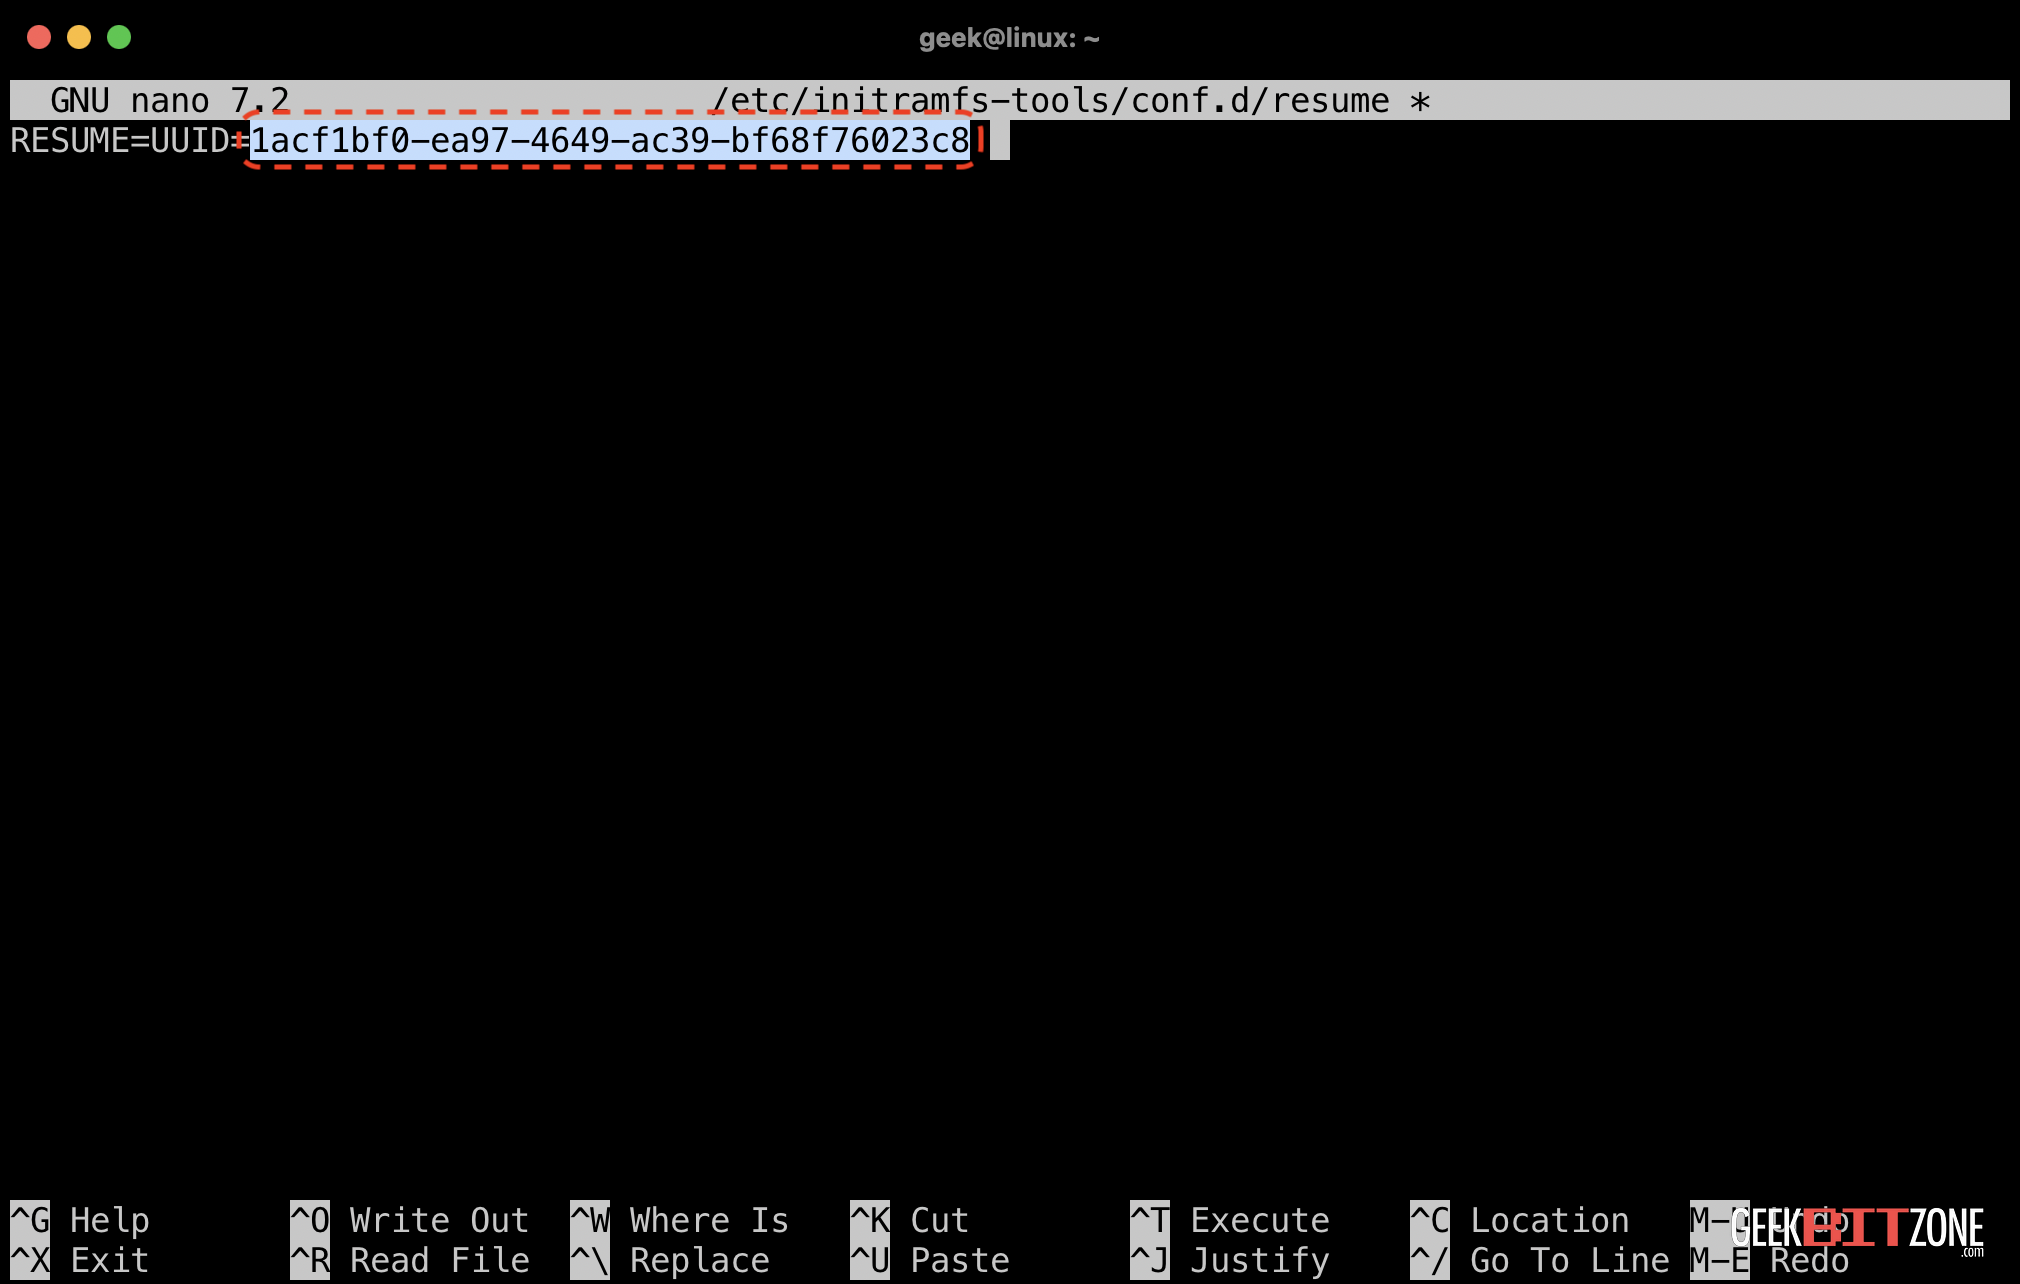
Replace the hexadecimal string after RESUME=UUID=xxxxxxxx-xxxx-xxxx-xxxx-xxxxxxxxxxxx with your own UUID string.
Press Ctrl+O to save and Ctrl+X to quit nano.
Updating the initial RAM file system
Update the boot record using the update-initramfs -u command, which refreshes and regenerates the initial RAM file system (initramfs) on a Linux system.
update-initramfs -u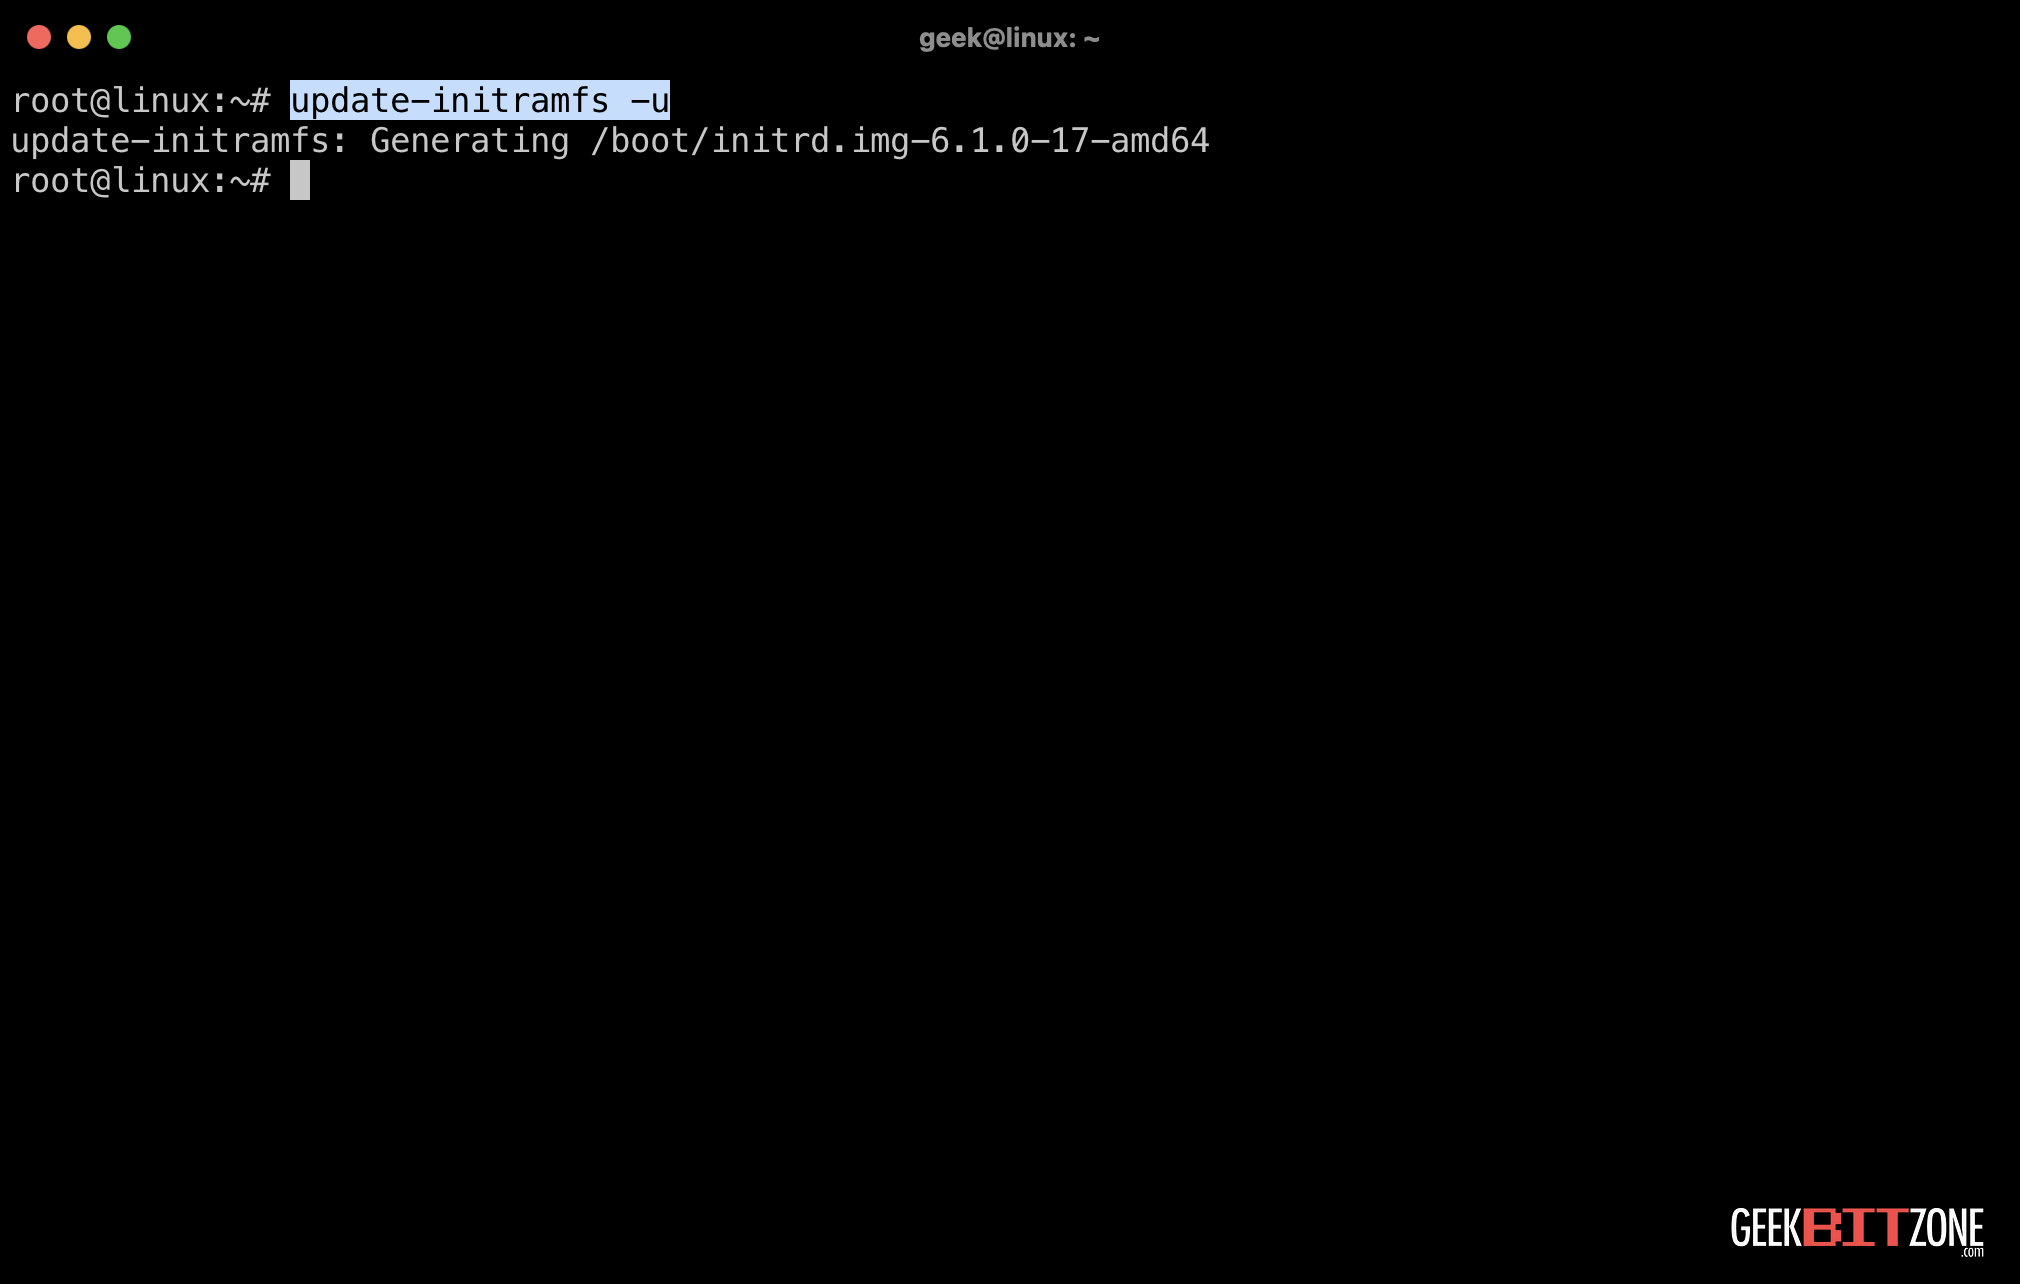
💡 The update-initramfs -u command is used to refresh and regenerate the initramfs (initial RAM file system) on a Linux system. It’s essential after making changes to system configurations, ensuring that any modifications are incorporated into the initial boot process.
Rebooting the system
That’s it! We are now done. All that remains is to reboot the system.
reboot
If your system comes back after the reboot, then you have successfully resized the partition. However, if not, restoring the VM from your latest snapshot or backup will be required.
Summary
This guide has walked you through the process of expanding an existing Linux partition within the Proxmox Virtual Environment. By following these step-by-step instructions, you’ve learned how to resize a Debian Linux partition in a Proxmox VM, addressing potential challenges along the way.
Whether you’ve successfully increased the partition size or encountered issues, you now have a clear understanding of the necessary procedures, contributing to your proficiency in managing virtualized environments.
References
Debian Linux
https://www.debian.org
Virtual Machine (VM)
https://en.wikipedia.org/wiki/Virtual_machine
Proxmox VE
https://www.proxmox.com/en/proxmox-virtual-environment/overview
lsblk
https://man7.org/linux/man-pages/man8/lsblk.8.html
cfdisk
https://manpages.debian.org/bullseye/fdisk/cfdisk.8.en.html
fdisk
https://manpages.debian.org/bullseye/fdisk/fdisk.8.en.html
mkswap
https://manpages.debian.org/bullseye/util-linux/mkswap.8.en.html
swapon
https://manpages.debian.org/bullseye/mount/swapon.8.en.html
fstab
https://wiki.debian.org/fstab
nano
https://packages.debian.org/bullseye/nano
update-initramfs
https://manpages.debian.org/bullseye/initramfs-tools/update-initramfs.8.en.html
reboot
https://manpages.debian.org/bullseye/systemd-sysv/reboot.8.en.html
See Also
How to mount an SMB network share on macOS Ventura without the Finder window popping up

How to install Plex Media Server in a Proxmox Linux Container (LXC)
How to click anywhere in a window to move it around on macOS Monterey
How to replace a drive on a Synology NAS with Synology Hybrid RAID (SHR) on DiskStation Manager (DSM) 6.2
How to test the memory and to find the results on a Synology NAS
How to secure IOT devices with VLANs and firewall rules on an Ubiquiti EdgeRouter-X and a MikroTik switch running SwOS Lite
How to turn your Mac into an AirPrint server - for free
How to schedule tasks with crontab on macOS

How to install and configure Syncthing on the Mac

How to restart the Samba (SMB) file sharing service on macOS
comments powered by Disqus
See also
- How to mount an SMB network share on macOS Ventura without the Finder window popping up
- How to install Plex Media Server in a Proxmox Linux Container (LXC)
- How to click anywhere in a window to move it around on macOS Monterey
- How to replace a drive on a Synology NAS with Synology Hybrid RAID (SHR) on DiskStation Manager (DSM) 6.2
- How to test the memory and to find the results on a Synology NAS
- How to secure IOT devices with VLANs and firewall rules on an Ubiquiti EdgeRouter-X and a MikroTik switch running SwOS Lite
- How to turn your Mac into an AirPrint server - for free
- How to schedule tasks with crontab on macOS
- How to install and configure Syncthing on the Mac
- How to restart the Samba (SMB) file sharing service on macOS