Table of Contents
How to install Nextcloud on Mac with Docker
Nextcloud is an open-source file hosting service which can be installed on any computer running the Linux operating system. Its functionality is similar to iCloud or Dropbox with the exception that files are stored on your personal drive instead of the cloud. This means you are always in full control over your data and there is no subscription fee to pay.
We will in this tutorial show how to install Nextcloud locally on a Mac computer running macOS High Sierra 10.13 (or later), which does natively not support this service.
System Requirements
- Mac model 2010 (or later)
- macOS High Sierra 10.13 (or later)
- VPN and a public IP address (optional)
Installing Docker Desktop for Mac
Before we can use Nextcloud we will need to install Docker Desktop for Mac which is an OS-level virtualization tool that allows us to run non-native software packages via something called containers. If you have ever used a virtual machine (VM), then Docker works in a similar way with the exception that the entire operating system is never loaded into memory. This gives us a significant performance advantage compared to when running the application through the VM.
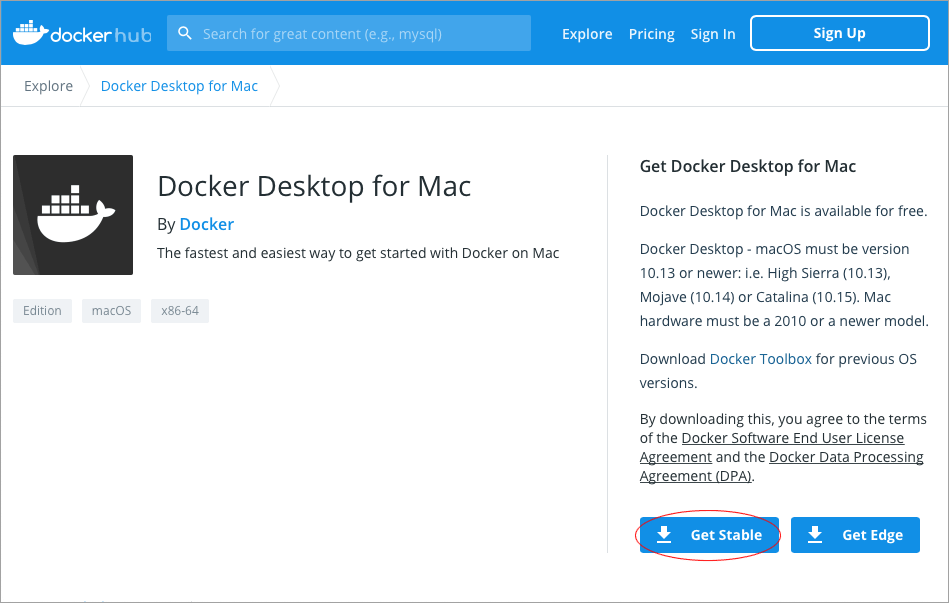
Let us get started. Navigate to the Docker Hub website to download the free Community version of Docker Desktop. We will in this tutorial use the Stable version.
https://hub.docker.com/editions/community/docker-ce-desktop-mac/
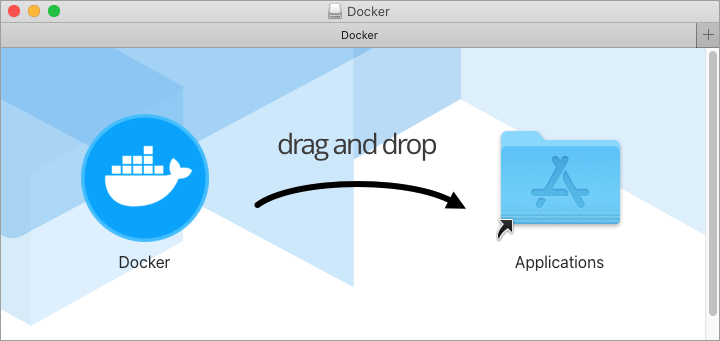
Once you have mounted the disk image, simply drag and drop the icon into your Applications folders.
Launch Docker from either the Launchpad or the Applications folder.
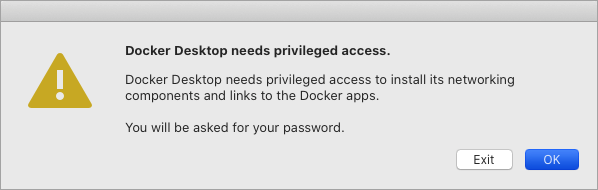
Click OK to allow Docker install its networking components.
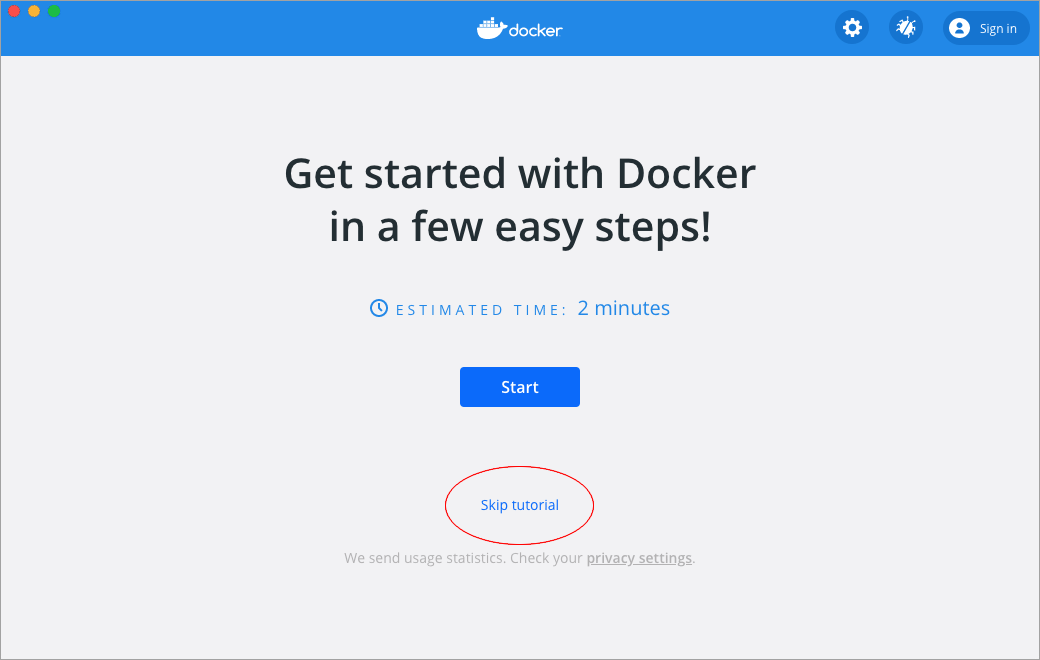
We are now on the splash screen. Press Start if you want learn more about Docker. Otherwise, just press Skip tutorial.
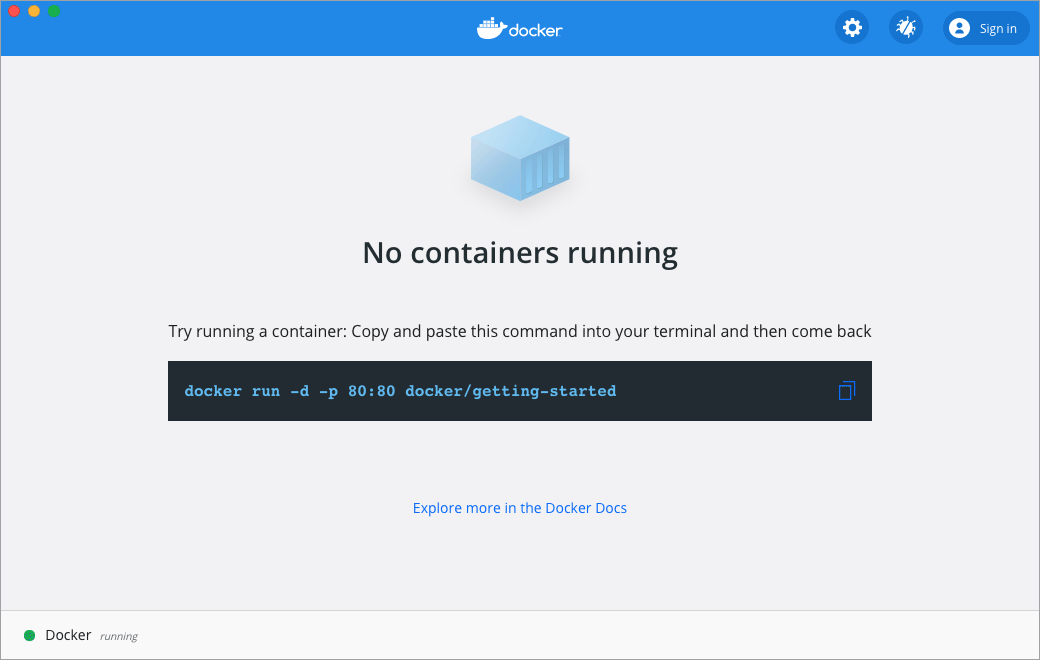
We have reached the main Docker page which is where we will pause for a second. As you can see Docker already gives us a hint for how to install containers.
With the first step out of the way, let us move onto how to install Nextcloud.
Installing Nextcloud
Open a new Terminal from either the Launchpad or the Applications folder.
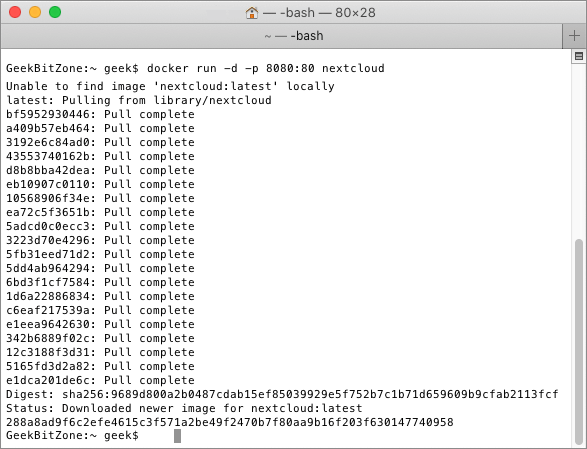
Copy and paste the following command to download a fresh version of the Nextcloud container.
docker run -d -p 8080:80 nextcloudIf the output is similar to the one seen below your installation has been successful.
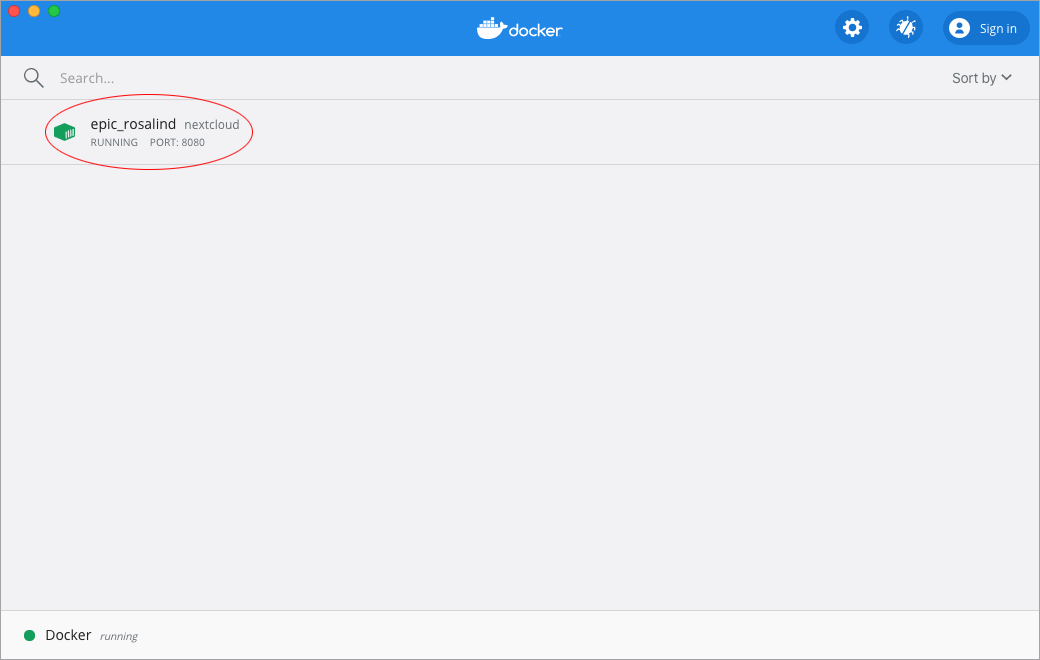
If we now return back to Docker we can see that our first virtual container, epic_rosalind, is up and running. This peculiar name is randomly generated each time you create a new container so yours is likely to be called something else. Go ahead and click on the container name.
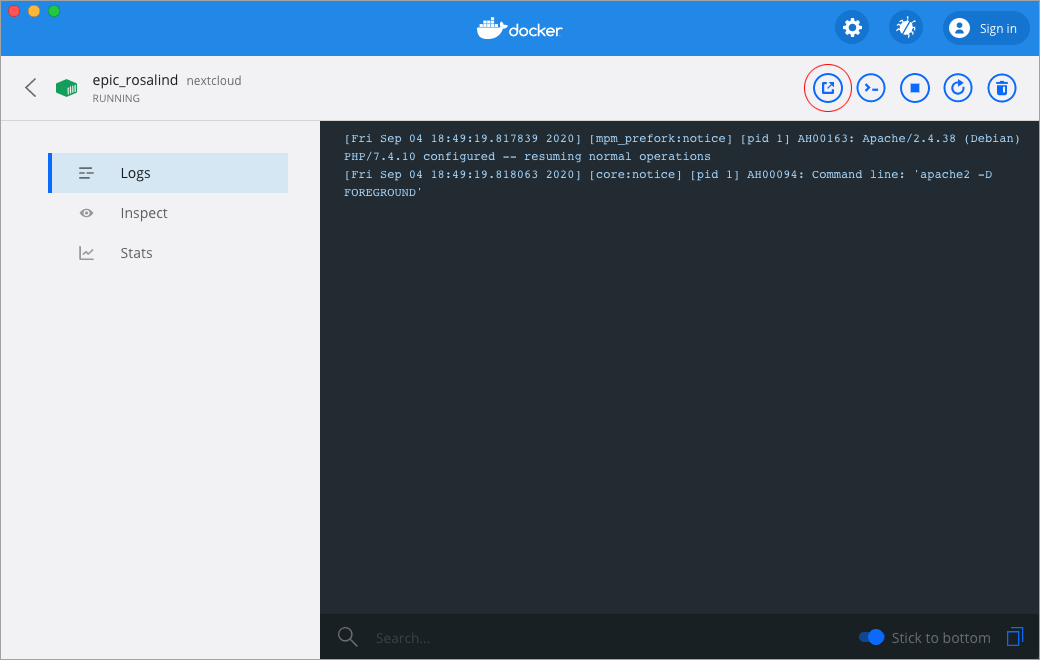
We can here see in-depth information about the container that is currently running. We are, however, only interested in Nextcloud itself, so let us go ahead and press the Open in Browser button highlighted in red.
Safari (or the web browser of your choice) will take us to the following address:
http://localhost:8080
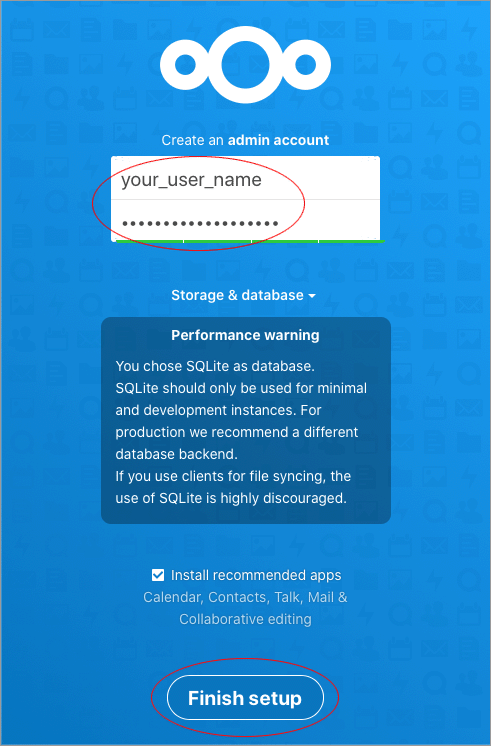
This is Nextcloud’s admin account creation page. Enter a username and password, but leave everything else at its default settings. You might notice that by choosing SQLite as your database, a performance warning is shown. This is totally fine for our test, but if you intend to use Nextcloud in a production environment, you have the choice to install more robust databases such as MySQL, MariaDB or PostgreSQL. For now, just click Finish setup.
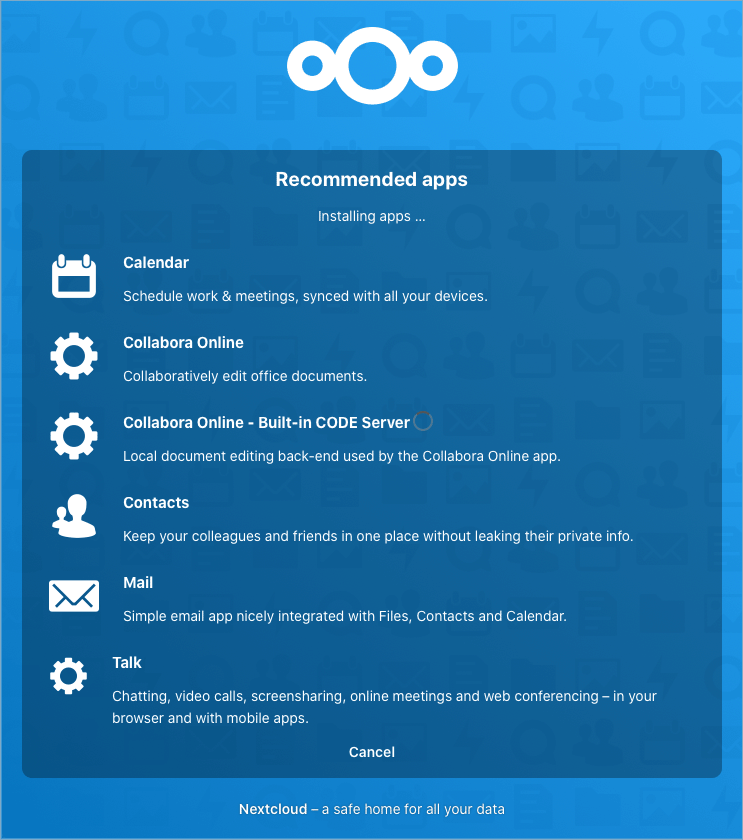
Please wait while Nextcloud installs the recommended apps.
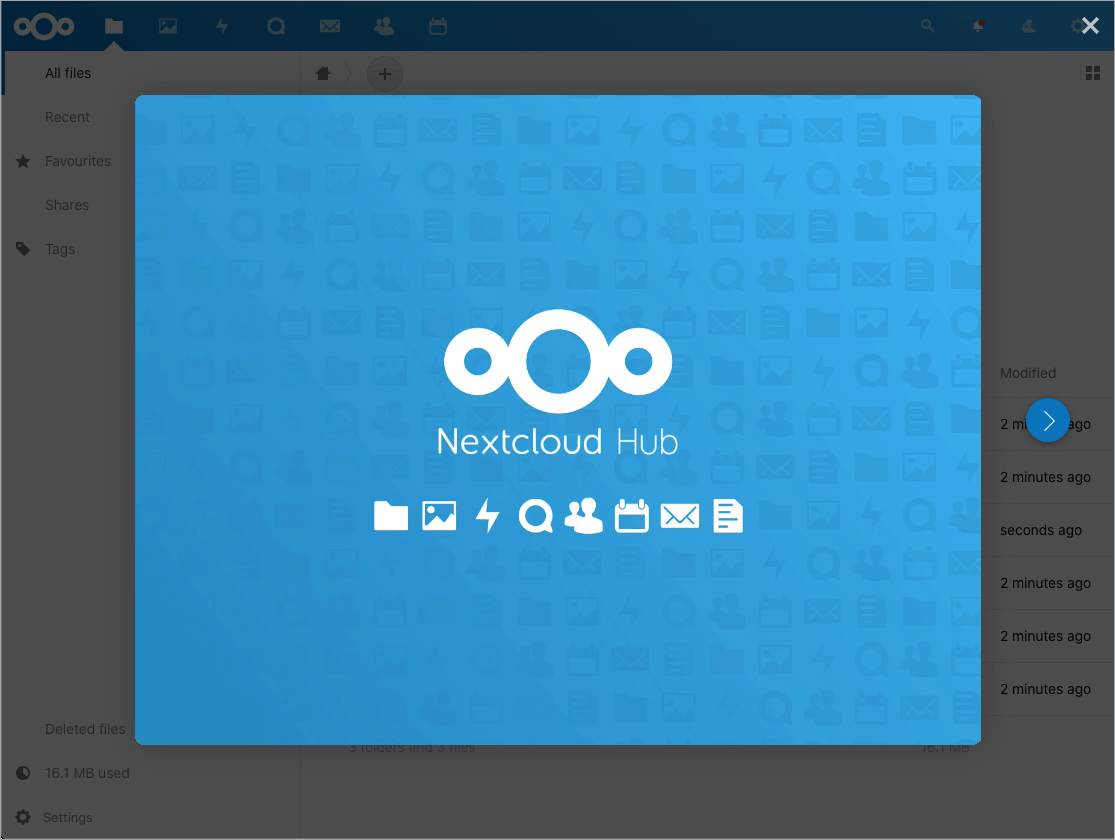
You should see the welcome screen after the installation has finished. Click the ‘X’ in the upper right corner to close this window.
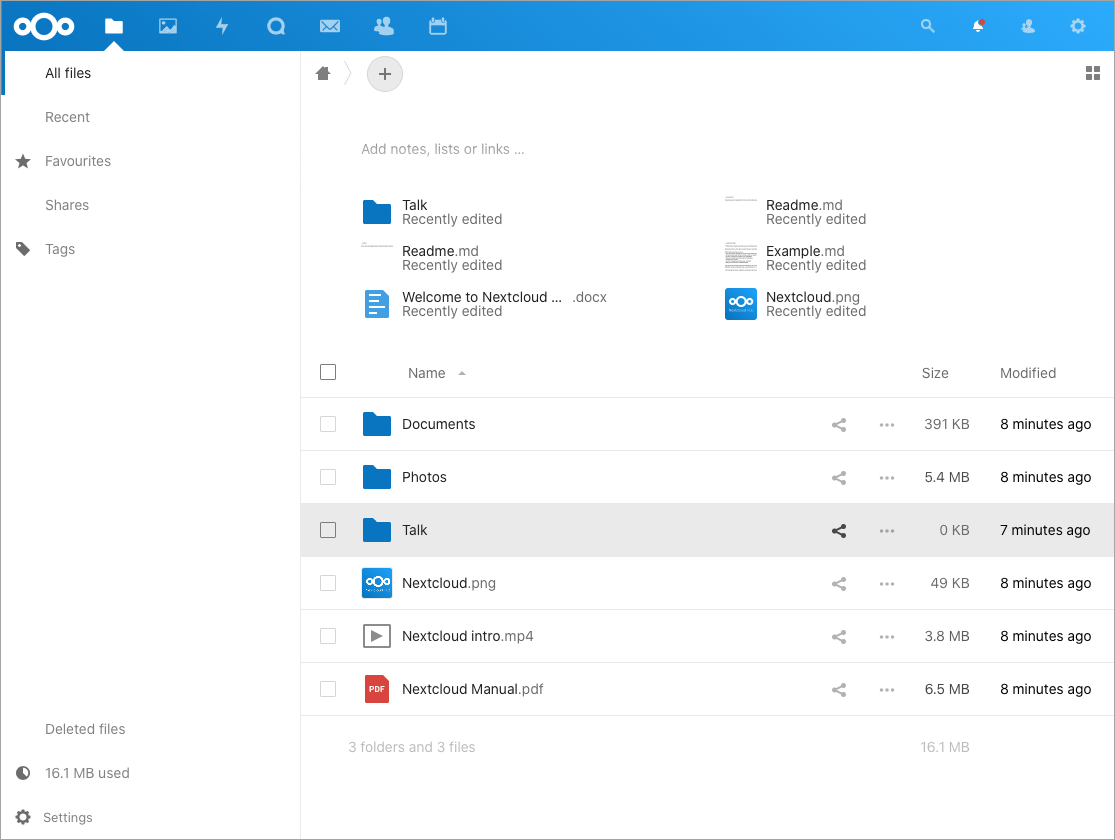
Congratulations! You have successfully installed Nextcloud on your Mac computer.
Configuring Network Access
If you only intend to access Nextcloud from within the same machine that you are currently using, there is nothing else for you to do. A cloud server, however, which is only accessible from the same machine, is not really a server after all. What we will show next requires some general networking knowledge. Before we start you should take a note of your local (LAN) IP address as well as your public internet (WAN) IP address.
What Is My Local IP Address?
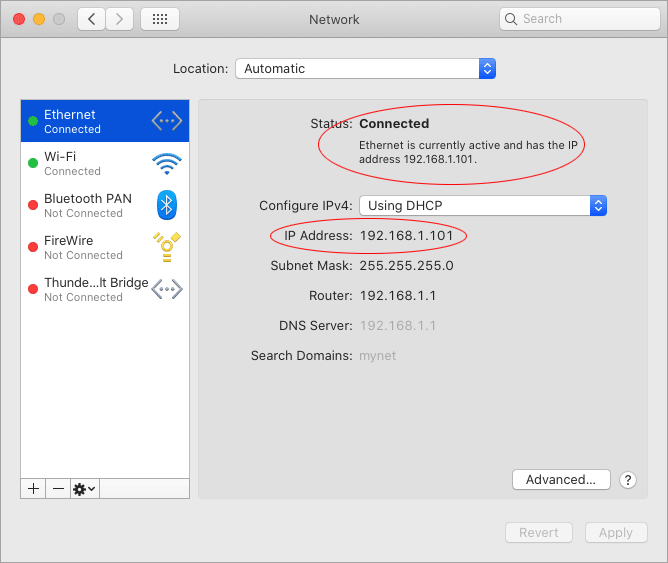
Go to System Preferences > Network to view your local IP address. Make sure you have selected the correct service (Ethernet, Wi-Fi, etc) from the left-hand column. In our example the local IP address is 192.168.1.101.
What Is My Public Internet IP Address?
There are several ways that we can view our public internet IP address.
- We can log in to our modem/router to view the public IP address found in the list of available network interfaces.
- We can go to a website, such as https://www.whatismyip.com, which will show our IP address.
Now, here is the thing. If you are (unfortunate) to live in a densely populated area, you might not have publicly accessible IP address at all, but instead something called Carrier-Grade Network Address Translation (CGNAT). This is the process where a network device, usually a firewall, assigns a public address to a computer (or group of computers) inside a private network. The only way around this is to pay your Internet Service Provider (ISP) to assign you a static IP address, subscribe to a Virtual Private Server (VPS) or learn more about IPv6 address which do not currently have this limitation. All that is beyond the scope of this article but we just want to highlight that it is still possible to access computers behind CGNAT.
Adding Trusted Domains
Armed with the knowledge about our IP address(es) we will now go ahead and edit /var/www/html/config.php which keeps track of the trusted domains, i.e. the IP address(es) from which the server can be accessible from. However, before we can edit this file we need to understand how file systems work inside Docker containers. As you will probably notice, /var/www/html/config.php, is nowhere to be seen if you try to look for it in the Finder window. This is because the file path is relative to your Docker container and not your local drive. The easiest way for us to locate this file is actually via the Nextcloud interface. We will go ahead and set this up now.
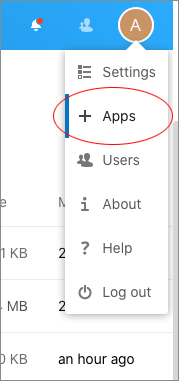
From the main page in Nextcloud, navigate to the Apps section found in the top right navigation bar.
Select Disabled apps in the left hand column and Enable External storage support.
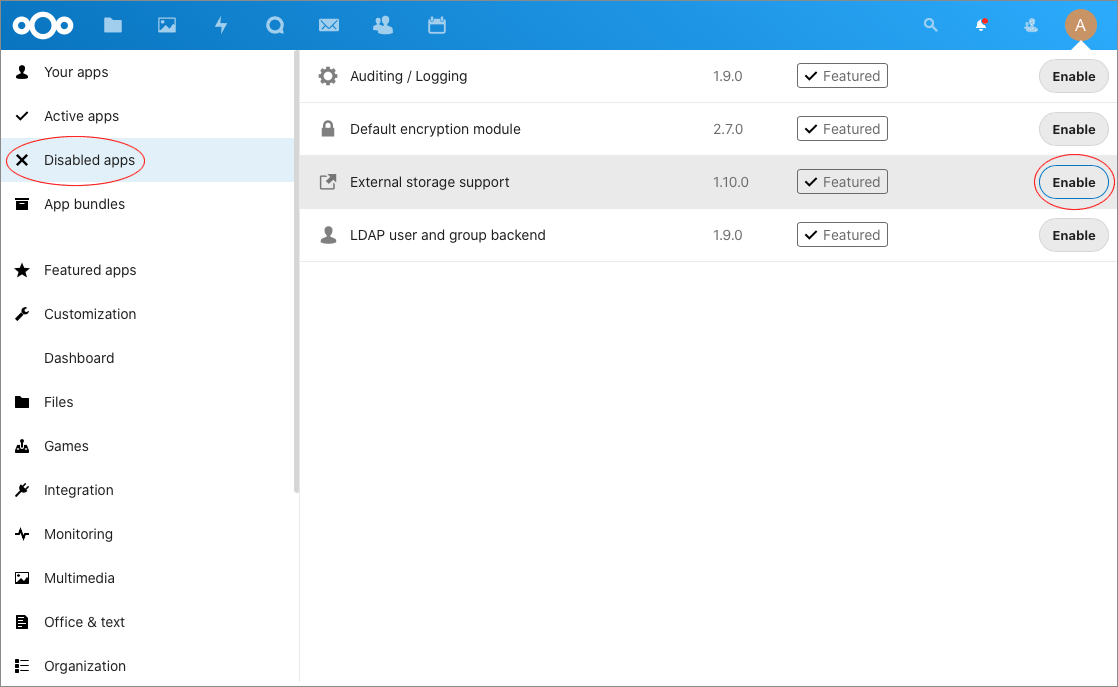
We have now enabled external storage support which will allow us to access the file system from inside the container.
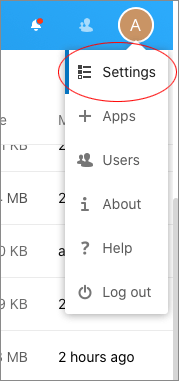
Next, select Settings in the navigation bar.
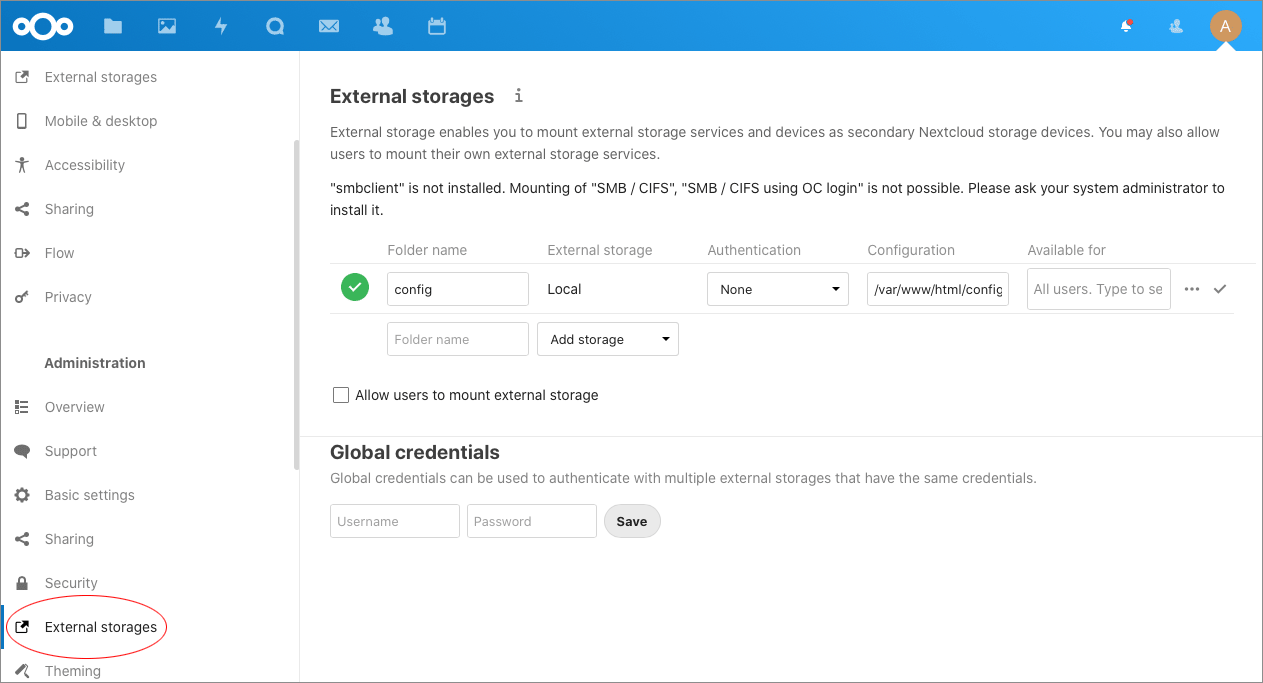
Select External Storages in the left hand column and Add storage in the right column. Then type in the following values.
- Folder name:
config - External storage:
Local - Authentication:
None - Configuration:
/var/www/html/config
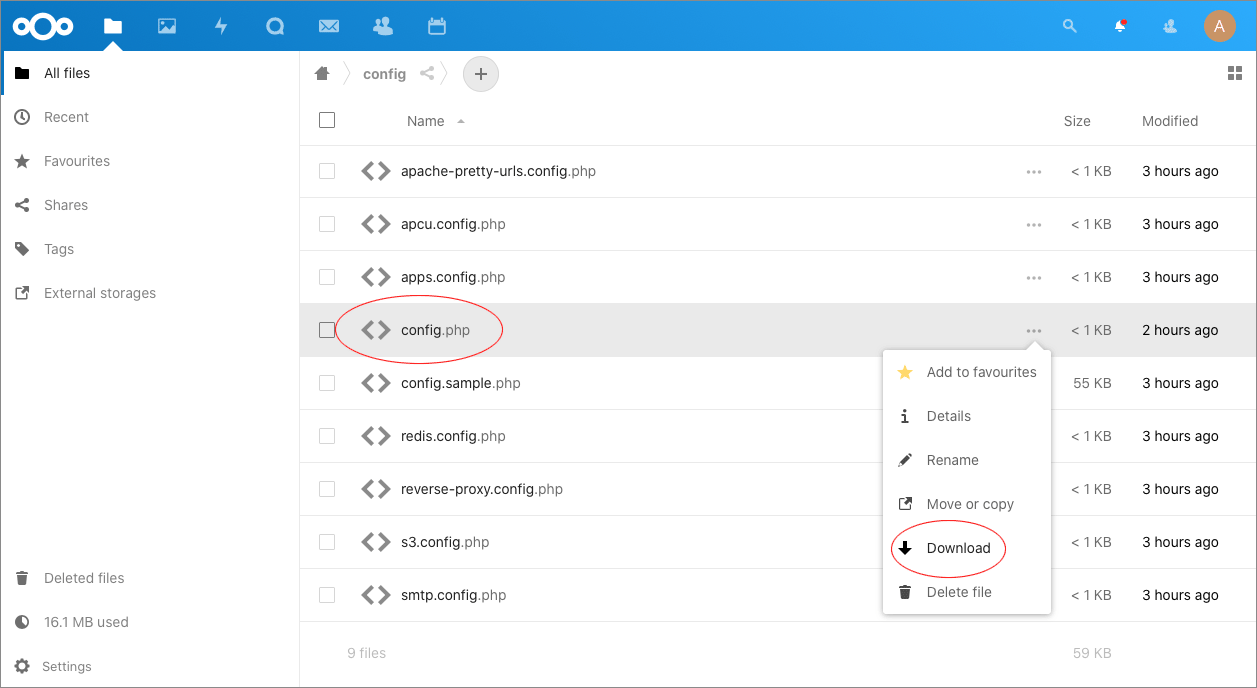
We have now created a direct shortcut to config.php from within Nextcloud’s file browser. This file can be Downloaded via the right click menu or by clicking on the three dots.
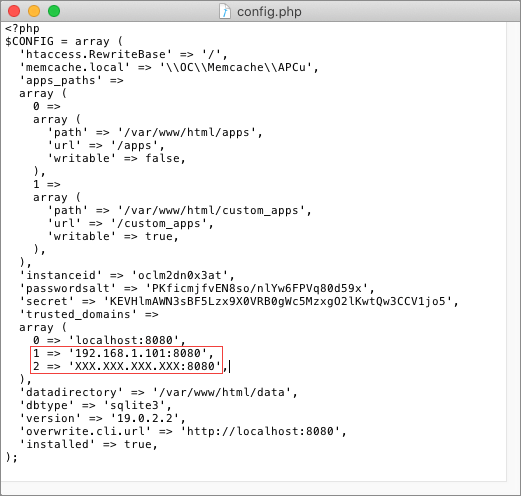
Open the downloaded file in your favourite text editor. Locate the line 0 => 'localhost:8080', and append your local
and public IP address below by incrementing the array index for each new entry.
  'trusted_domains' =>
  array (
    0 => 'localhost:8080',
    1 => '192.168.1.101:8080',
    2 => 'XXX.XXX.XXX.XXX:8080',
  ),
The edited config.php file should now look something like this. Take a note of the two new lines highlighted in red. The first new line is your local IP address and the second new line is your optional public IP address.
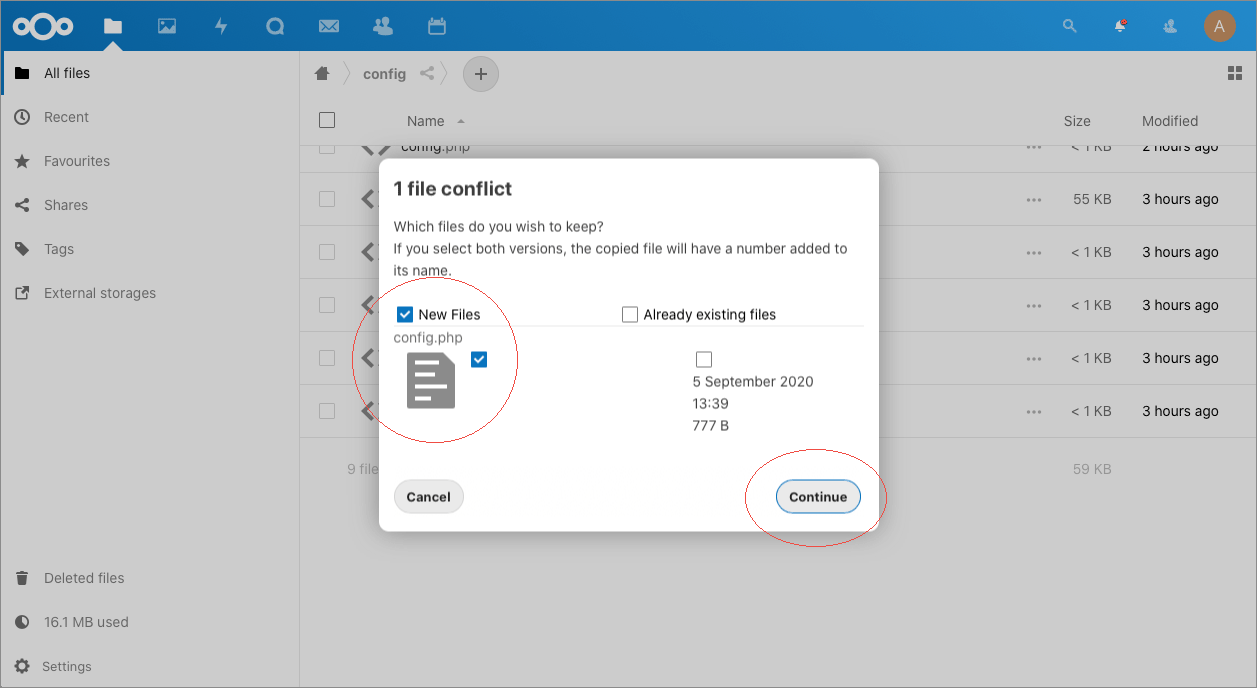
Save the file and drag and drop it back to the Nextcloud browser window to upload it. We only need to keep the New File.
Testing Local Network Access
We have now configured Nextcloud to be accessible from our home network. Let us see if we can access the server on our phone by typing http://192.168.1.101:8080.
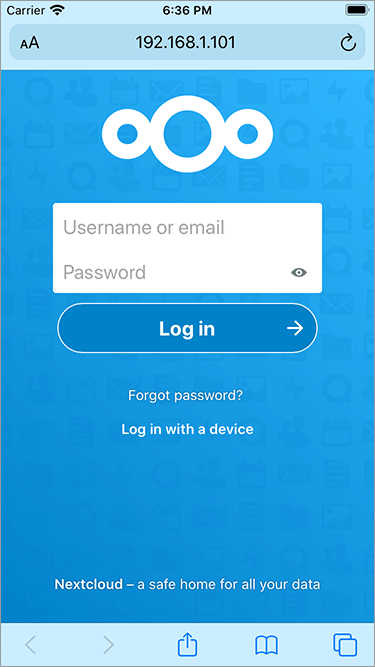
Great, we are able to connect through our home network. For public internet access there are several other steps that need to be taken into account. They are all beyond the scope of this article, but as a general rule:
- Only allow HTTPS (TLS) connections
- Only connect to your server through a VPN
Summary
This guide has shown how Nextcloud, which does not have native macOS support, can still be installed on a Mac computer with the help of Docker Desktop.
Further information
We hope you found this introductory article useful, but if you want to learn more about Nextcloud and Docker, please visit.
See Also

How to extend the lifespan of memory cards on the Raspberry Pi with Log2Ram

How to measure the network speed between two computers with iPerf

How to turn your Raspberry Pi into a Jukebox
How to connect to GitHub with SSH

How to compile OpenEmu for macOS
How to install Gitk for macOS
10 Useful Git Commands

How to access a Plex Server behind CGNAT with ngrok

10 Influential Pixel Artists

How to Customise the Linux Bash Prompt
comments powered by Disqus
See also
- How to extend the lifespan of memory cards on the Raspberry Pi with Log2Ram
- How to measure the network speed between two computers with iPerf
- How to turn your Raspberry Pi into a Jukebox
- How to connect to GitHub with SSH
- How to compile OpenEmu for macOS
- How to install Gitk for macOS
- 10 Useful Git Commands
- How to access a Plex Server behind CGNAT with ngrok
- 10 Influential Pixel Artists
- How to Customise the Linux Bash Prompt